Shot Workflow
This article outlines the shot workflow for Nuke and Maya. This is different from the asset workflow.
Nuke
1. Load Flow Production Tracking desktop app
2. Click your project

3. Click your program
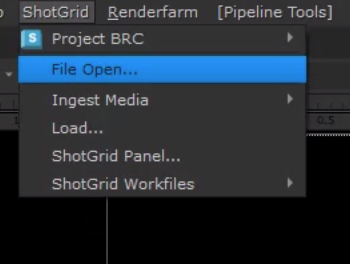
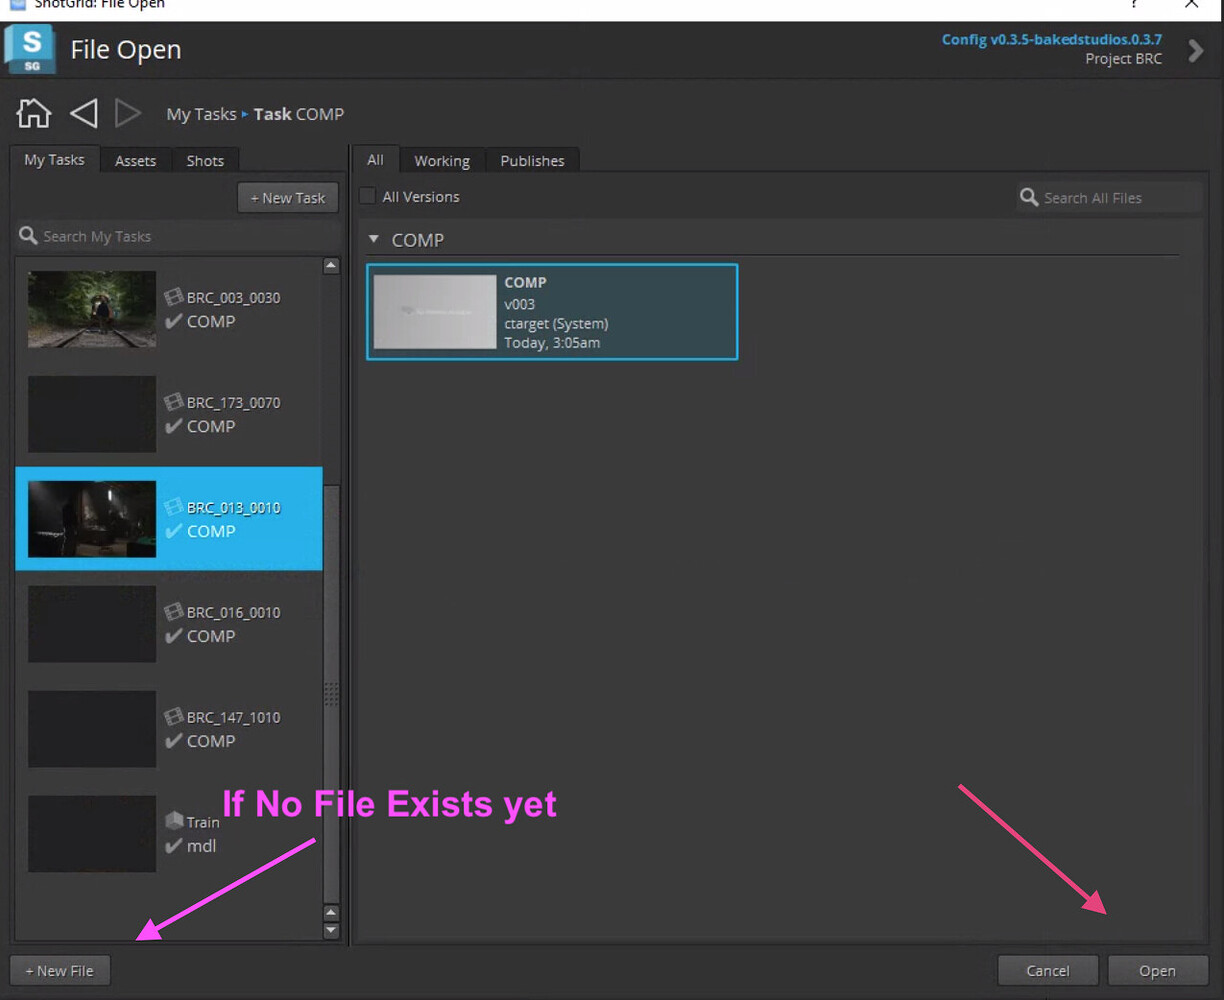
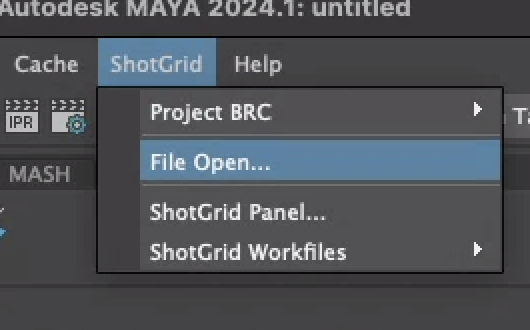
4. Go to Flow Production Tracking -> File Open
5. Find your file and open or create a new
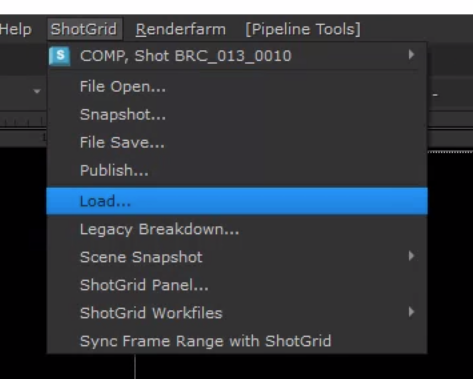
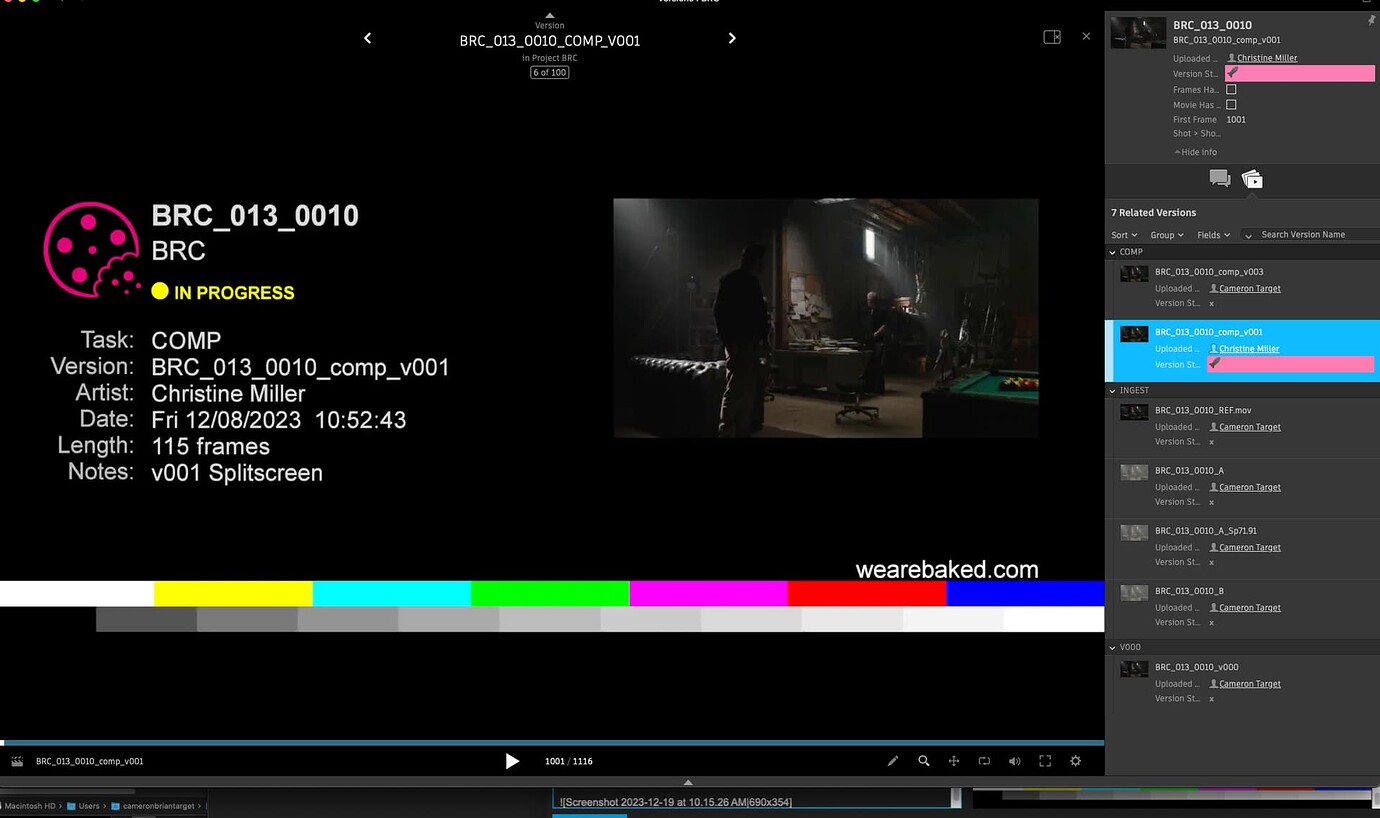
6. Go to Flow Production Tracking -> Loader to load Your media, plates or assets
note
You can now begin work and continue when ready.
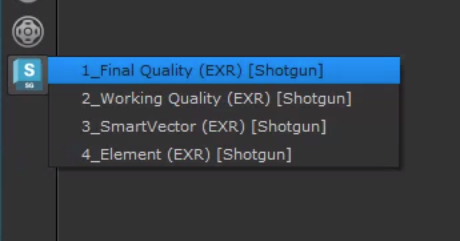
7. Create a Flow Production Tracking write node
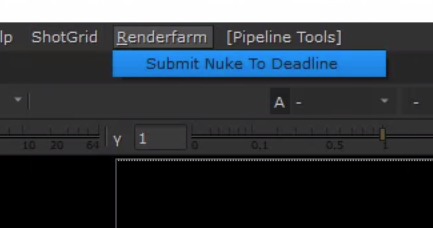
8. Select Write Node and Submit Nuke To Deadline
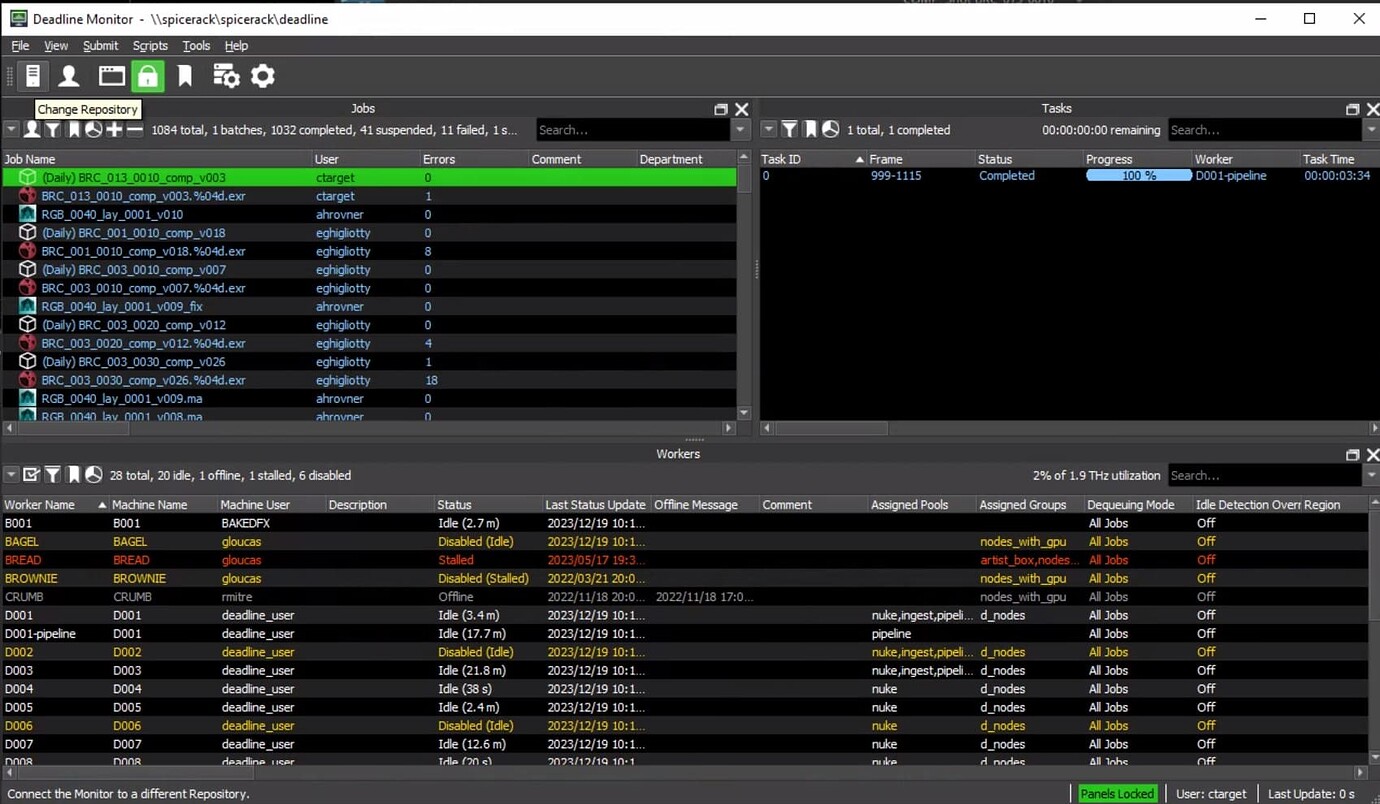
9. Wait for Render

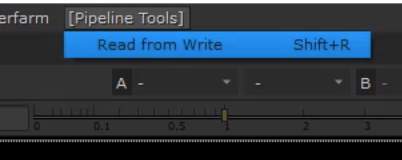
10. Select Write Node and Read from Write
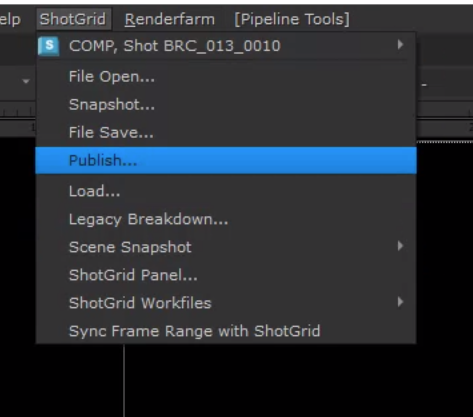
11. Select Read Node and go to Flow Production Tracking -> Publish
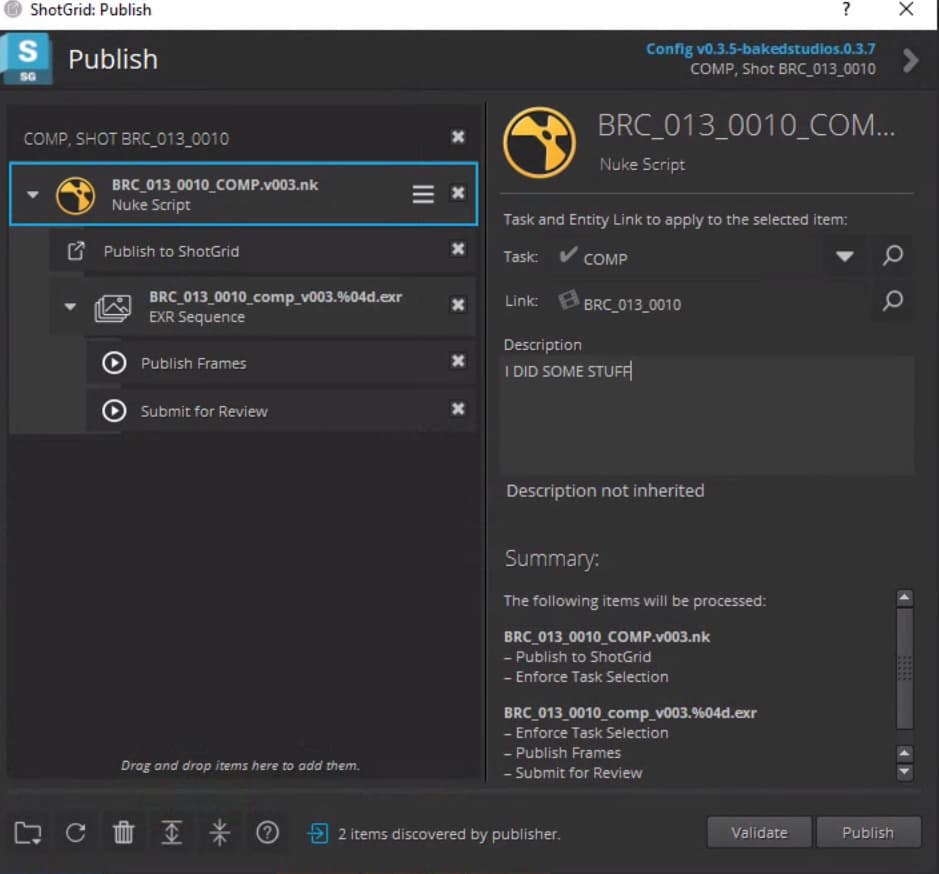
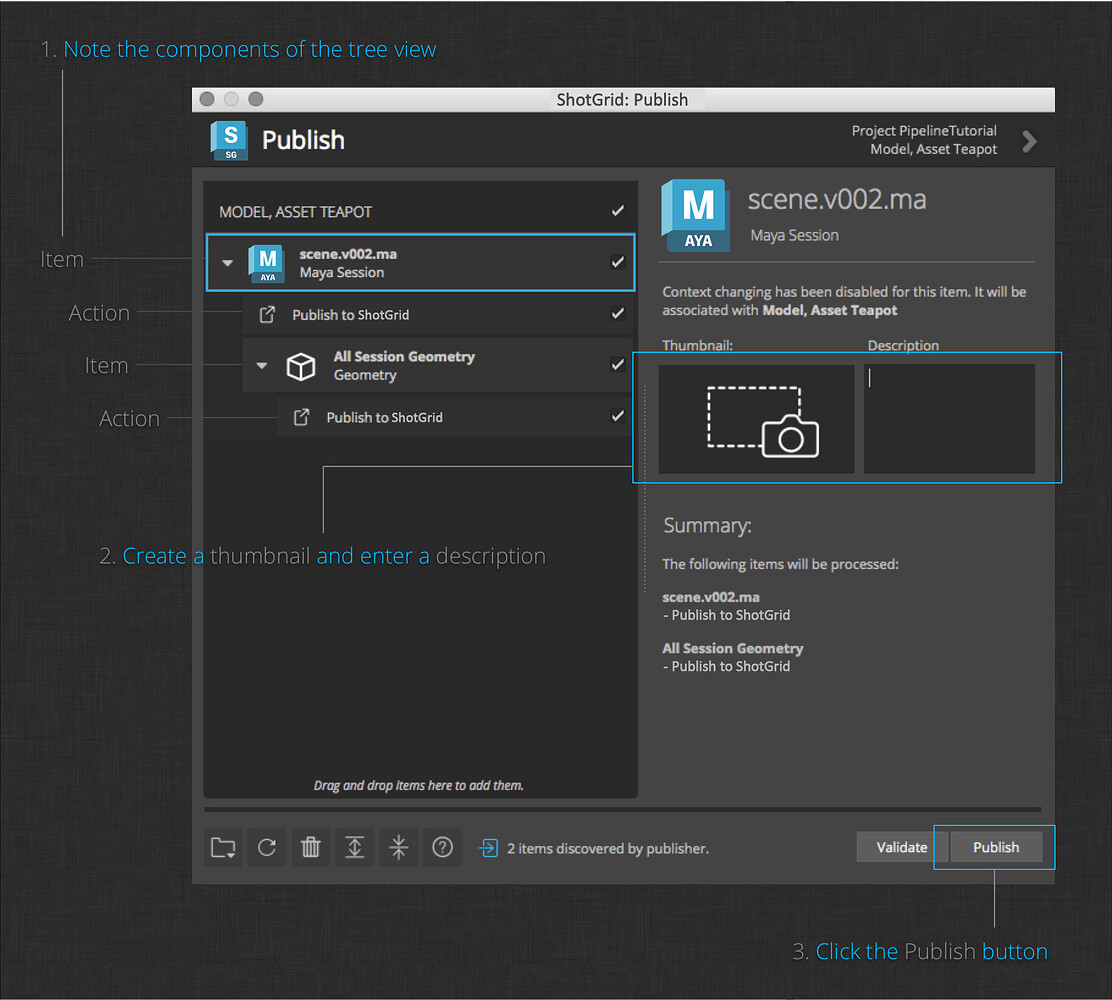
12. Enter description and publish.
13. Wait for render
DONE!
Maya
1. Load Flow Production Tracking desktop app

2. Click your project

3. Click your program

4. Go to Flow Production Tracking -> File Open
5. Find your file and open or create a new

6. Go to Flow Production Tracking -> Loader to load your media, plates or other assets
note
You can now begin work and continue when ready.
Publishing in Maya
Scenes
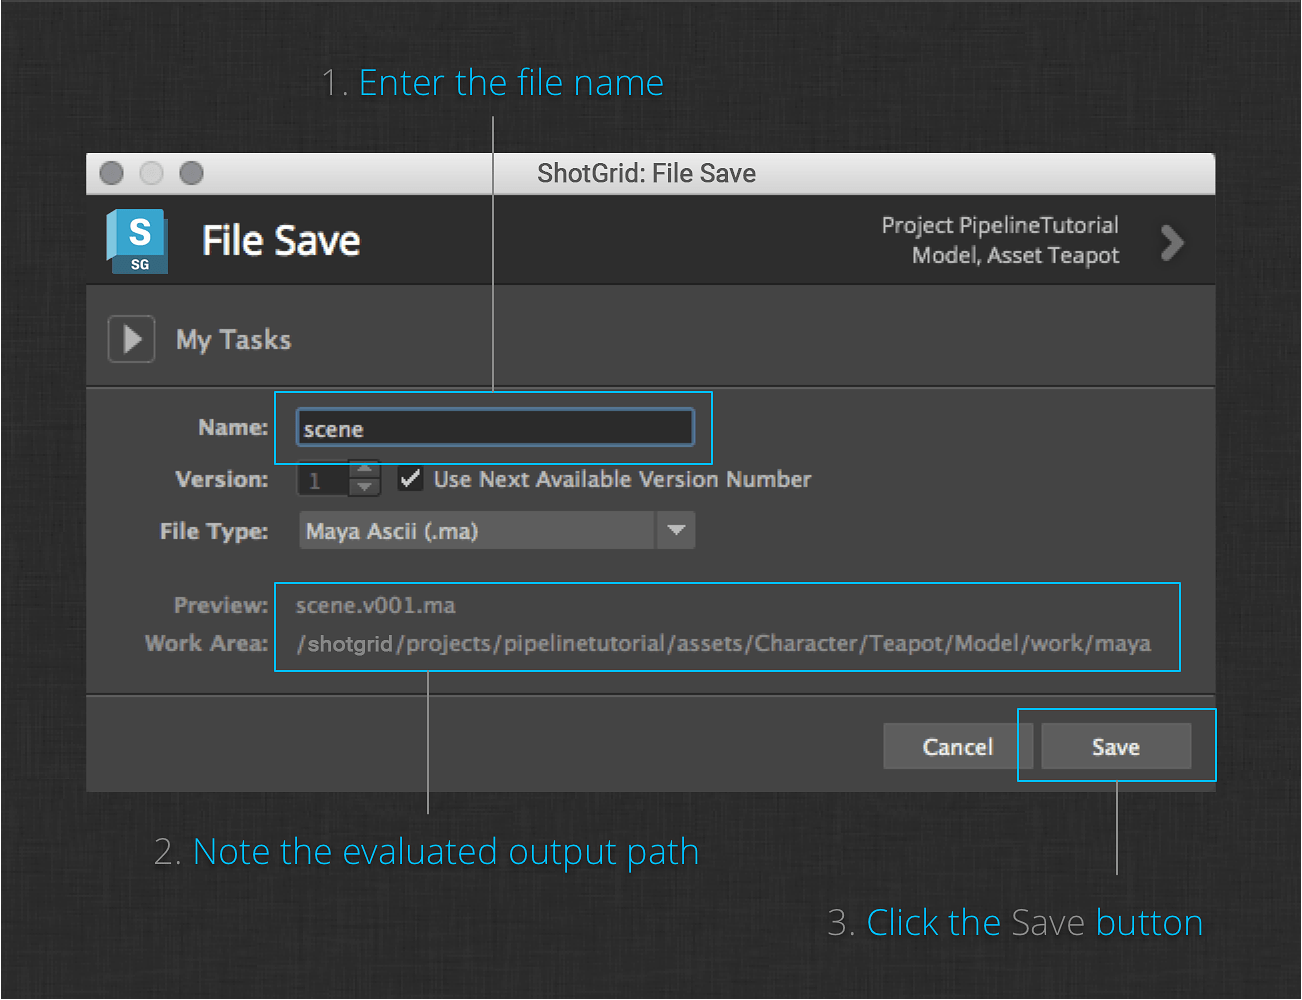
1. Save your Scene:
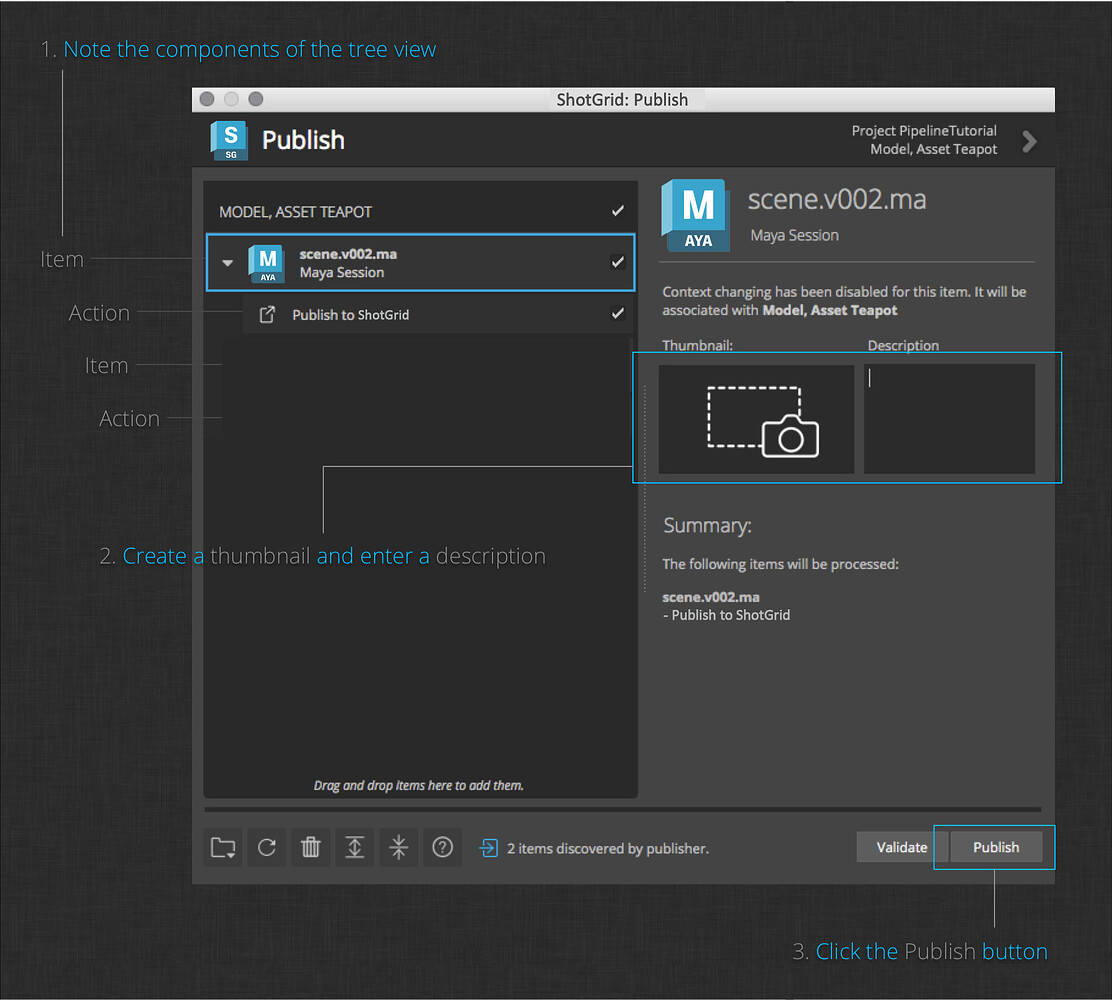
2. Publish your Scene:
Alembics
1. Finish your geometry.
2. Save your scene.
3. Publish your geometry:
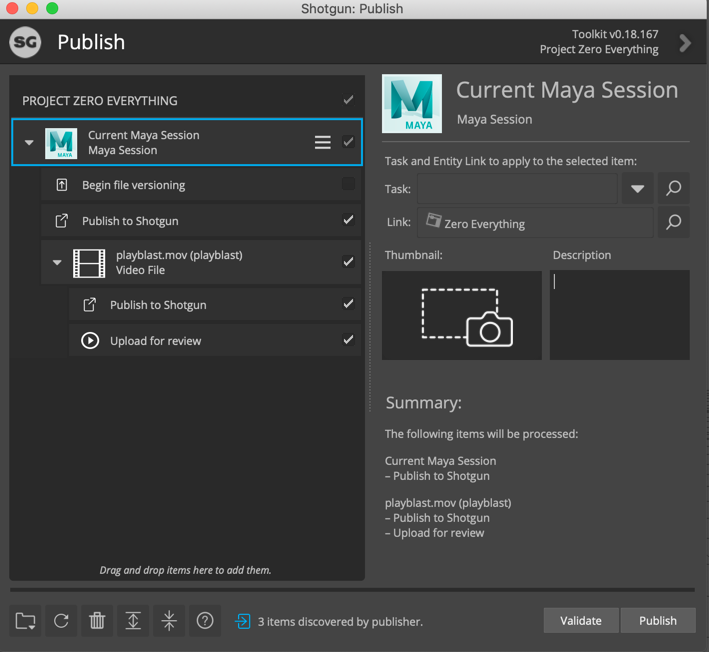
Playblasts
1. Create a playblast.
2. Publish your playblast.
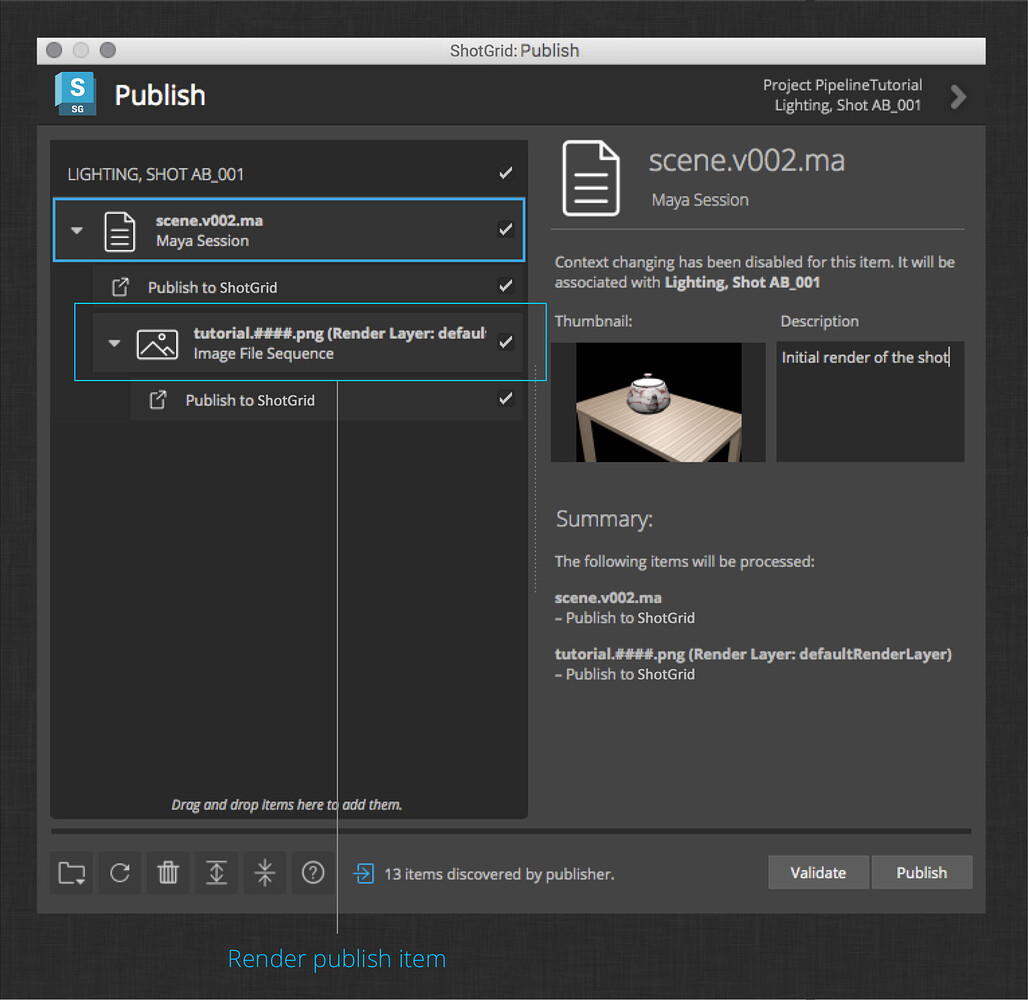
Renders
1. Render your shot to disk.
2. Publish your render to Flow Production Tracking.