Part 1: Preparing a Project
Creating Show Alias and Slack channels
The first step in starting a project is to create a show alias and Slack channels that include all team members involved. These are essential communication tools that will be used throughout the duration of the project.
Slack
Within Slack, there will always be two channels per project: one for production (eg. bam_prod) and one for artists (eg.bam_artist). They will include all internal members at Baked involved in the project.
Show Alias
The purpose of a show alias is to include everyone in correspondence with the project. The show alias must always be included in the emails when communicating with the client.
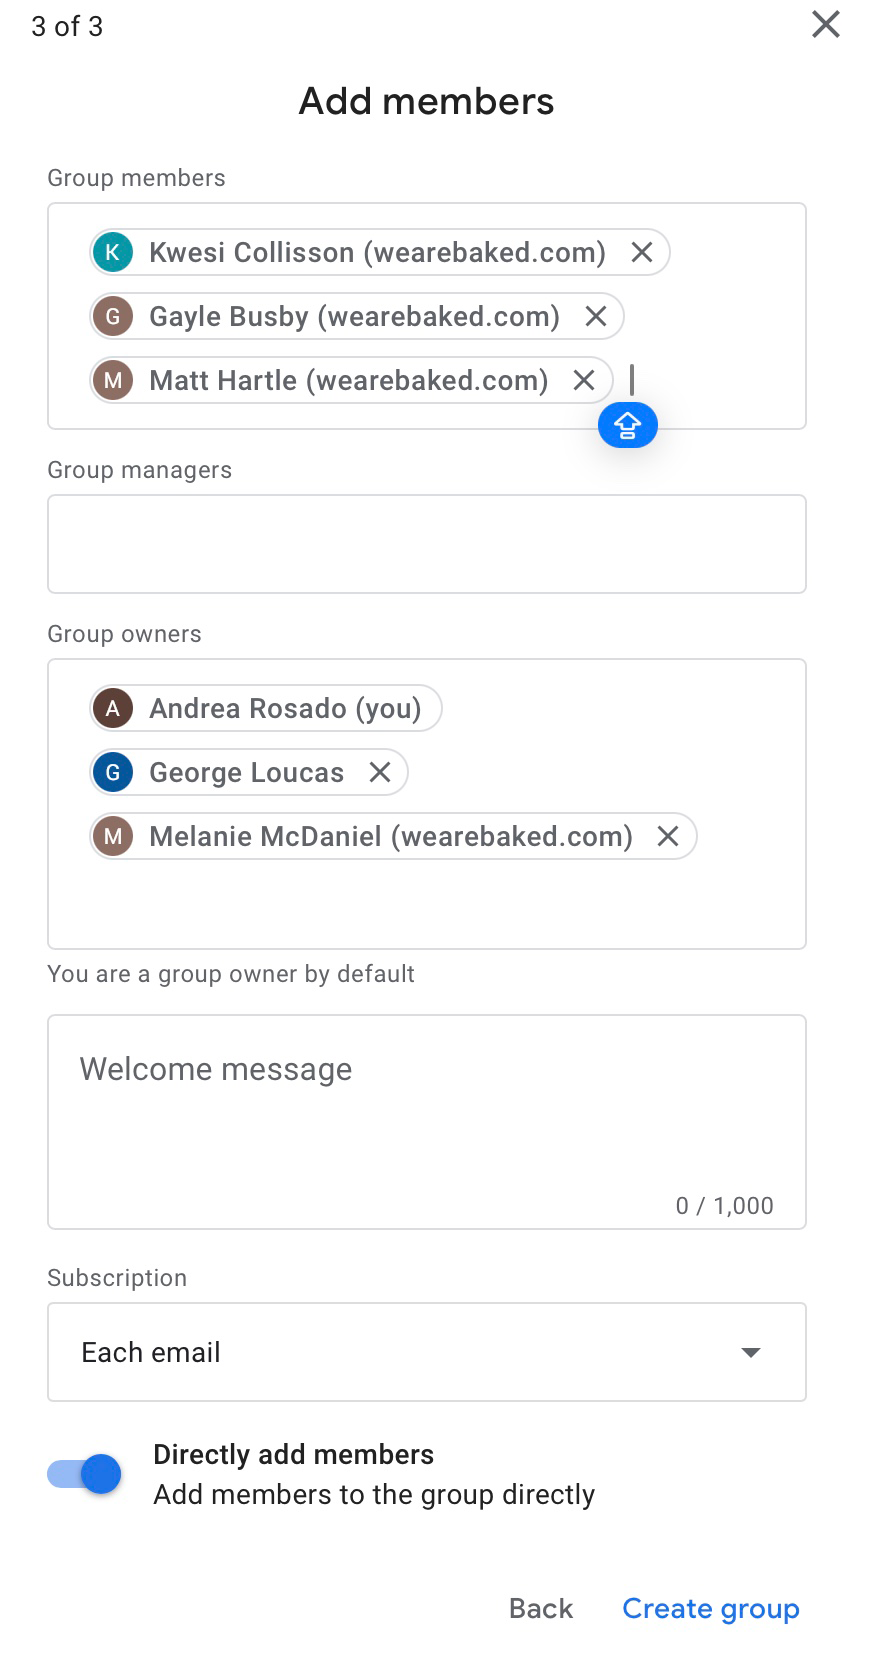
Follow these steps to create the alias:
a. Use Google Groups to create the alias and set it so everyone in the organization sees it.
b. Name the group according to the project code(Eg: BAM, TAW, HAL...etc.) and set it so everyone in the organization sees it.
Everyone that has @wearebaked.com as email are part of the entire organization
c. Add group members and click create group. Usually members will be everyone in the production Slack channel. However, this may vary based on project.
d. Make sure to adjust the following settings in "Group Settings" So that client can send files and emails to the alias without having it bounce back.

e. Send a message to the newly created Show Alias to test that it works.

Anyone that is part of the organization can keep track of the alias' emails that they are included in within Google Groups.
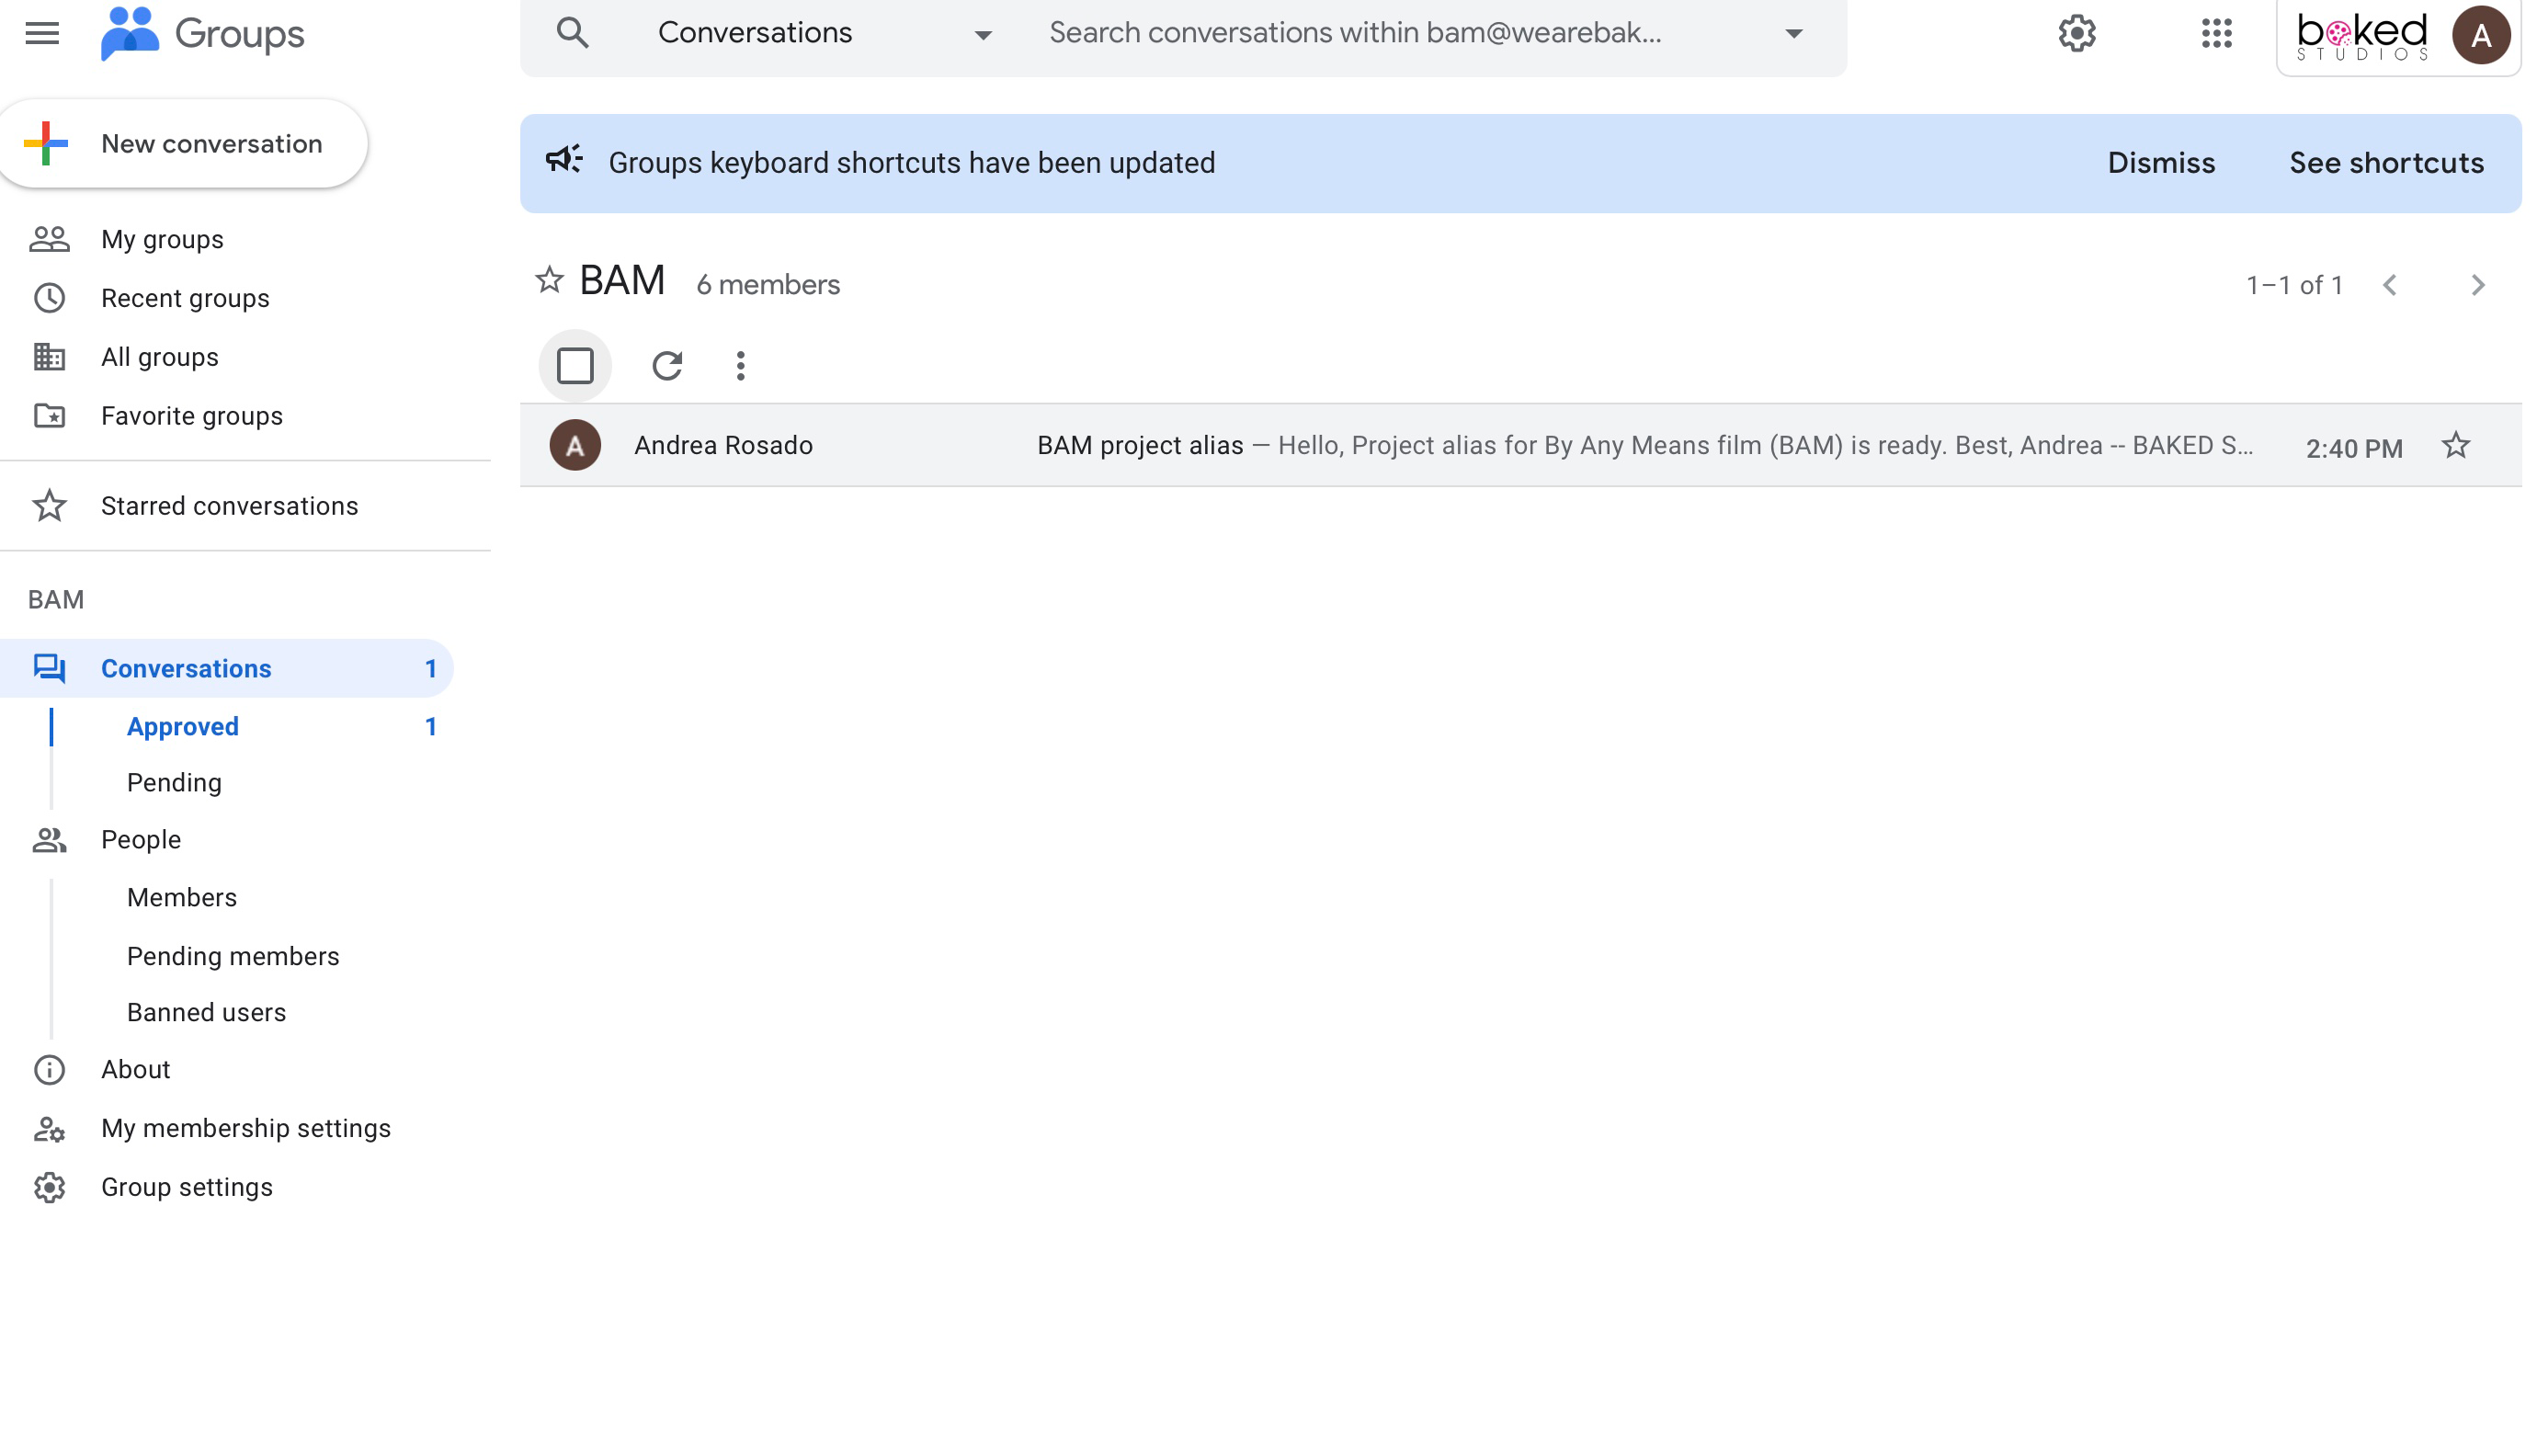
Stay organized by keeping track of project-specific communication in Google Groups.
While preparation occurs, communication with client is crucial. It is important that client receives the Baked Studios Spec Sheet as one of the first steps within the workflow. Its purpose is for the client to know and prepare what Baked requires to complete work efficiently.
Creating a Project in Shot Grid
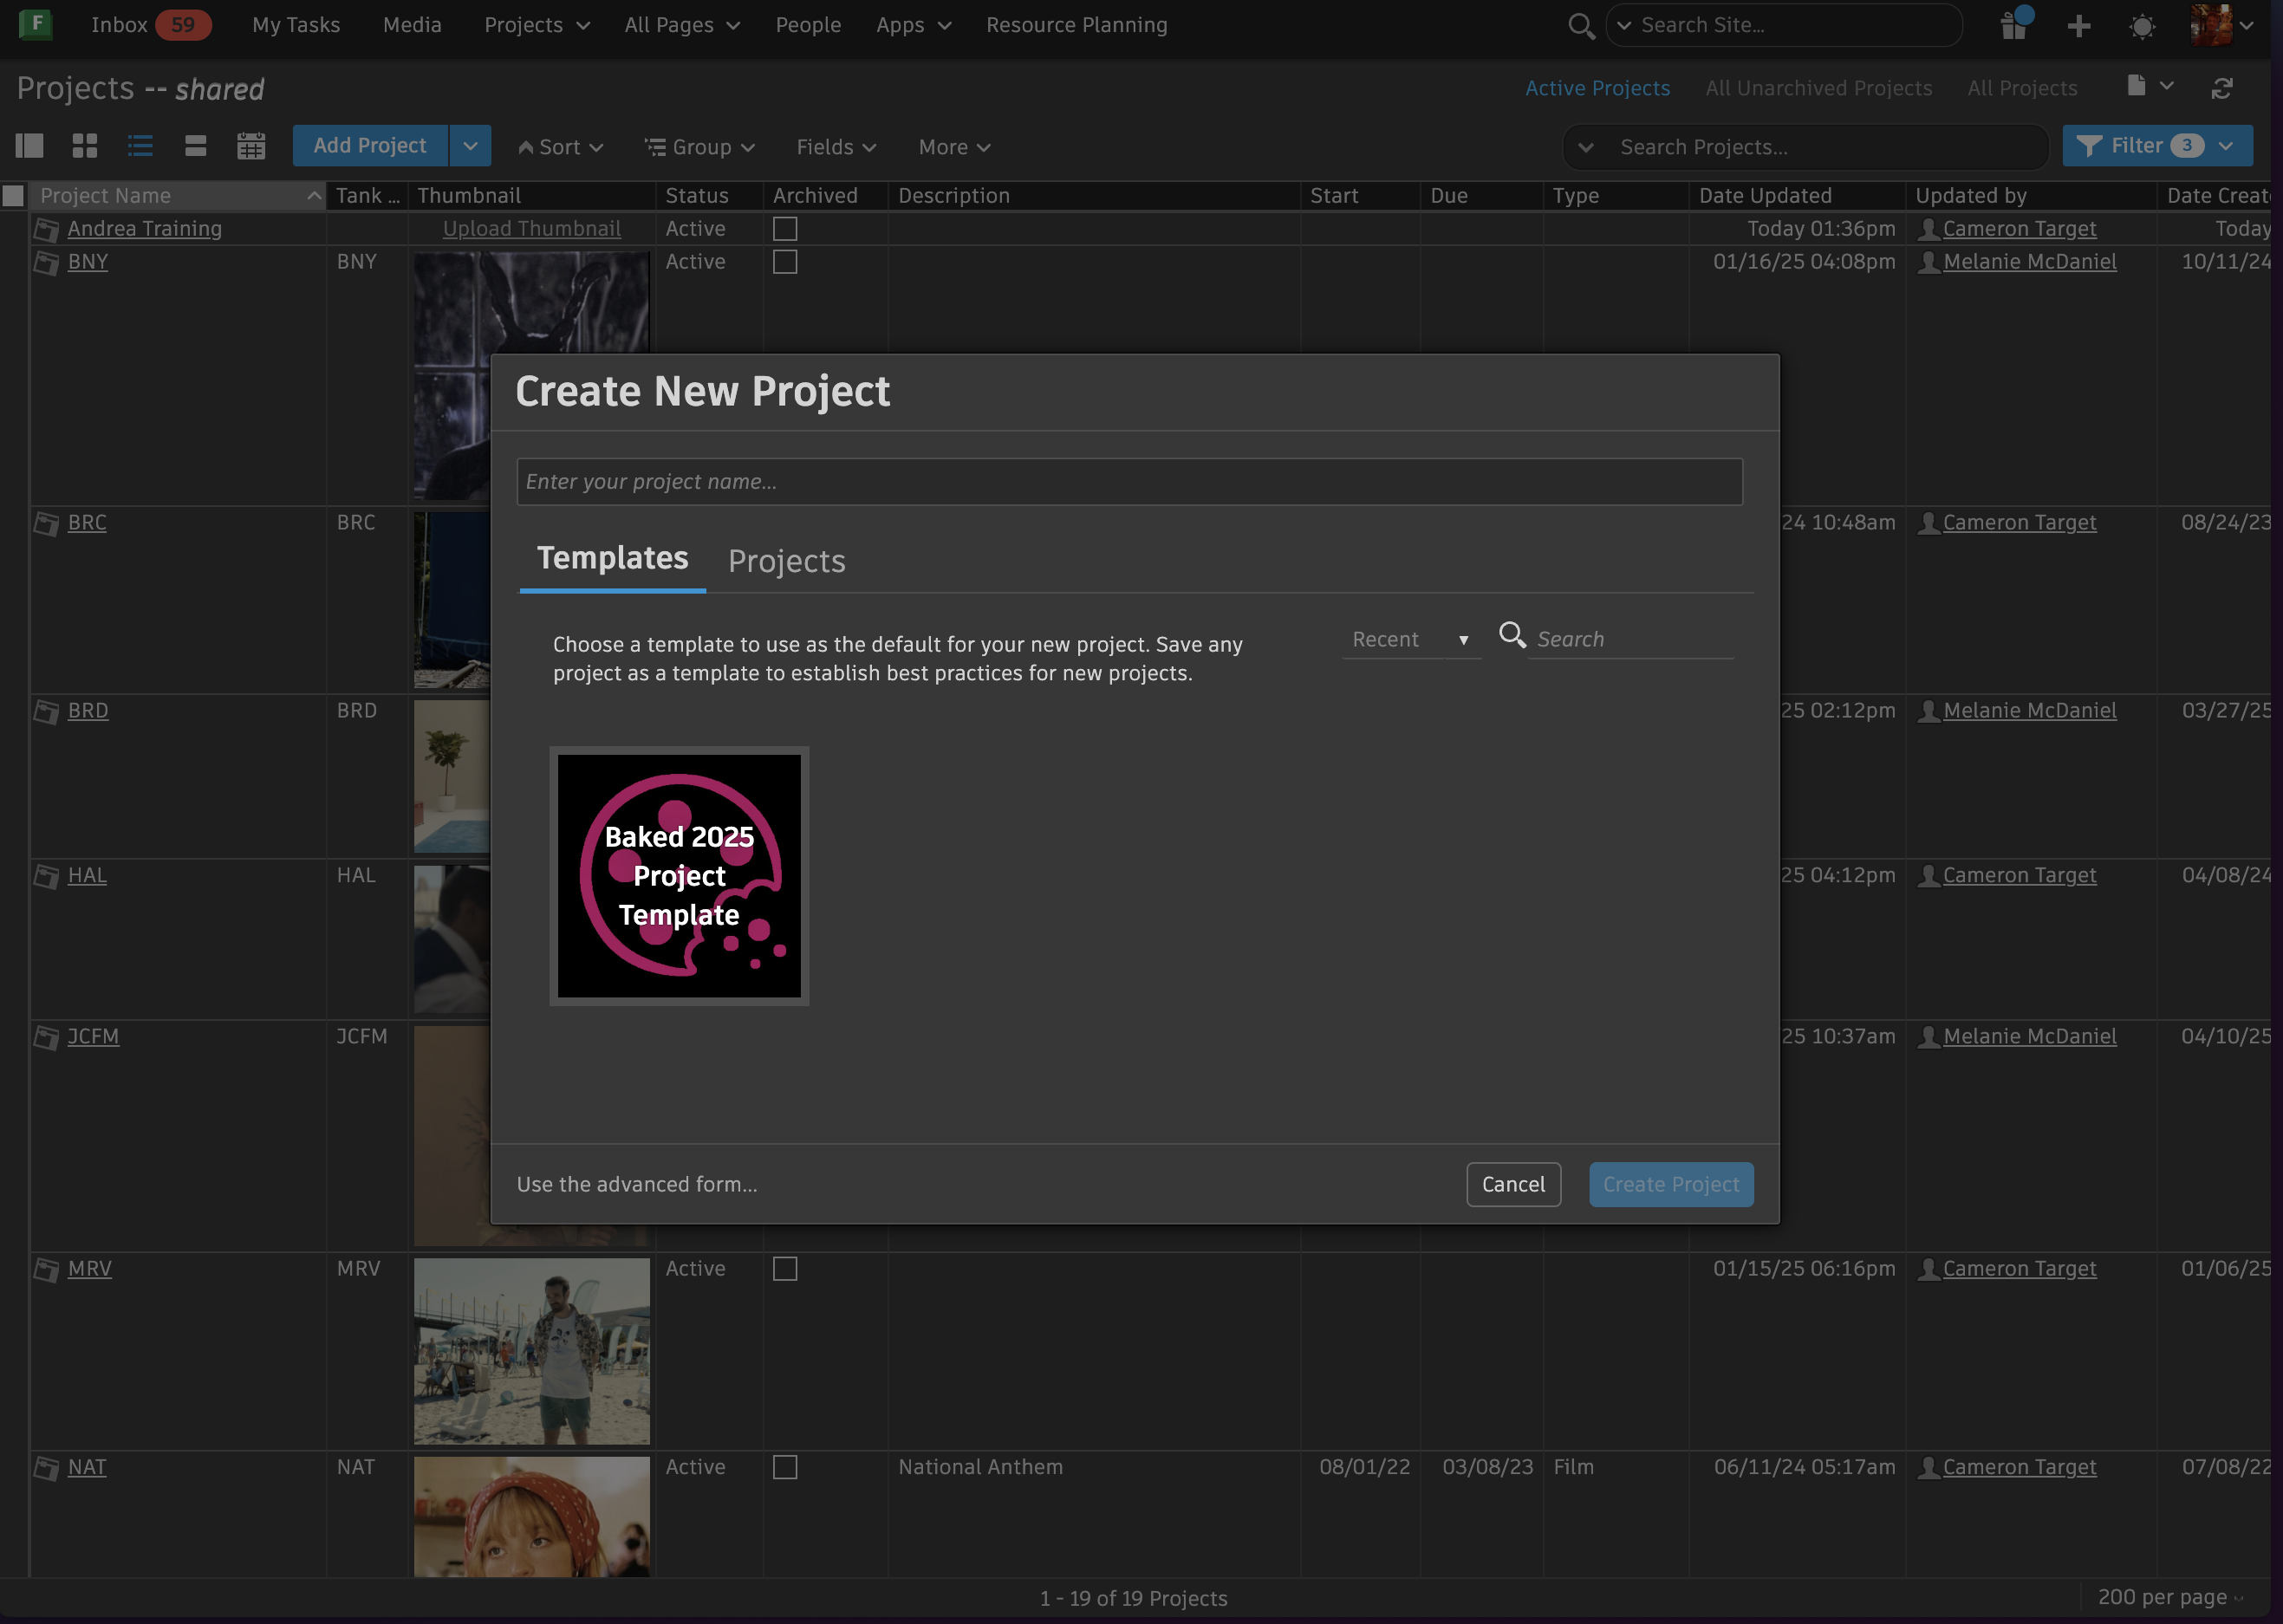
At Baked, Flow Production Tracking is the primary tool used to manage projects. Before post-production begins, the coordinator must create the project using the Baked Project Template.
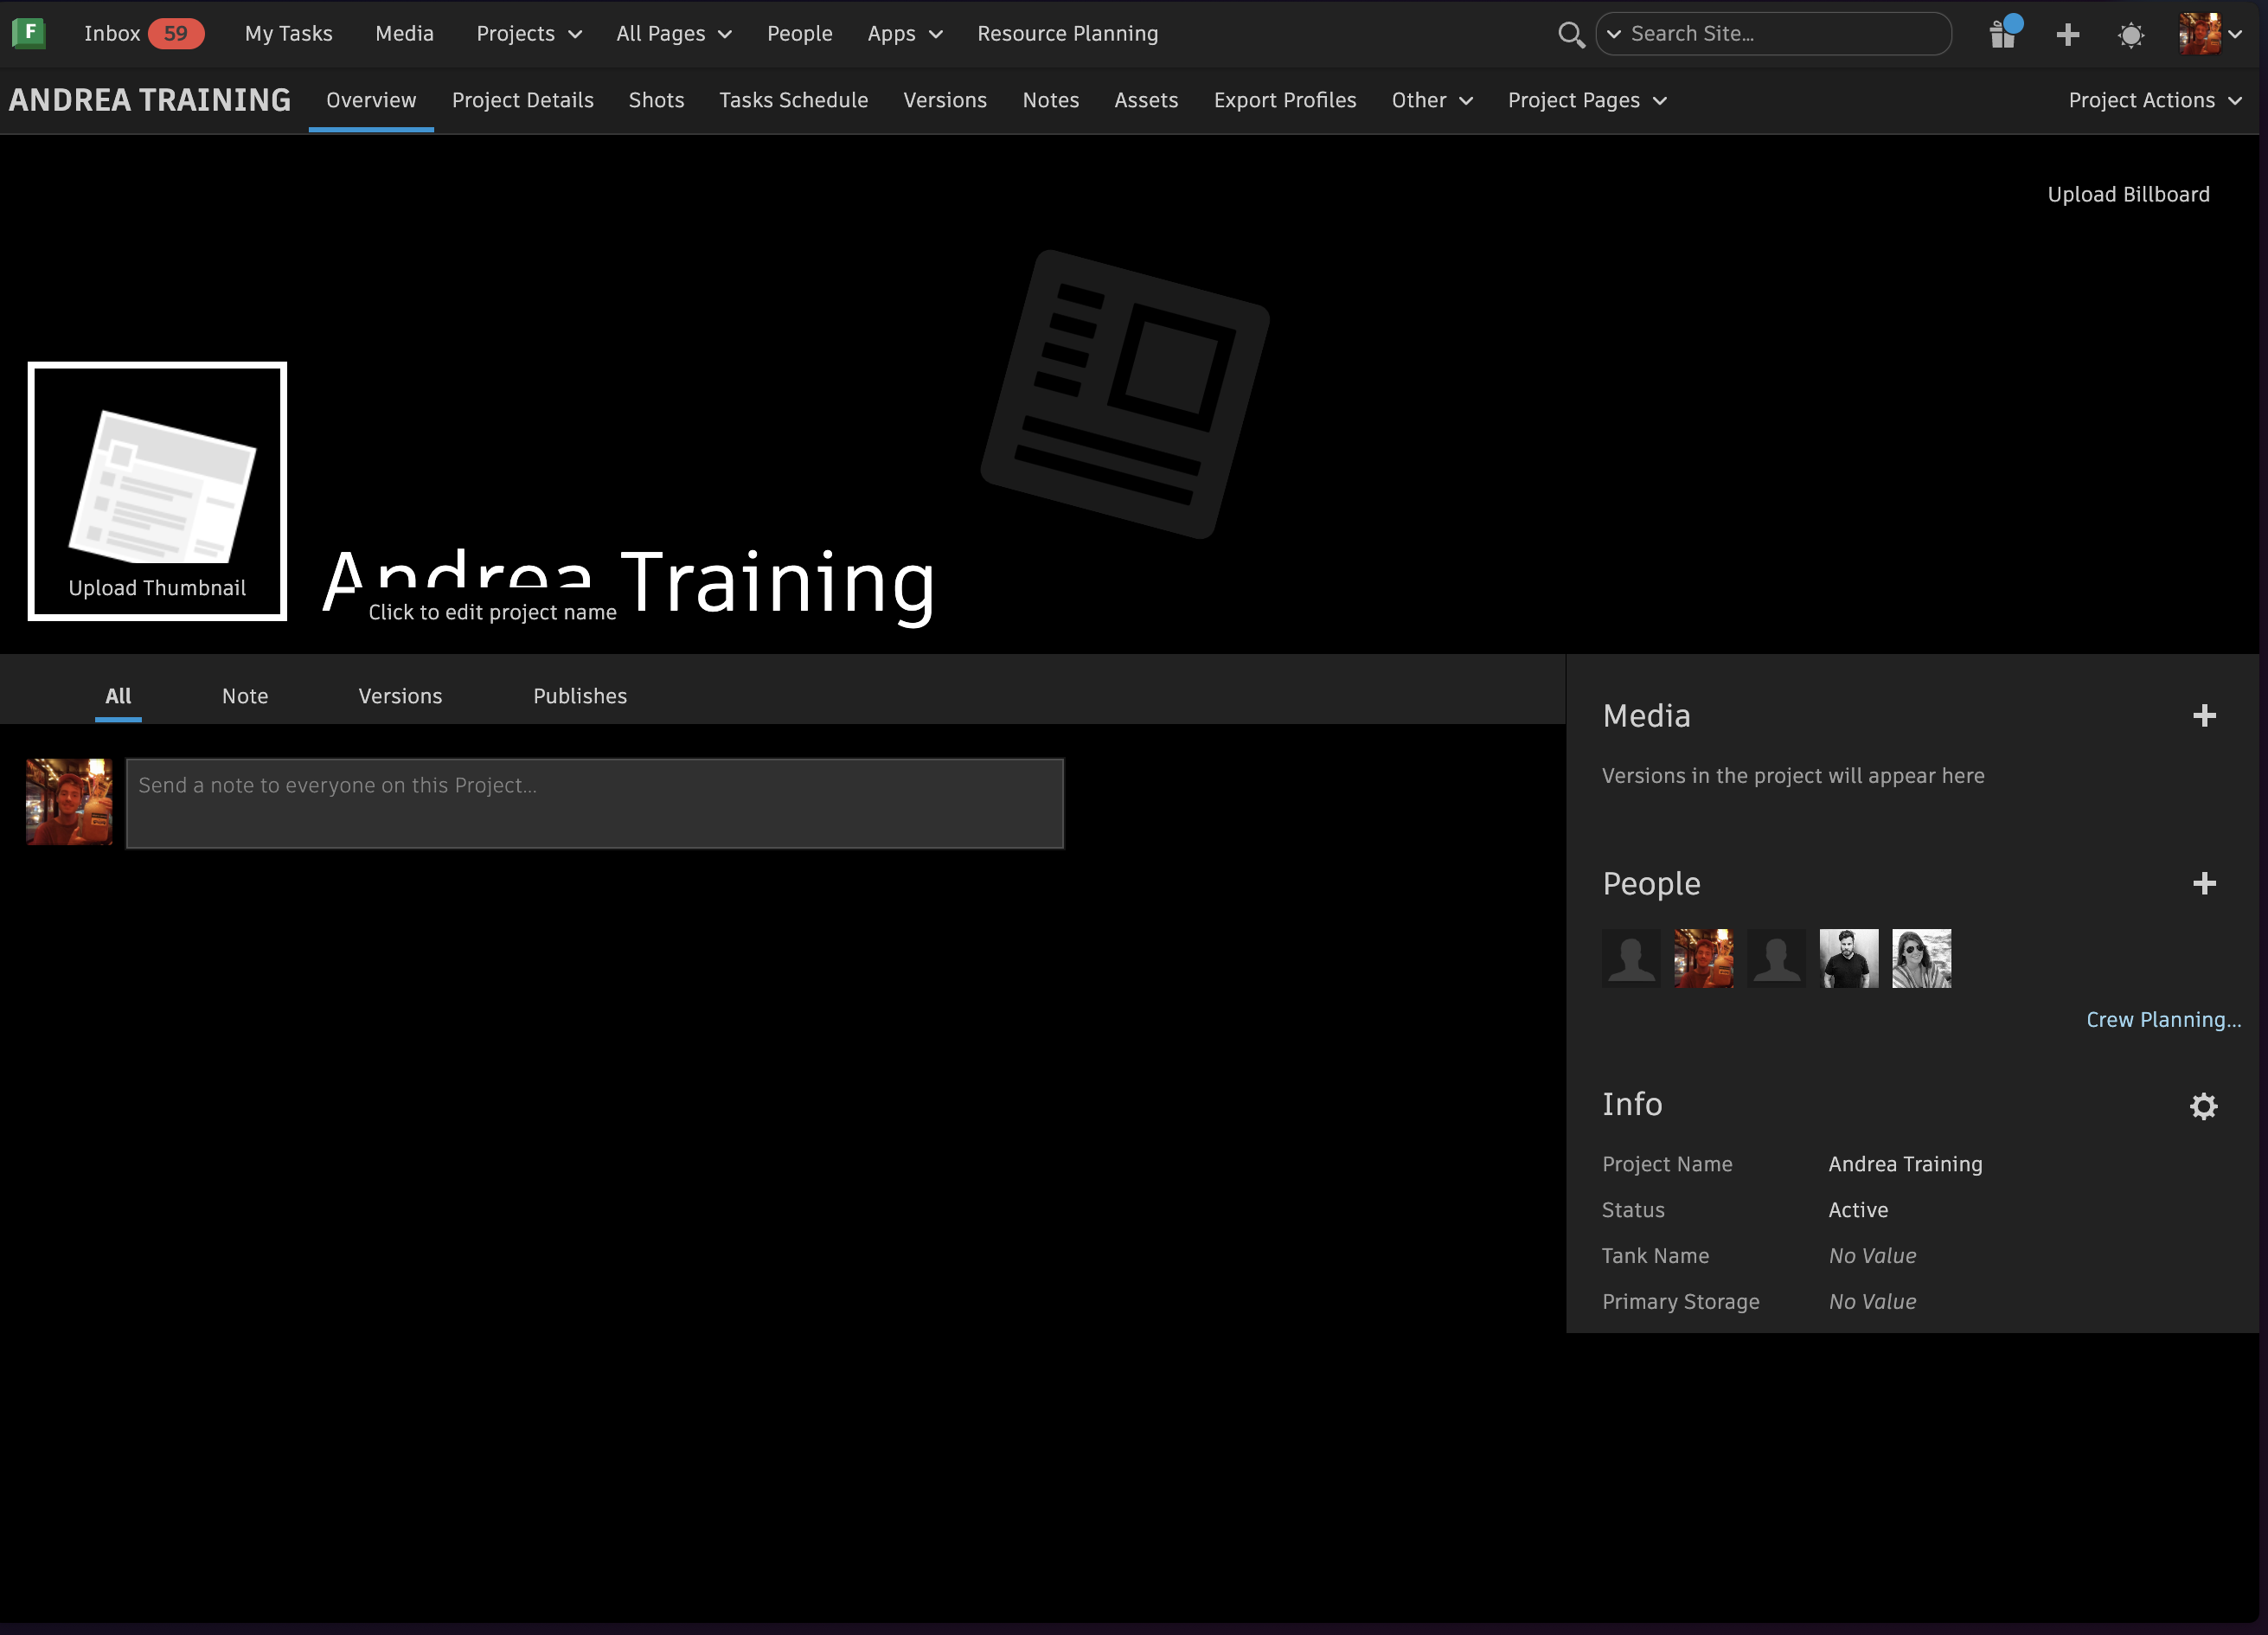
- Once the project is created in Flow Production Tracking, all members of production and artists that will be part of the project must be added to it under the Overview tab. (The production team includes VFX Supervisor, Producer, Project Manager,Head of Production and Pipeline Manager.) After this, the Pipeline Manager must be notified that the project has been created to begin setting up tank names and establishing primary storage for post-production workflow. An optional thumbnail can also be uploaded in the Overview tab for organizational purposes.
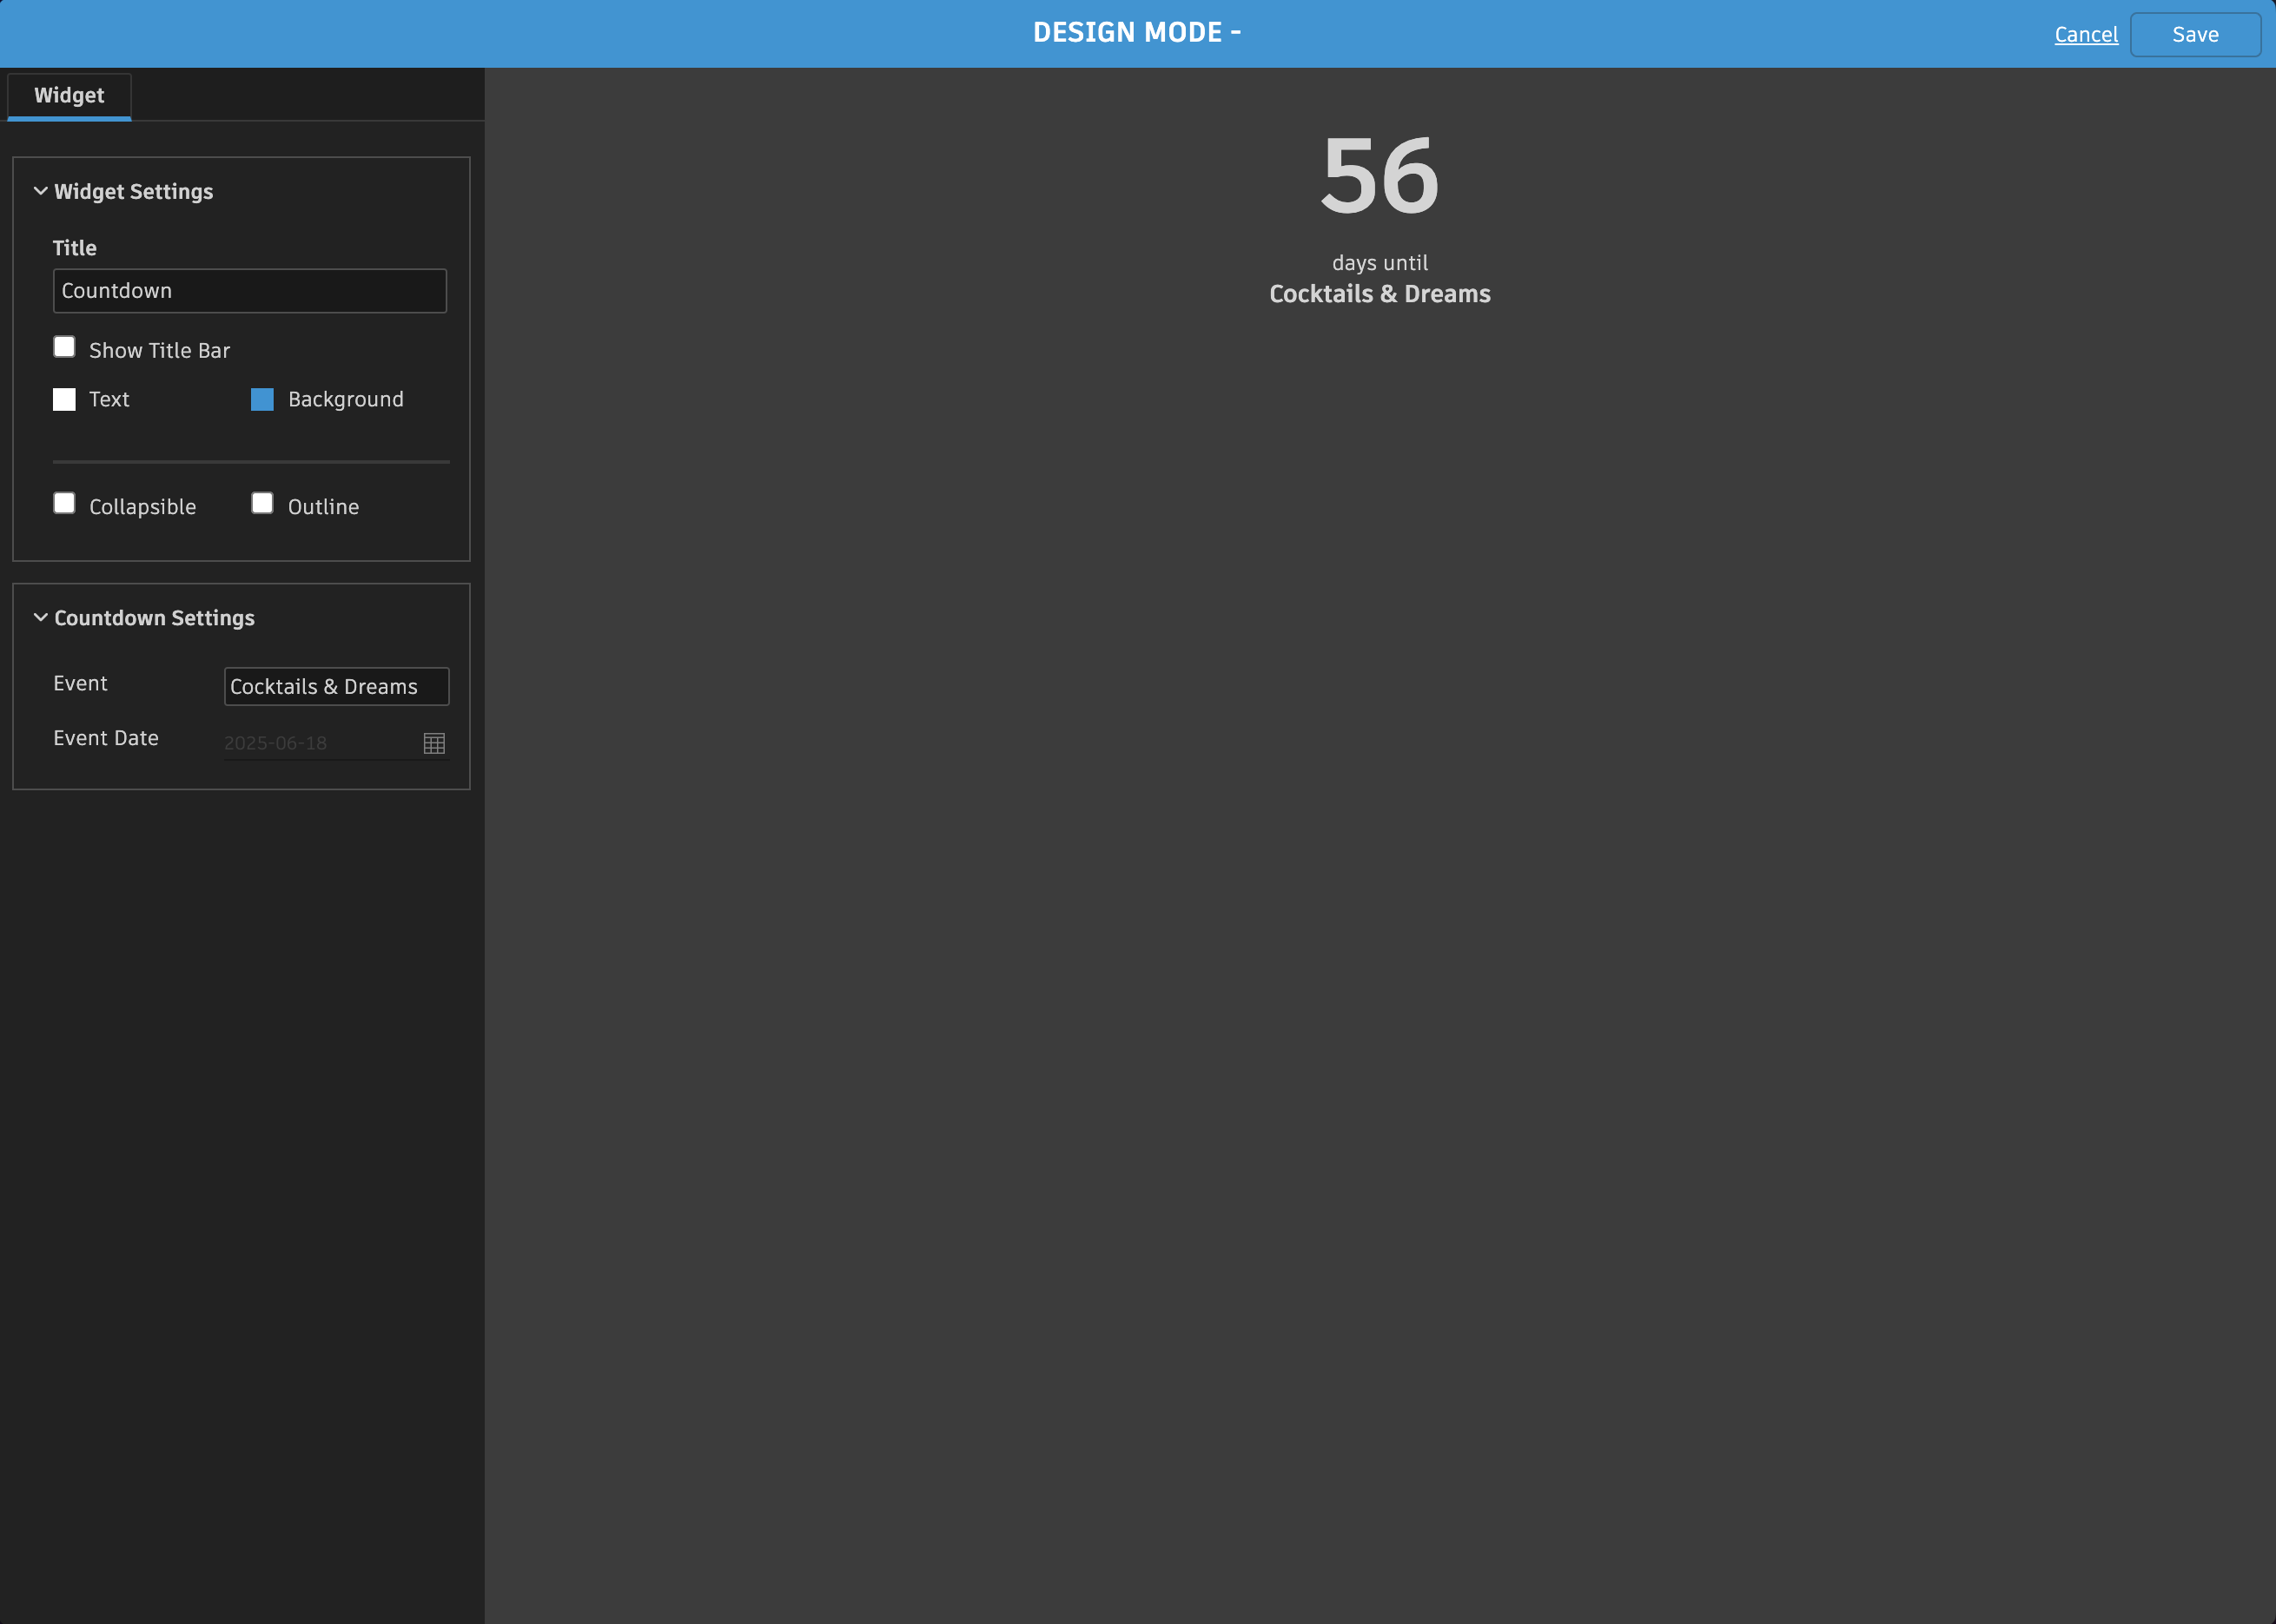
- As part of project setup, the coordinator is also responsible for recording key scheduling milestones. In Flow Production Tracking, under Project Details, the coordinator must set the Dropdead Deadline by entering it under Countdown Settings > Event Date in Design Mode. Once saved, this action will create a countdown for the project duration.

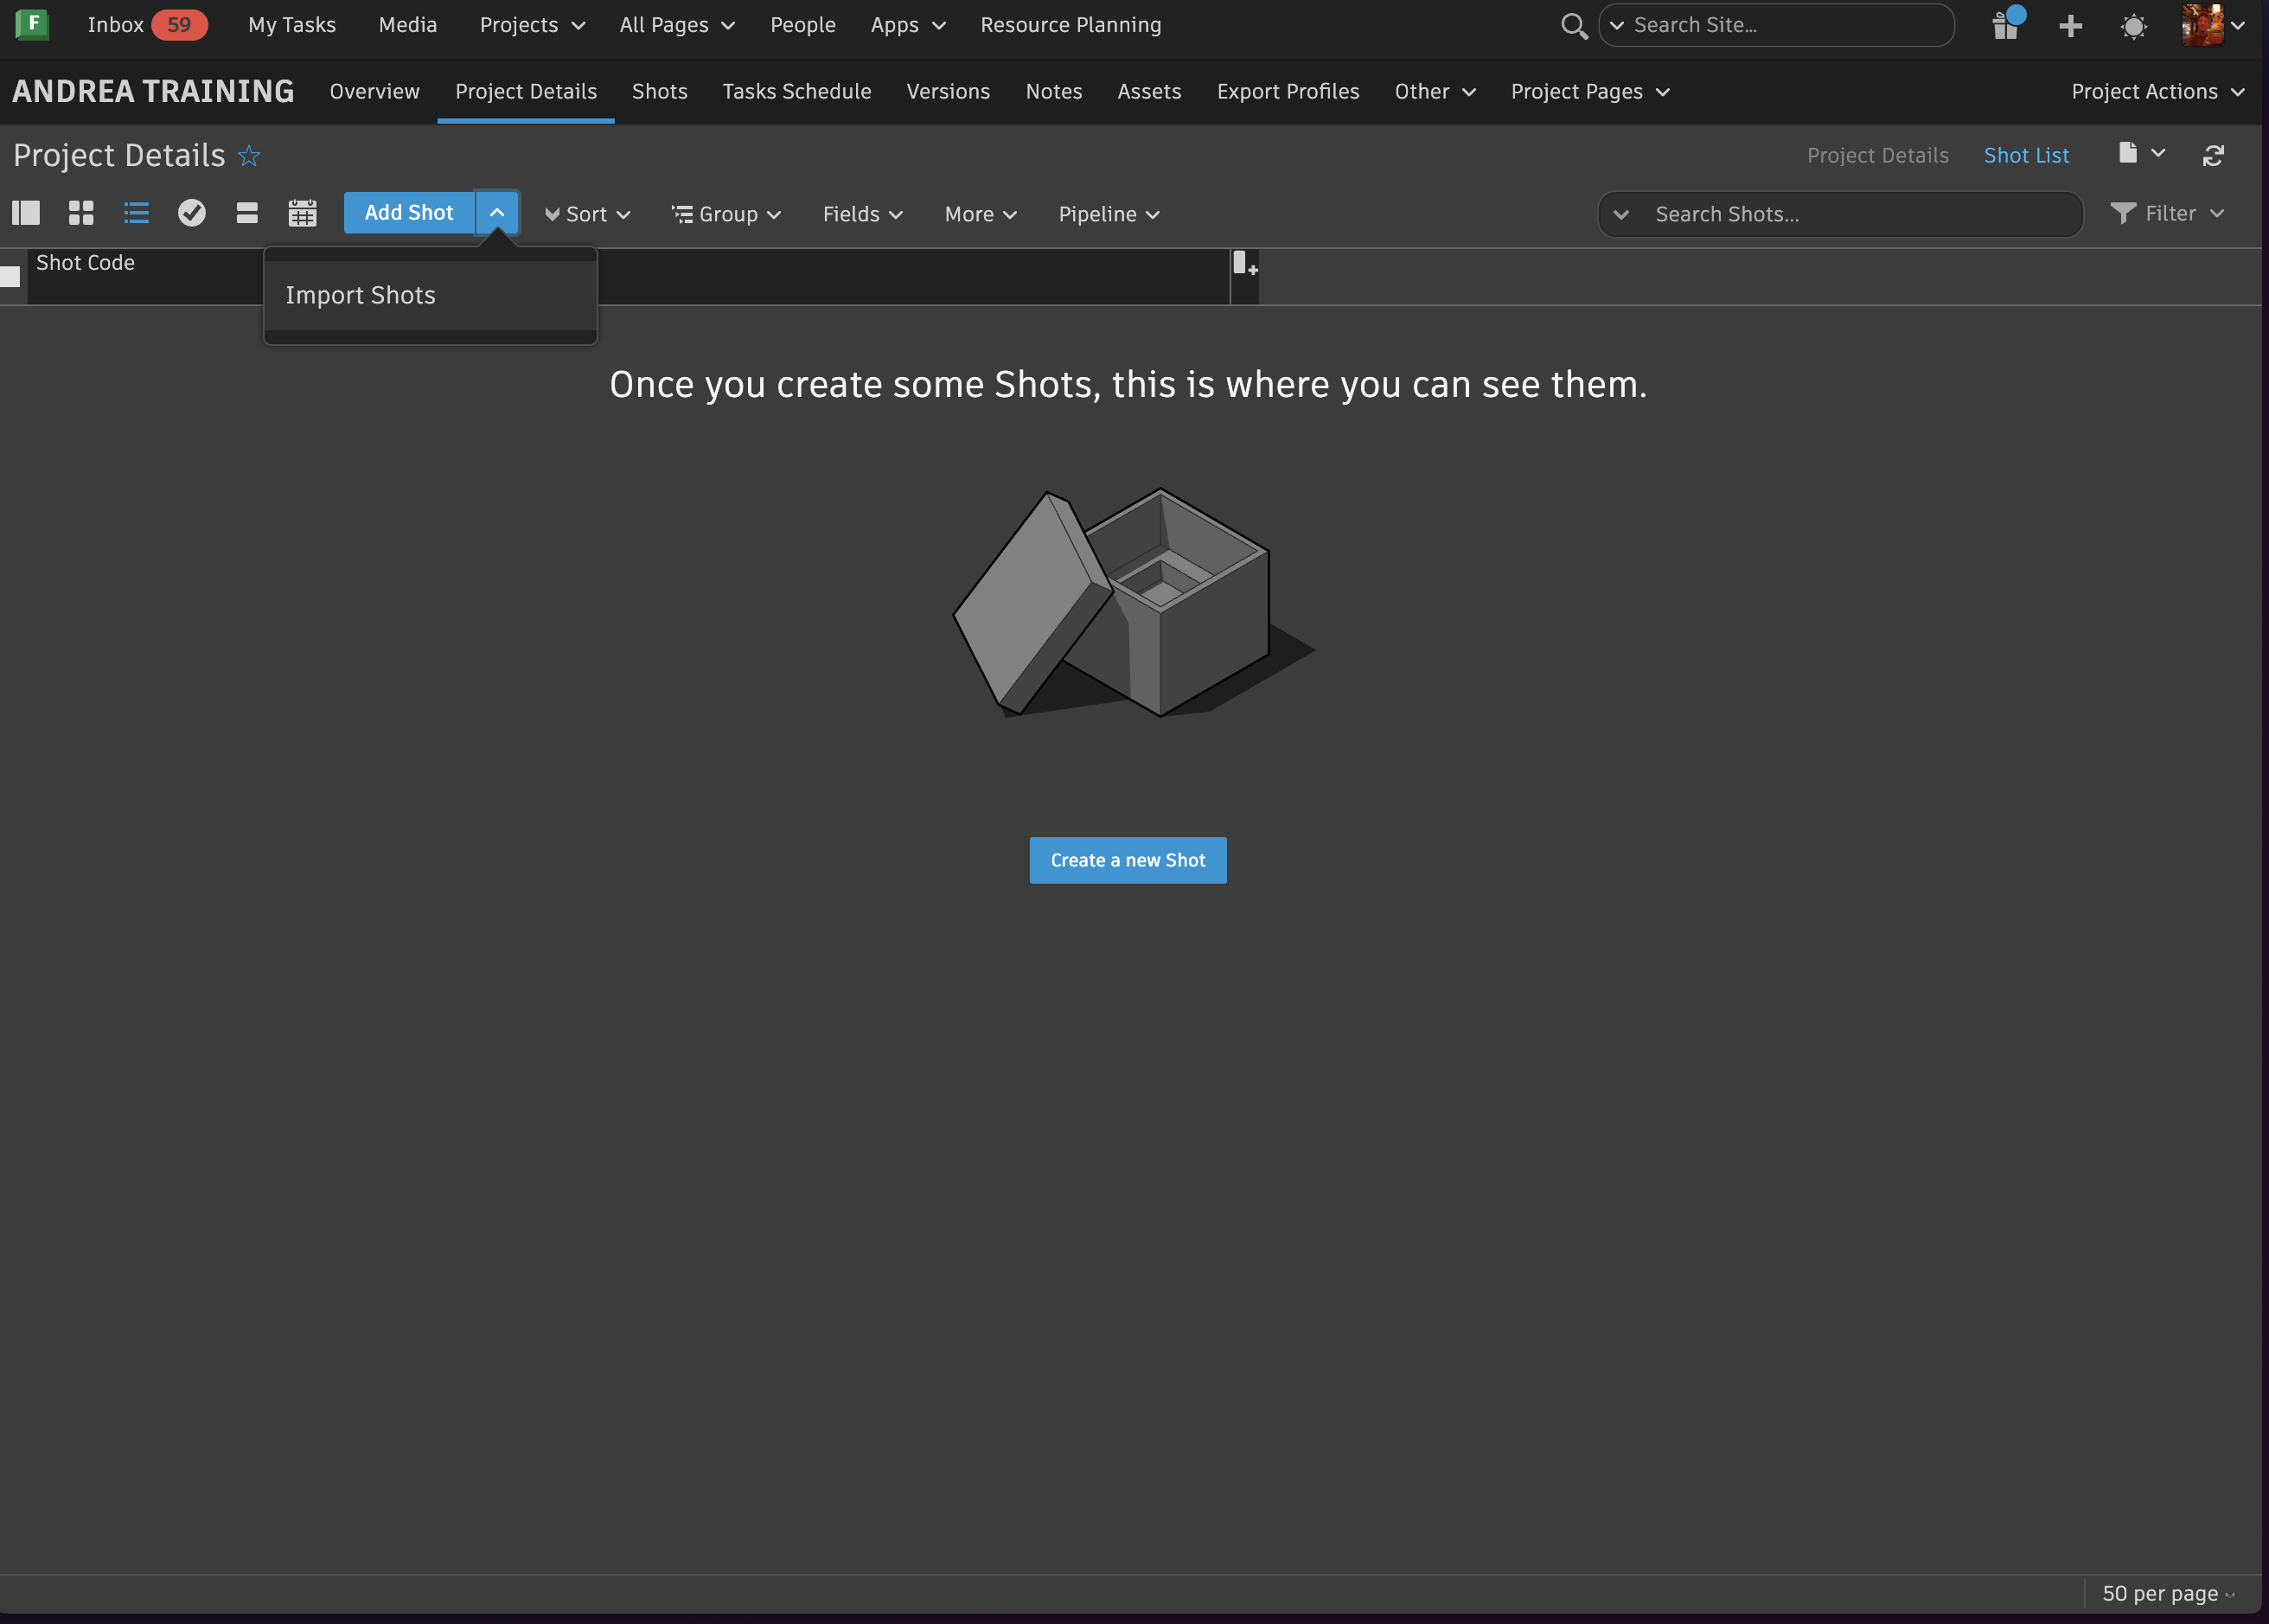
Adding shots
- After setting the project's deadline, shot information must be brought in under the Shot List tab.
- Coordinator must communicate with the Head of Production to paste in the full list of shots that were bid to the client, including their respective descriptions for the required VFX work.
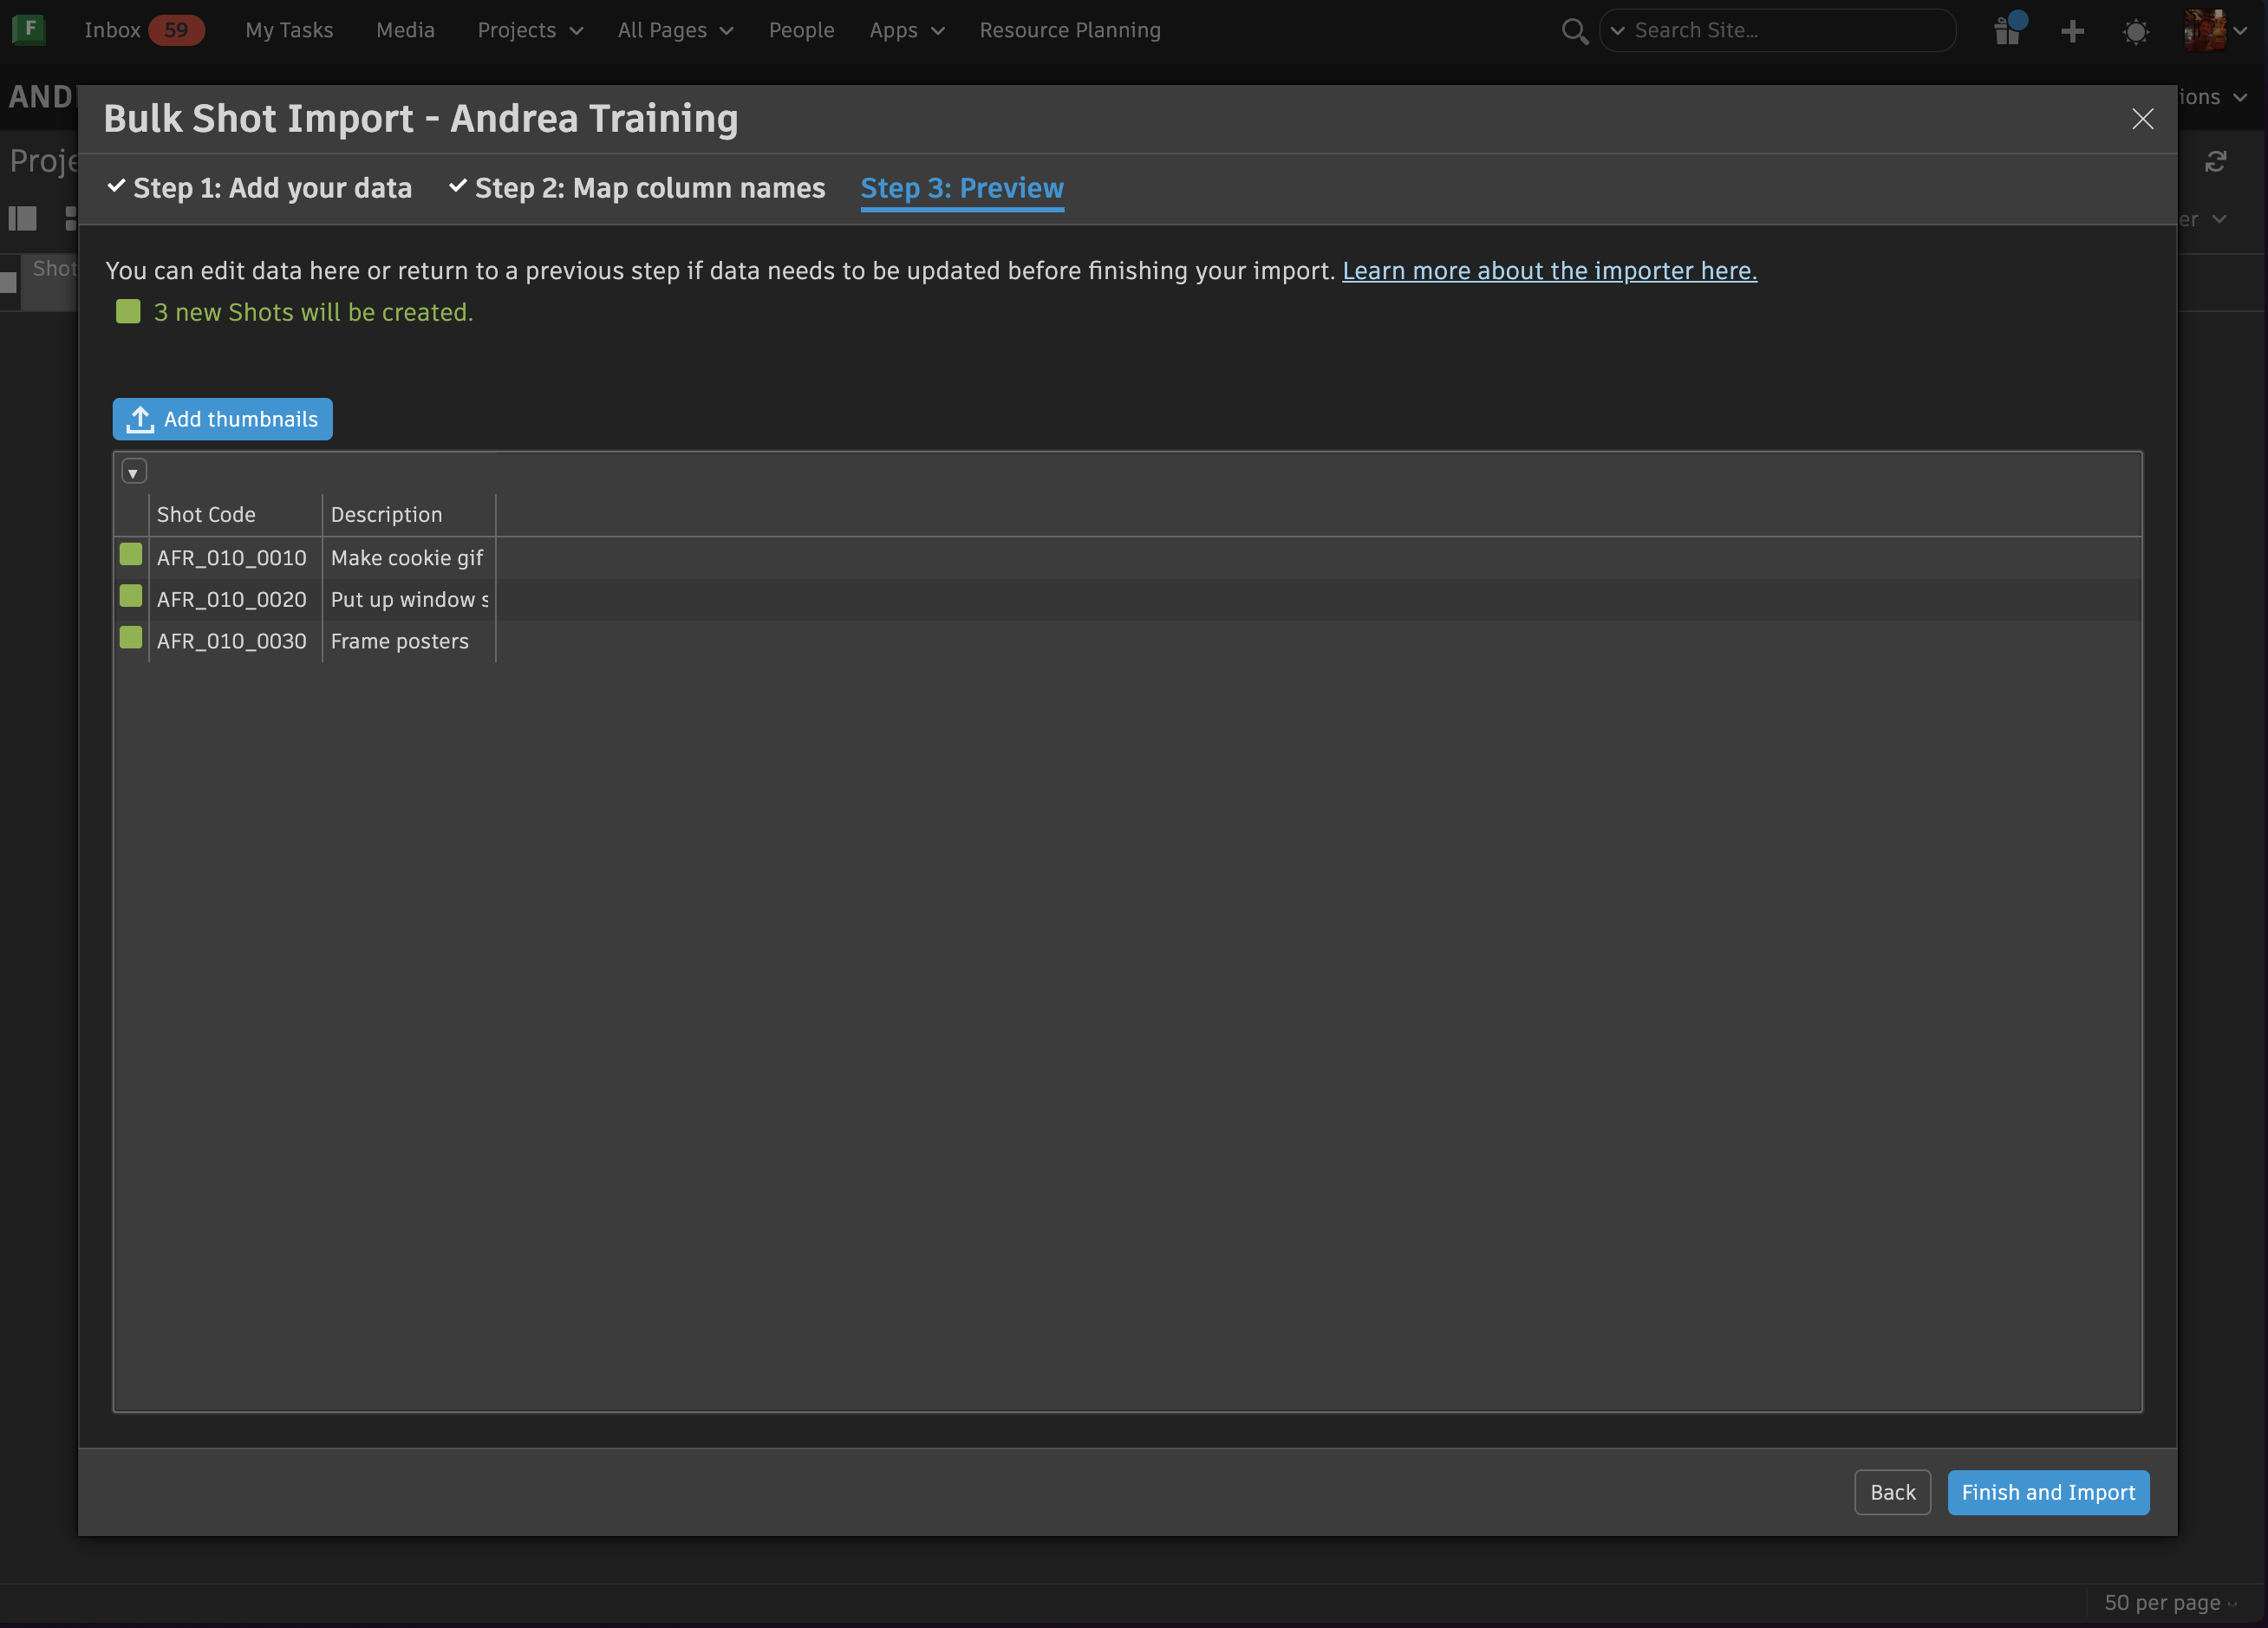
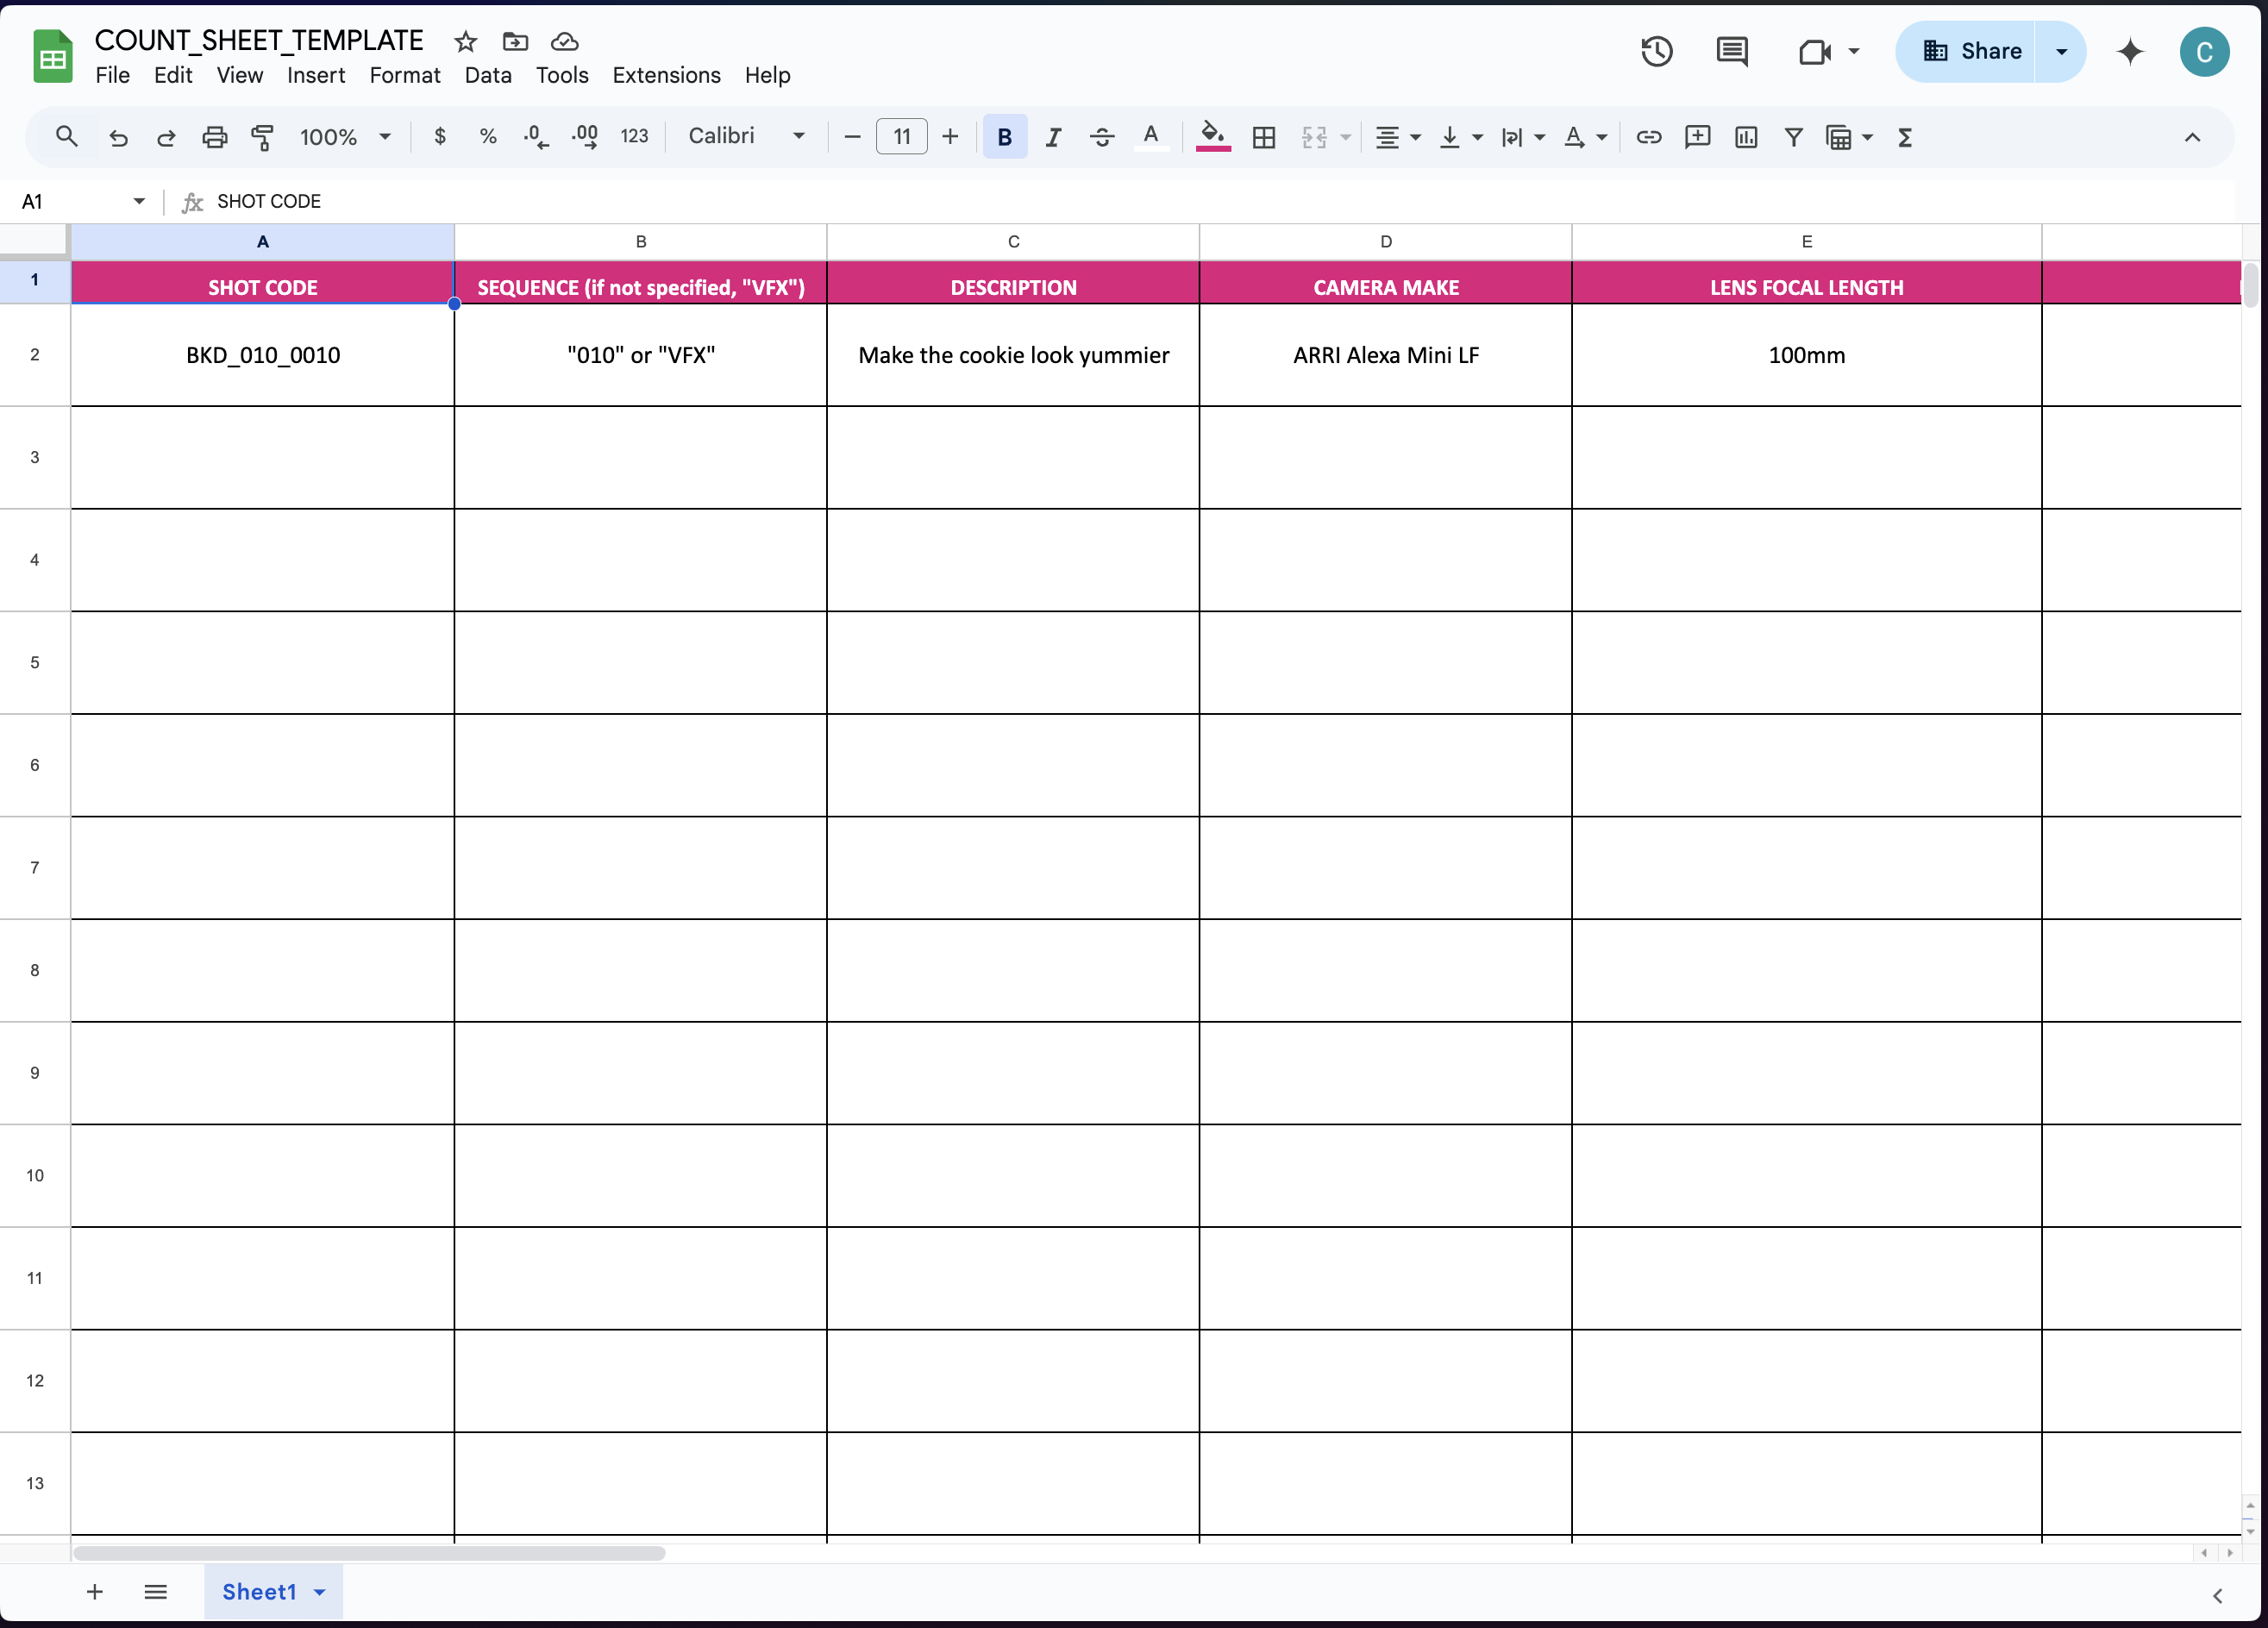
- Once the shot list is created in Flow Production Tracking, Coordinator needs to communicate with client and request that they complete Baked's Count Sheet Template following the previously sent Spec Sheet as guide. This document will include all necessary shot information such as naming conventions, sequence, descriptions, handles, frame ranges, camera information..etc.
Aim to start a project by sending this template. However, flexibility is important. Clients will not always complete Baked's spreadsheet, they may provide their own or simply approach this step in a completely different way. We adapt to the client not the other way around.
- This information is then imported into the Pipeline Info View on the Shots Page in Flow.
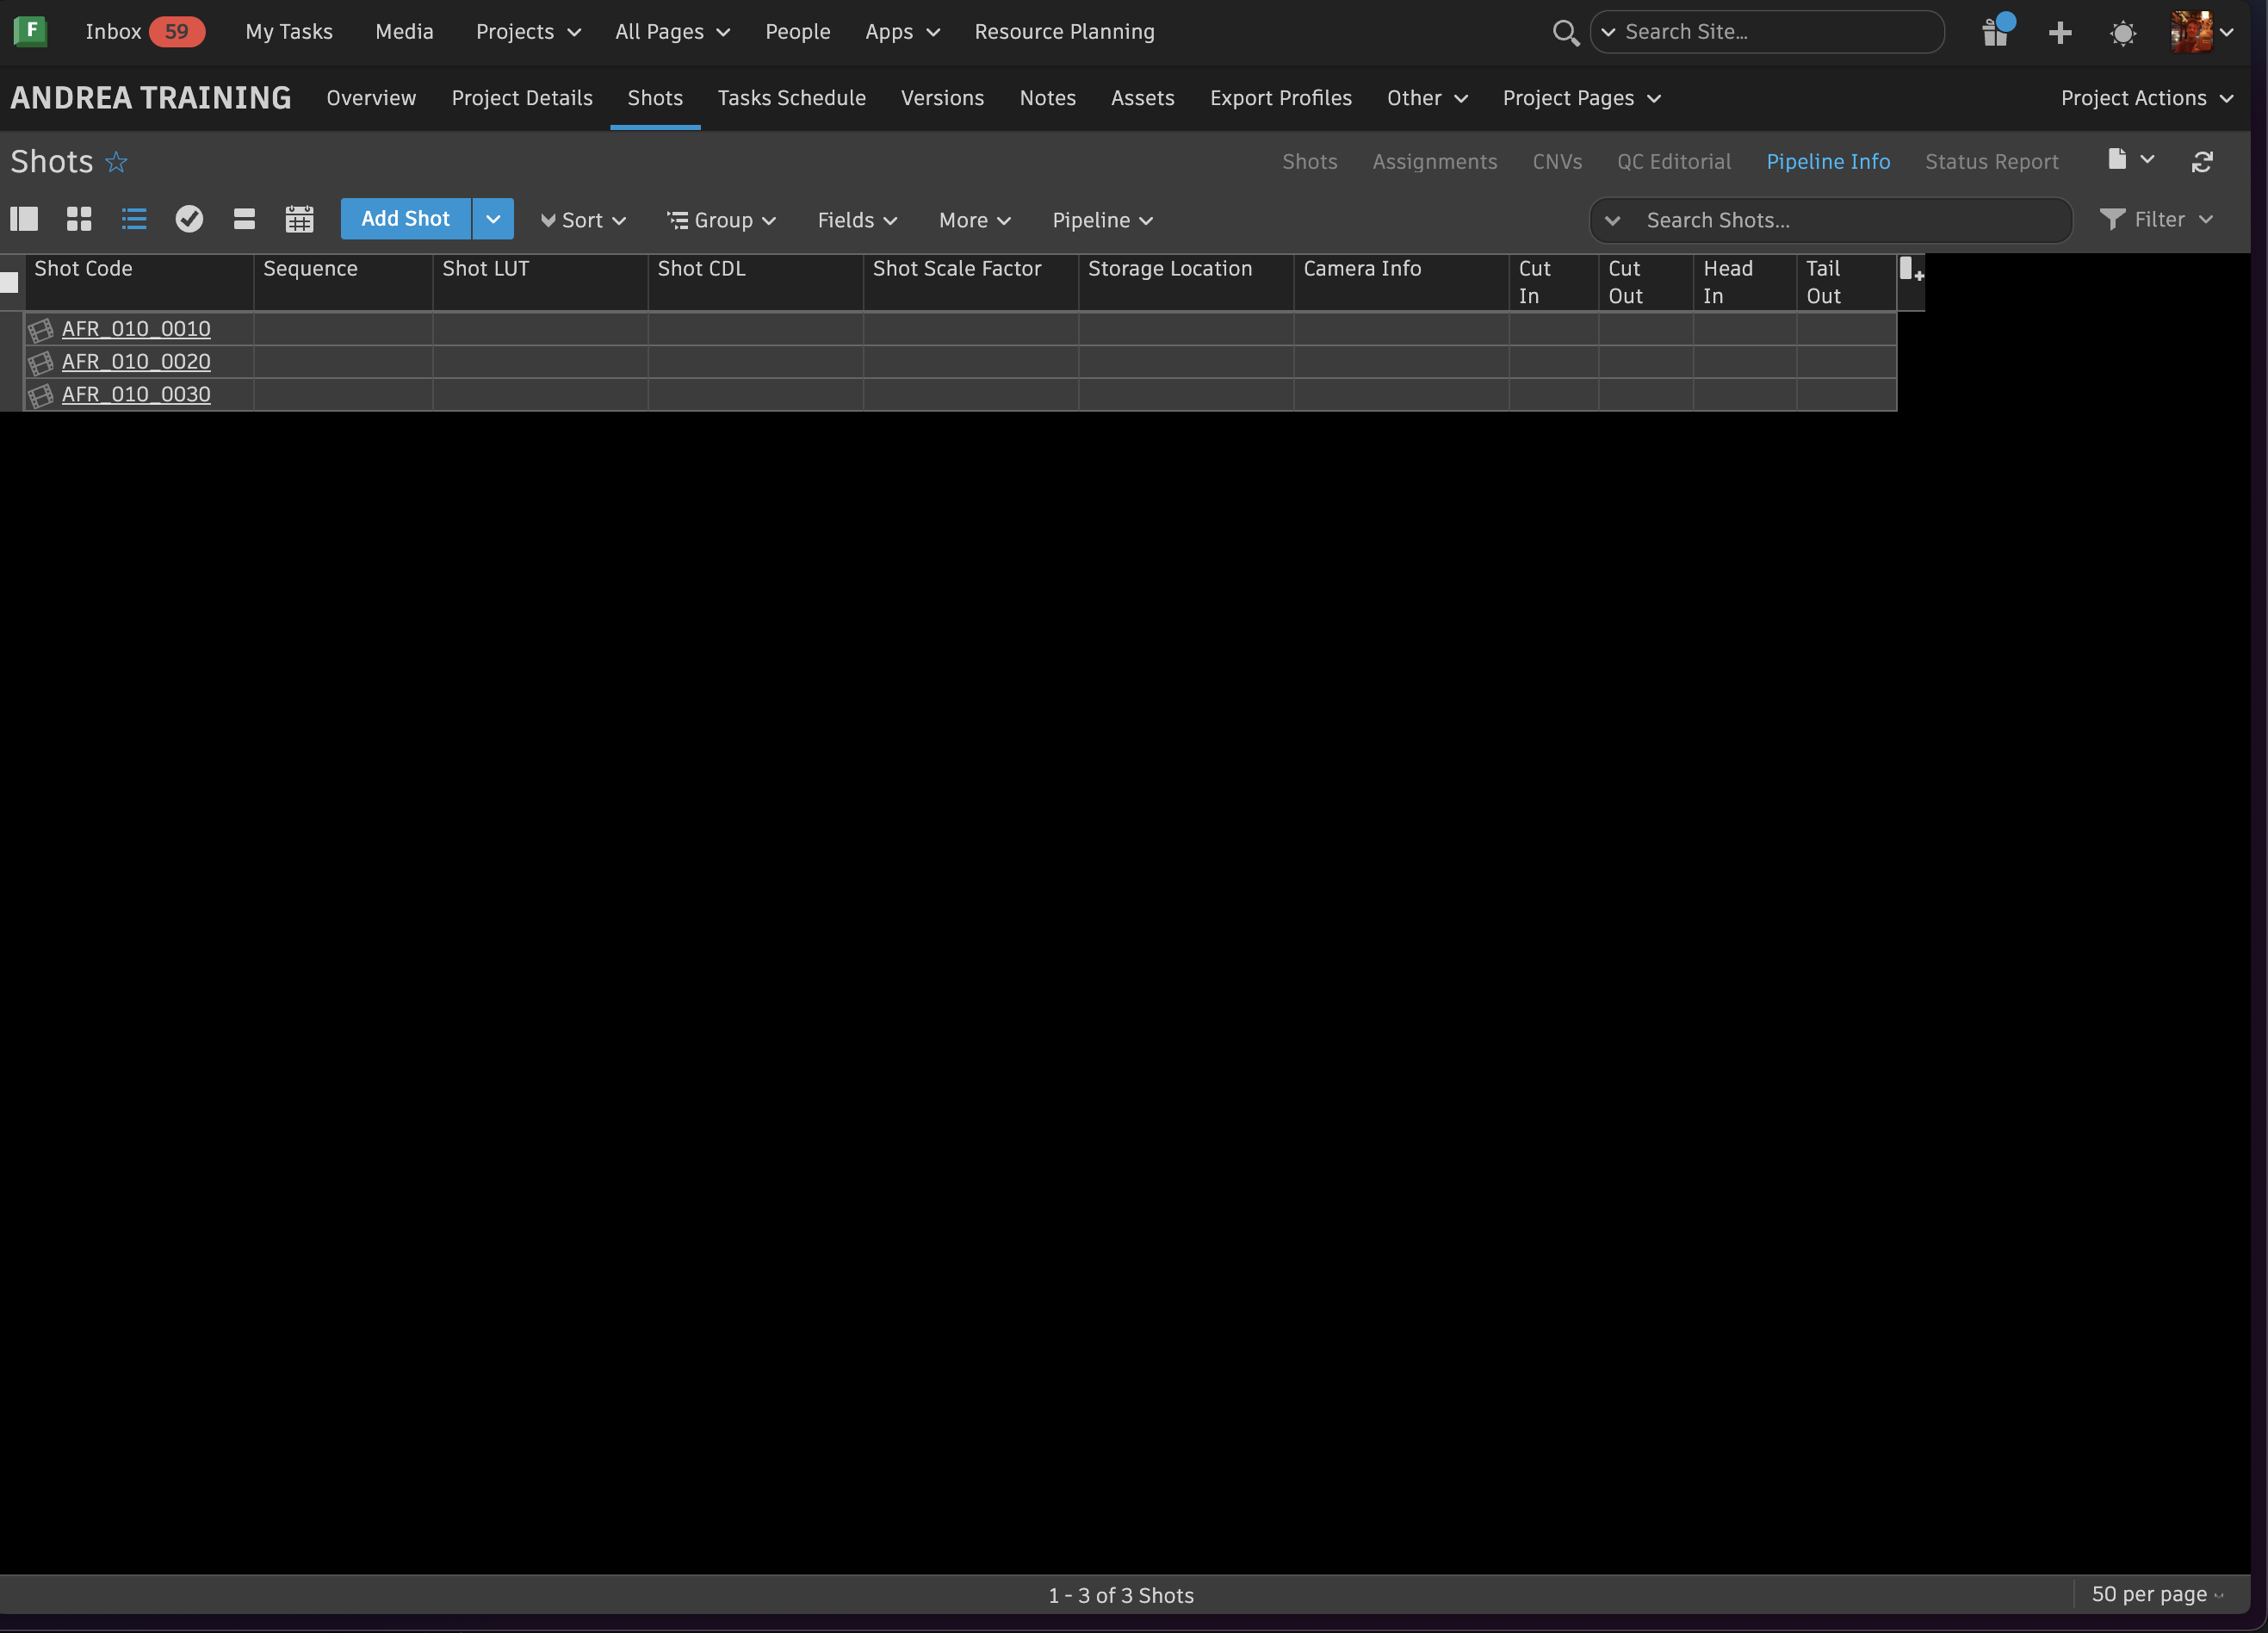
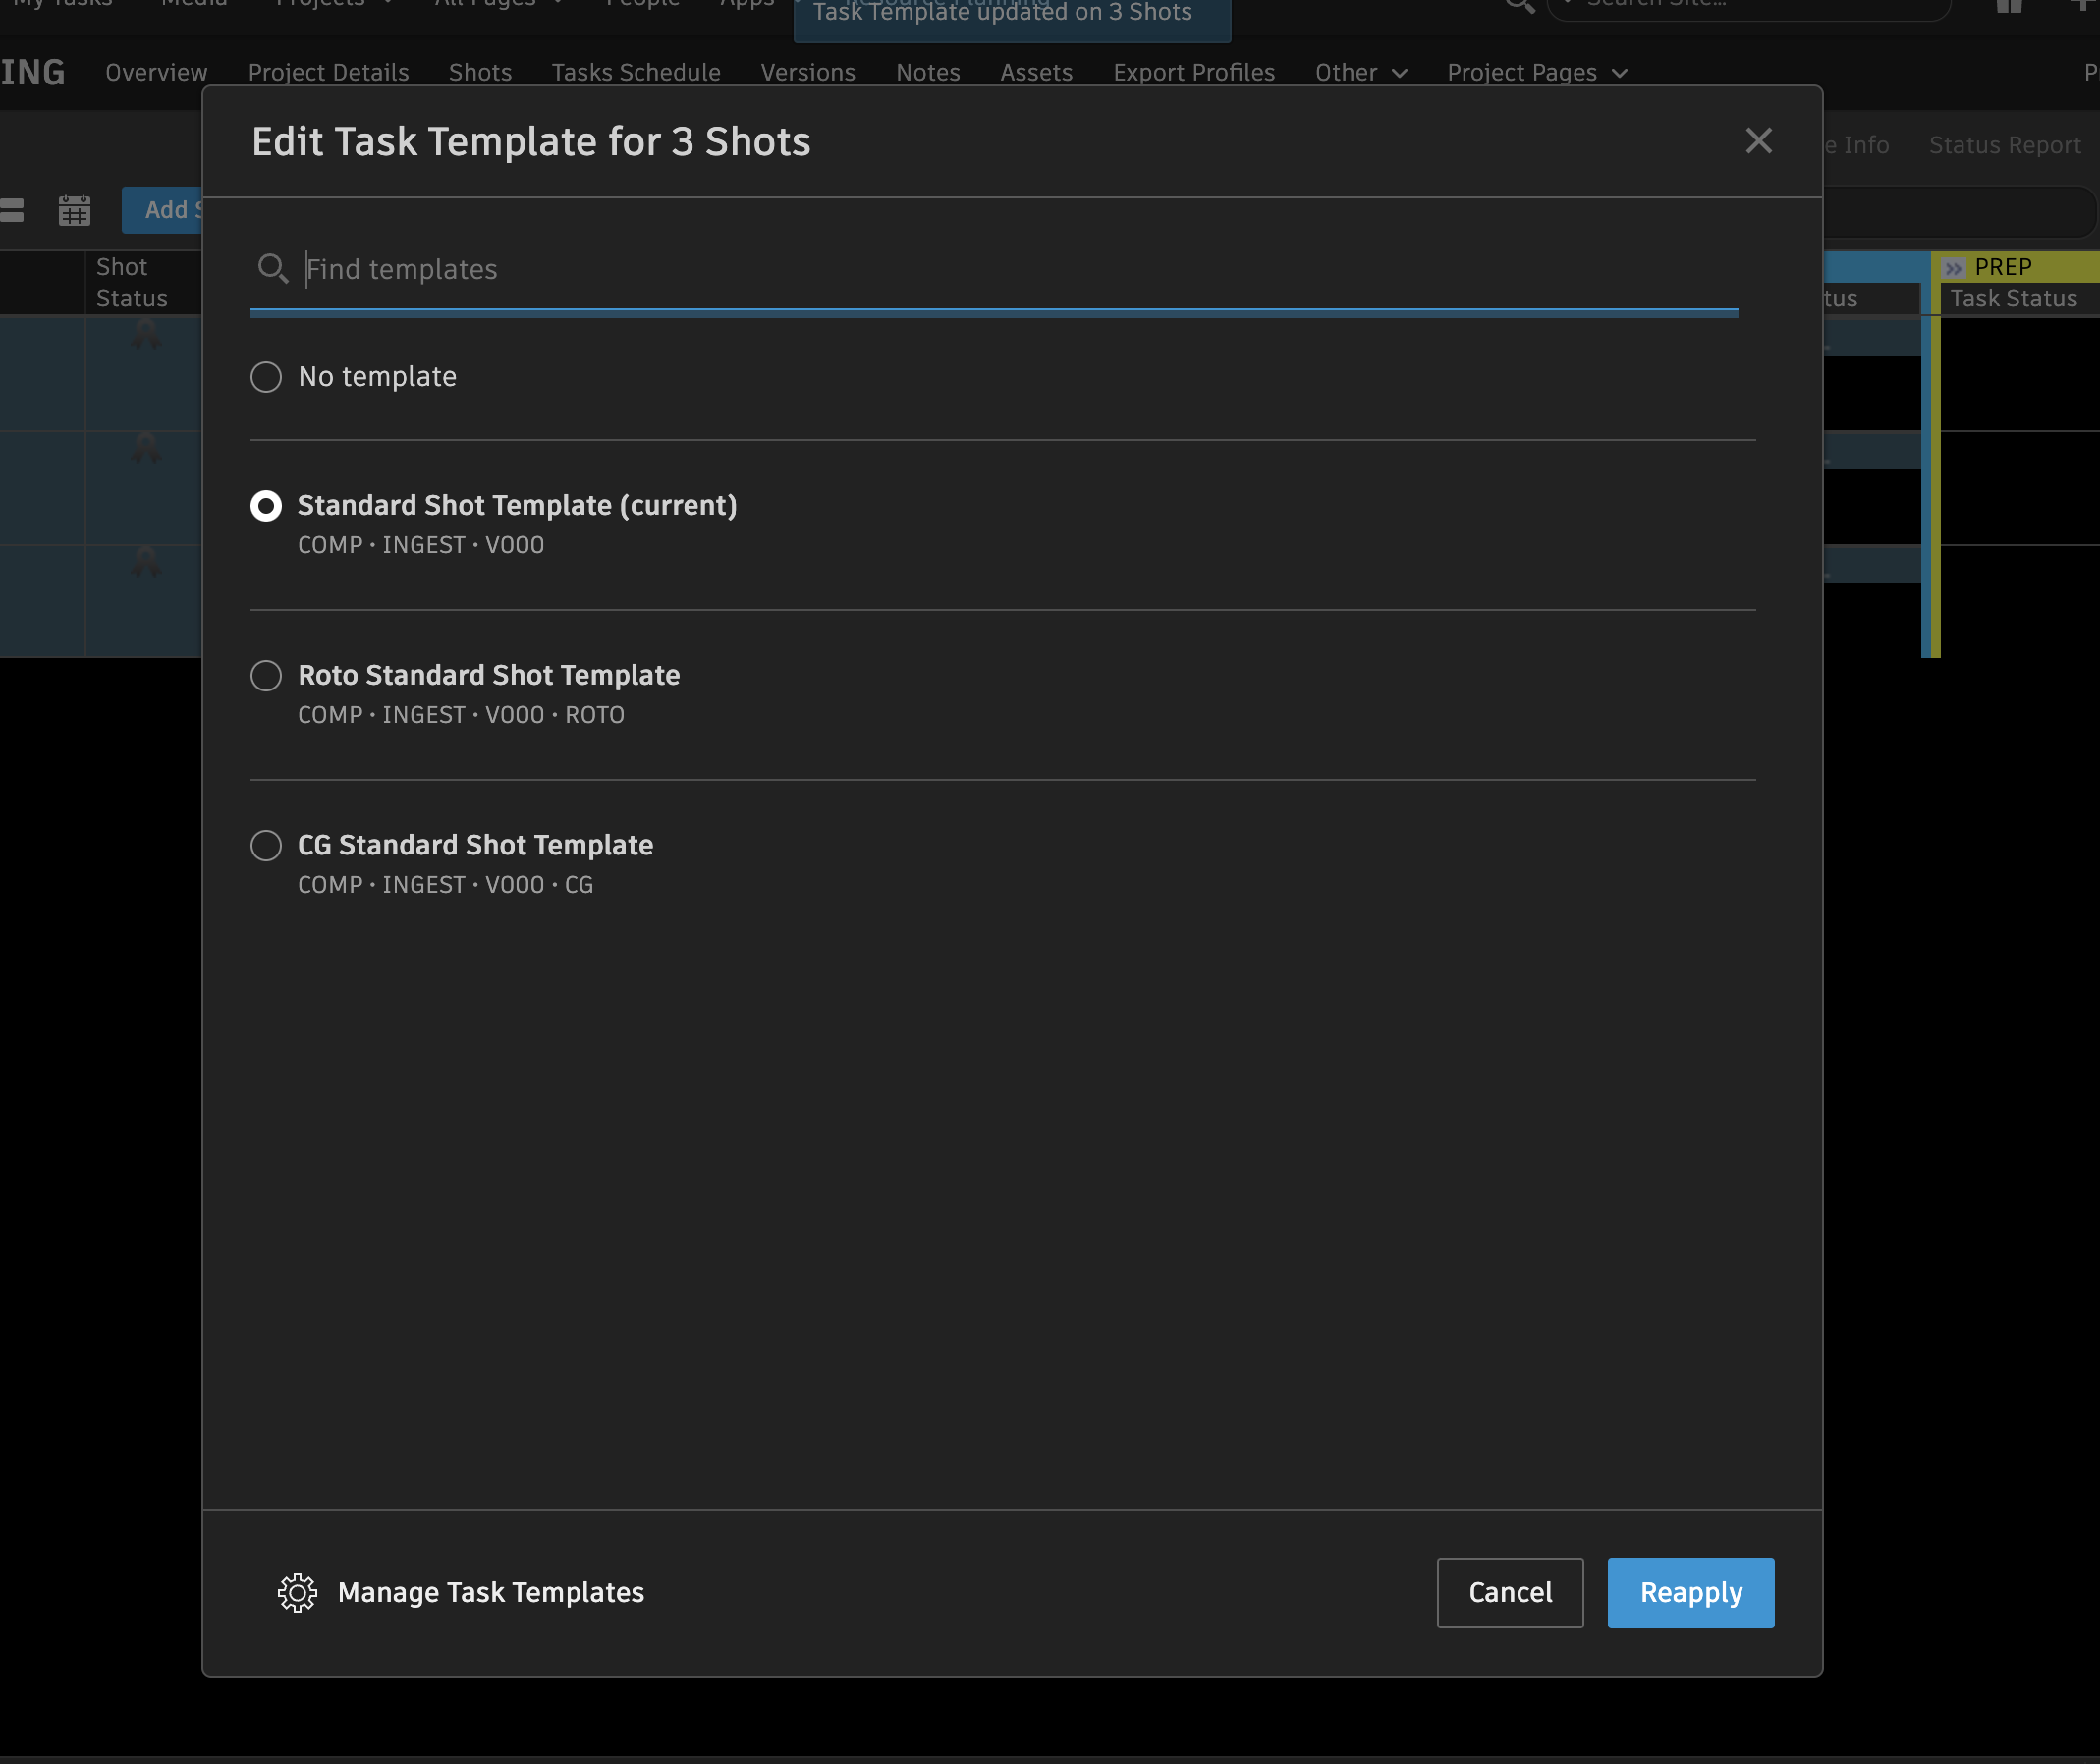
- In Flow Production Tracking, the coordinator must add a task template to incorporate the information provided by the client. Under the Shot Tab, the standard shot template must be added to all selected shots before beginning to publish the editorial references. (Refs)

Publishing Edit Refs
At Baked, a specific folder structure must be followed to ensure an efficient and organized workflow for everyone involved in production. Supervisors are responsible for setting these up in the pipeline using the Nuke Template.
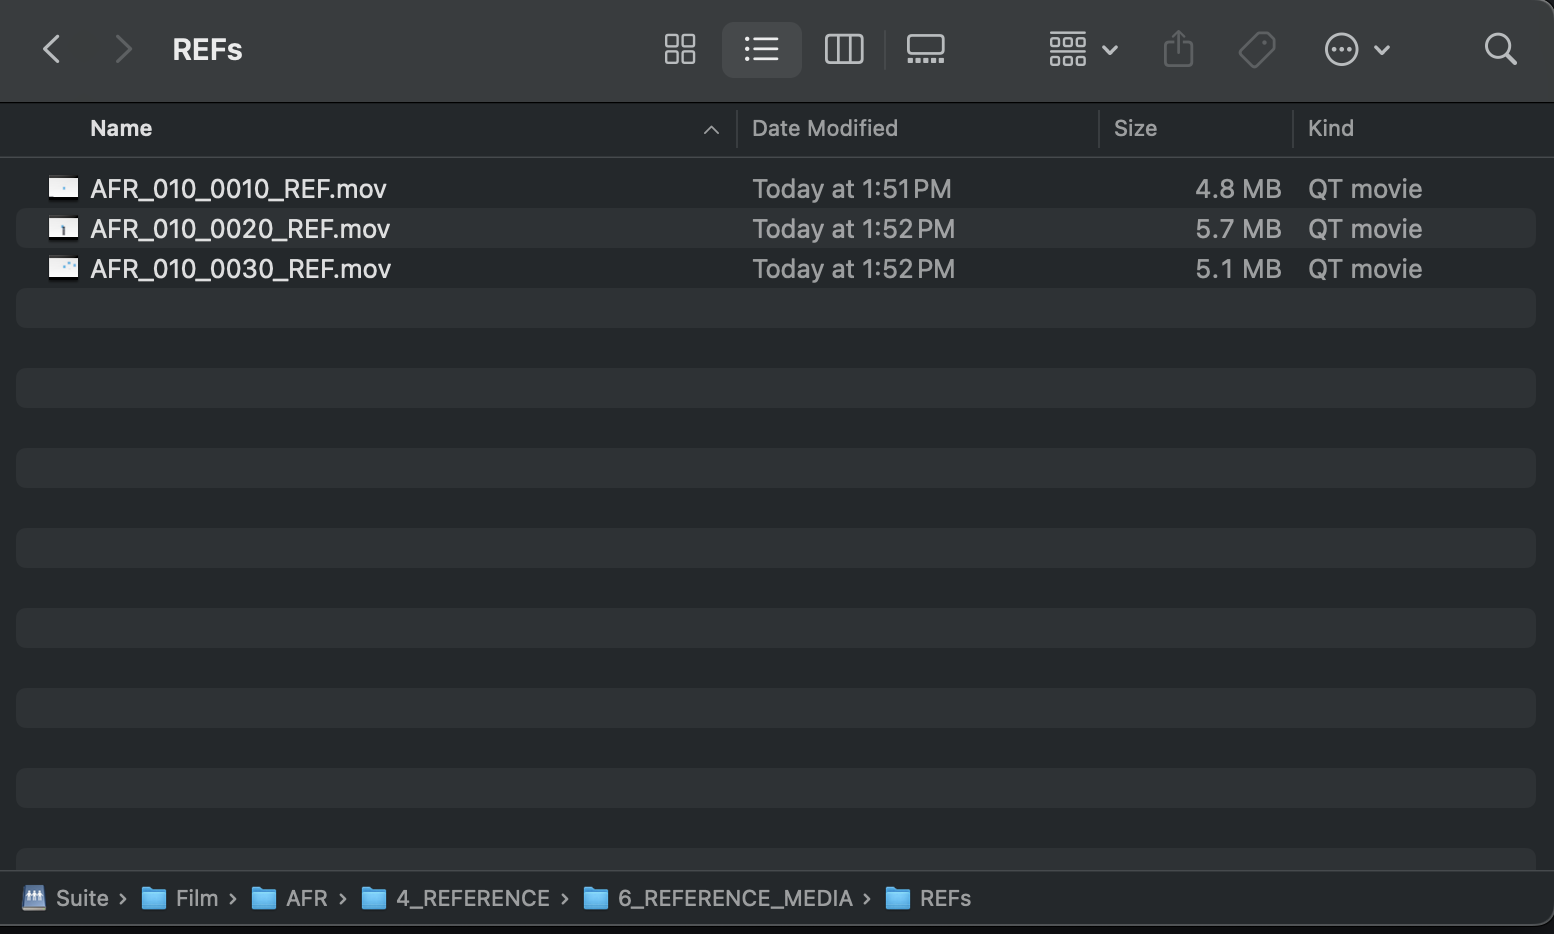
- Within the folder structure, the editorial Pulls must be placed in the 1_IO folder. The editorial references must be copied over from that folder into REFs folder before they are officially published in Flow Production Tracking.
- Once the files are in the correct folder, the coordinator must click publish through the Flow Production Tracking Desktop Application. Then, ingest the edit_refs into production by dragging and dropping the files into the publish window.

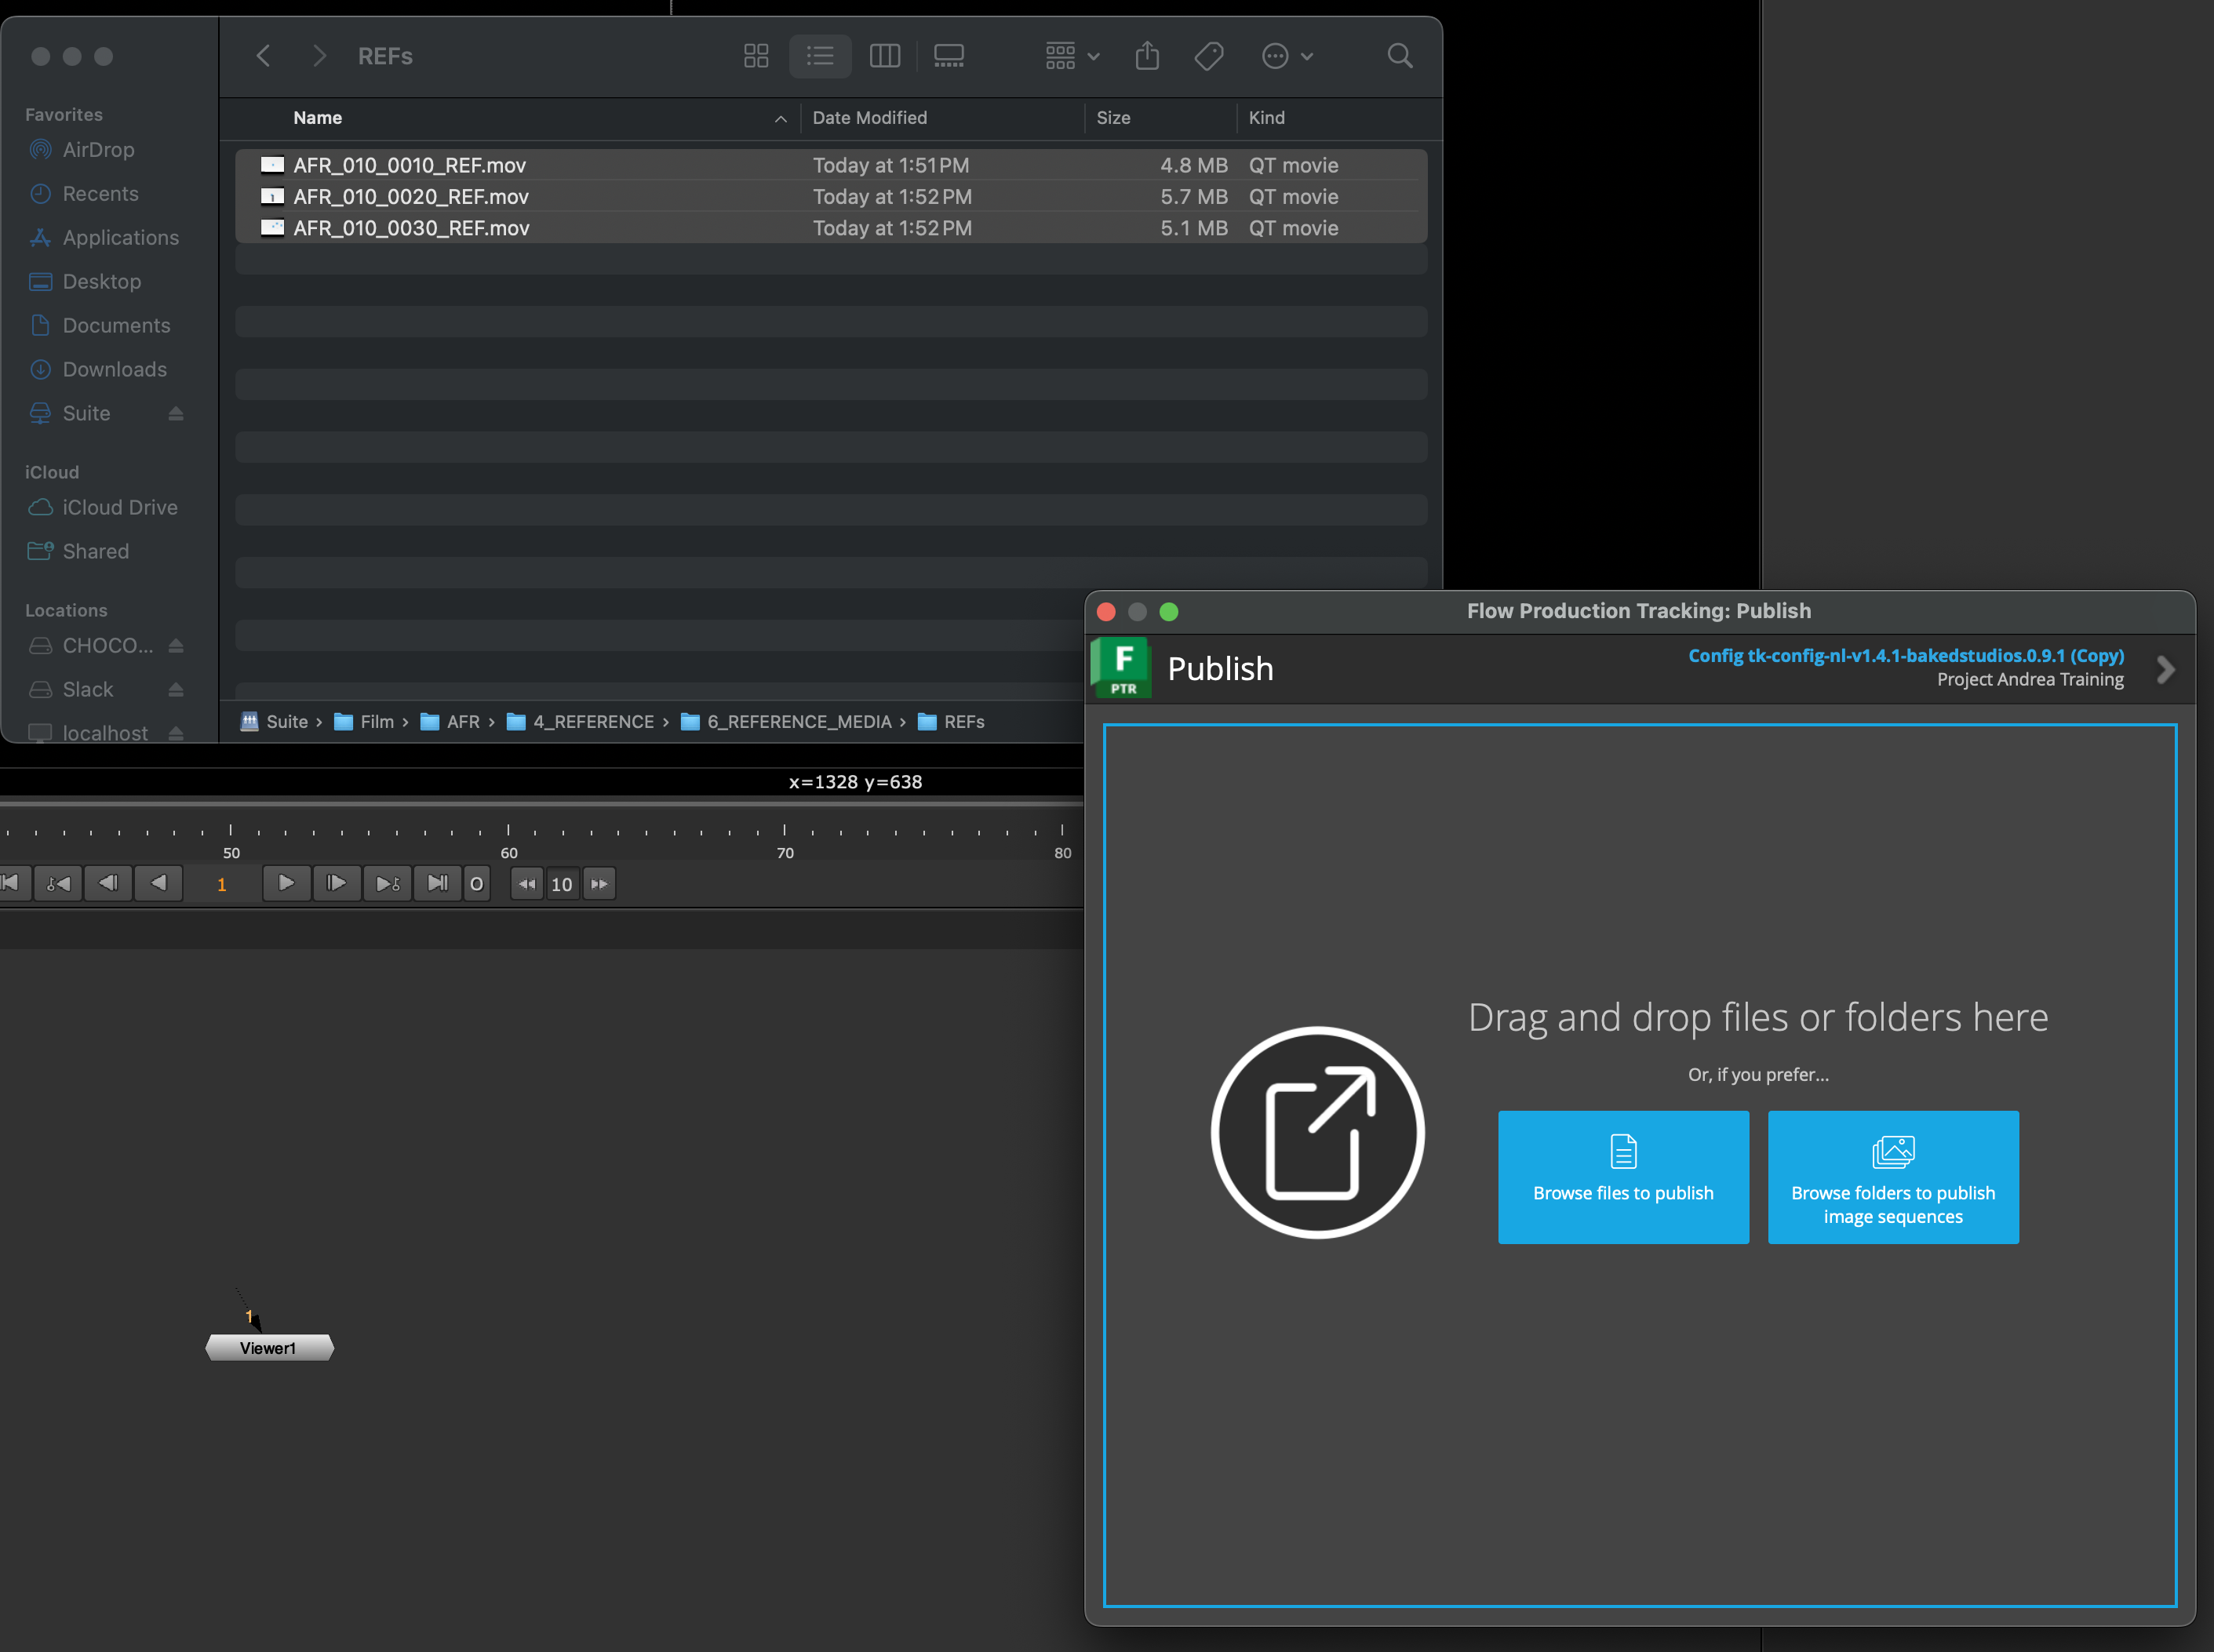
- Before completing the publishing process, the coordinator must specify the description for all items as "REF" to identify them within Flow Production Tracking, and assign the correct ingest task linked to its respective shot. Then, click validate and publish to finalize publishing the editorial references.
Please make sure the task is assigned to INGEST, not COMP. Assigning it to COMP will update the version status in Shotgun to CNV, which we want to avoid. That status change can disrupt the workflow and mislead the team by signaling there's a new version ready for internal review when there isn't.
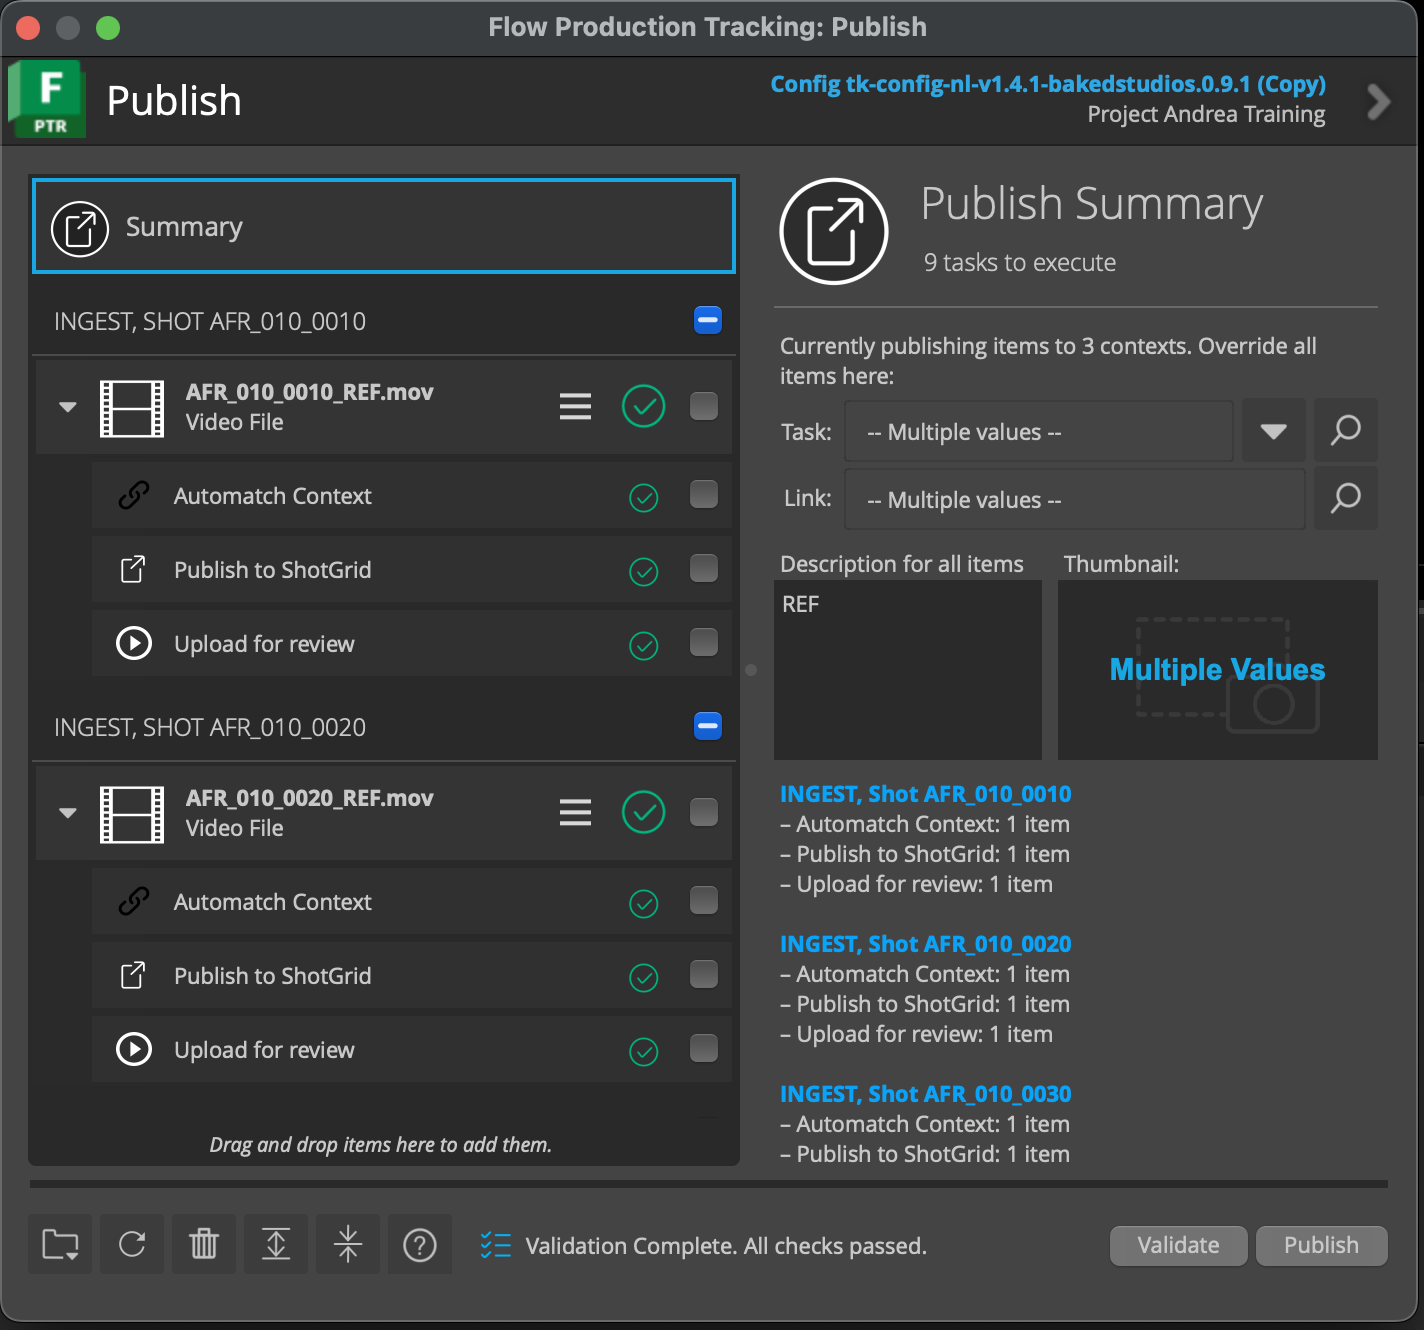
Edit Refs must be published through the Desktop App instead of Ingested through Nuke because the publish includes sound. Ingesting does not include sound.
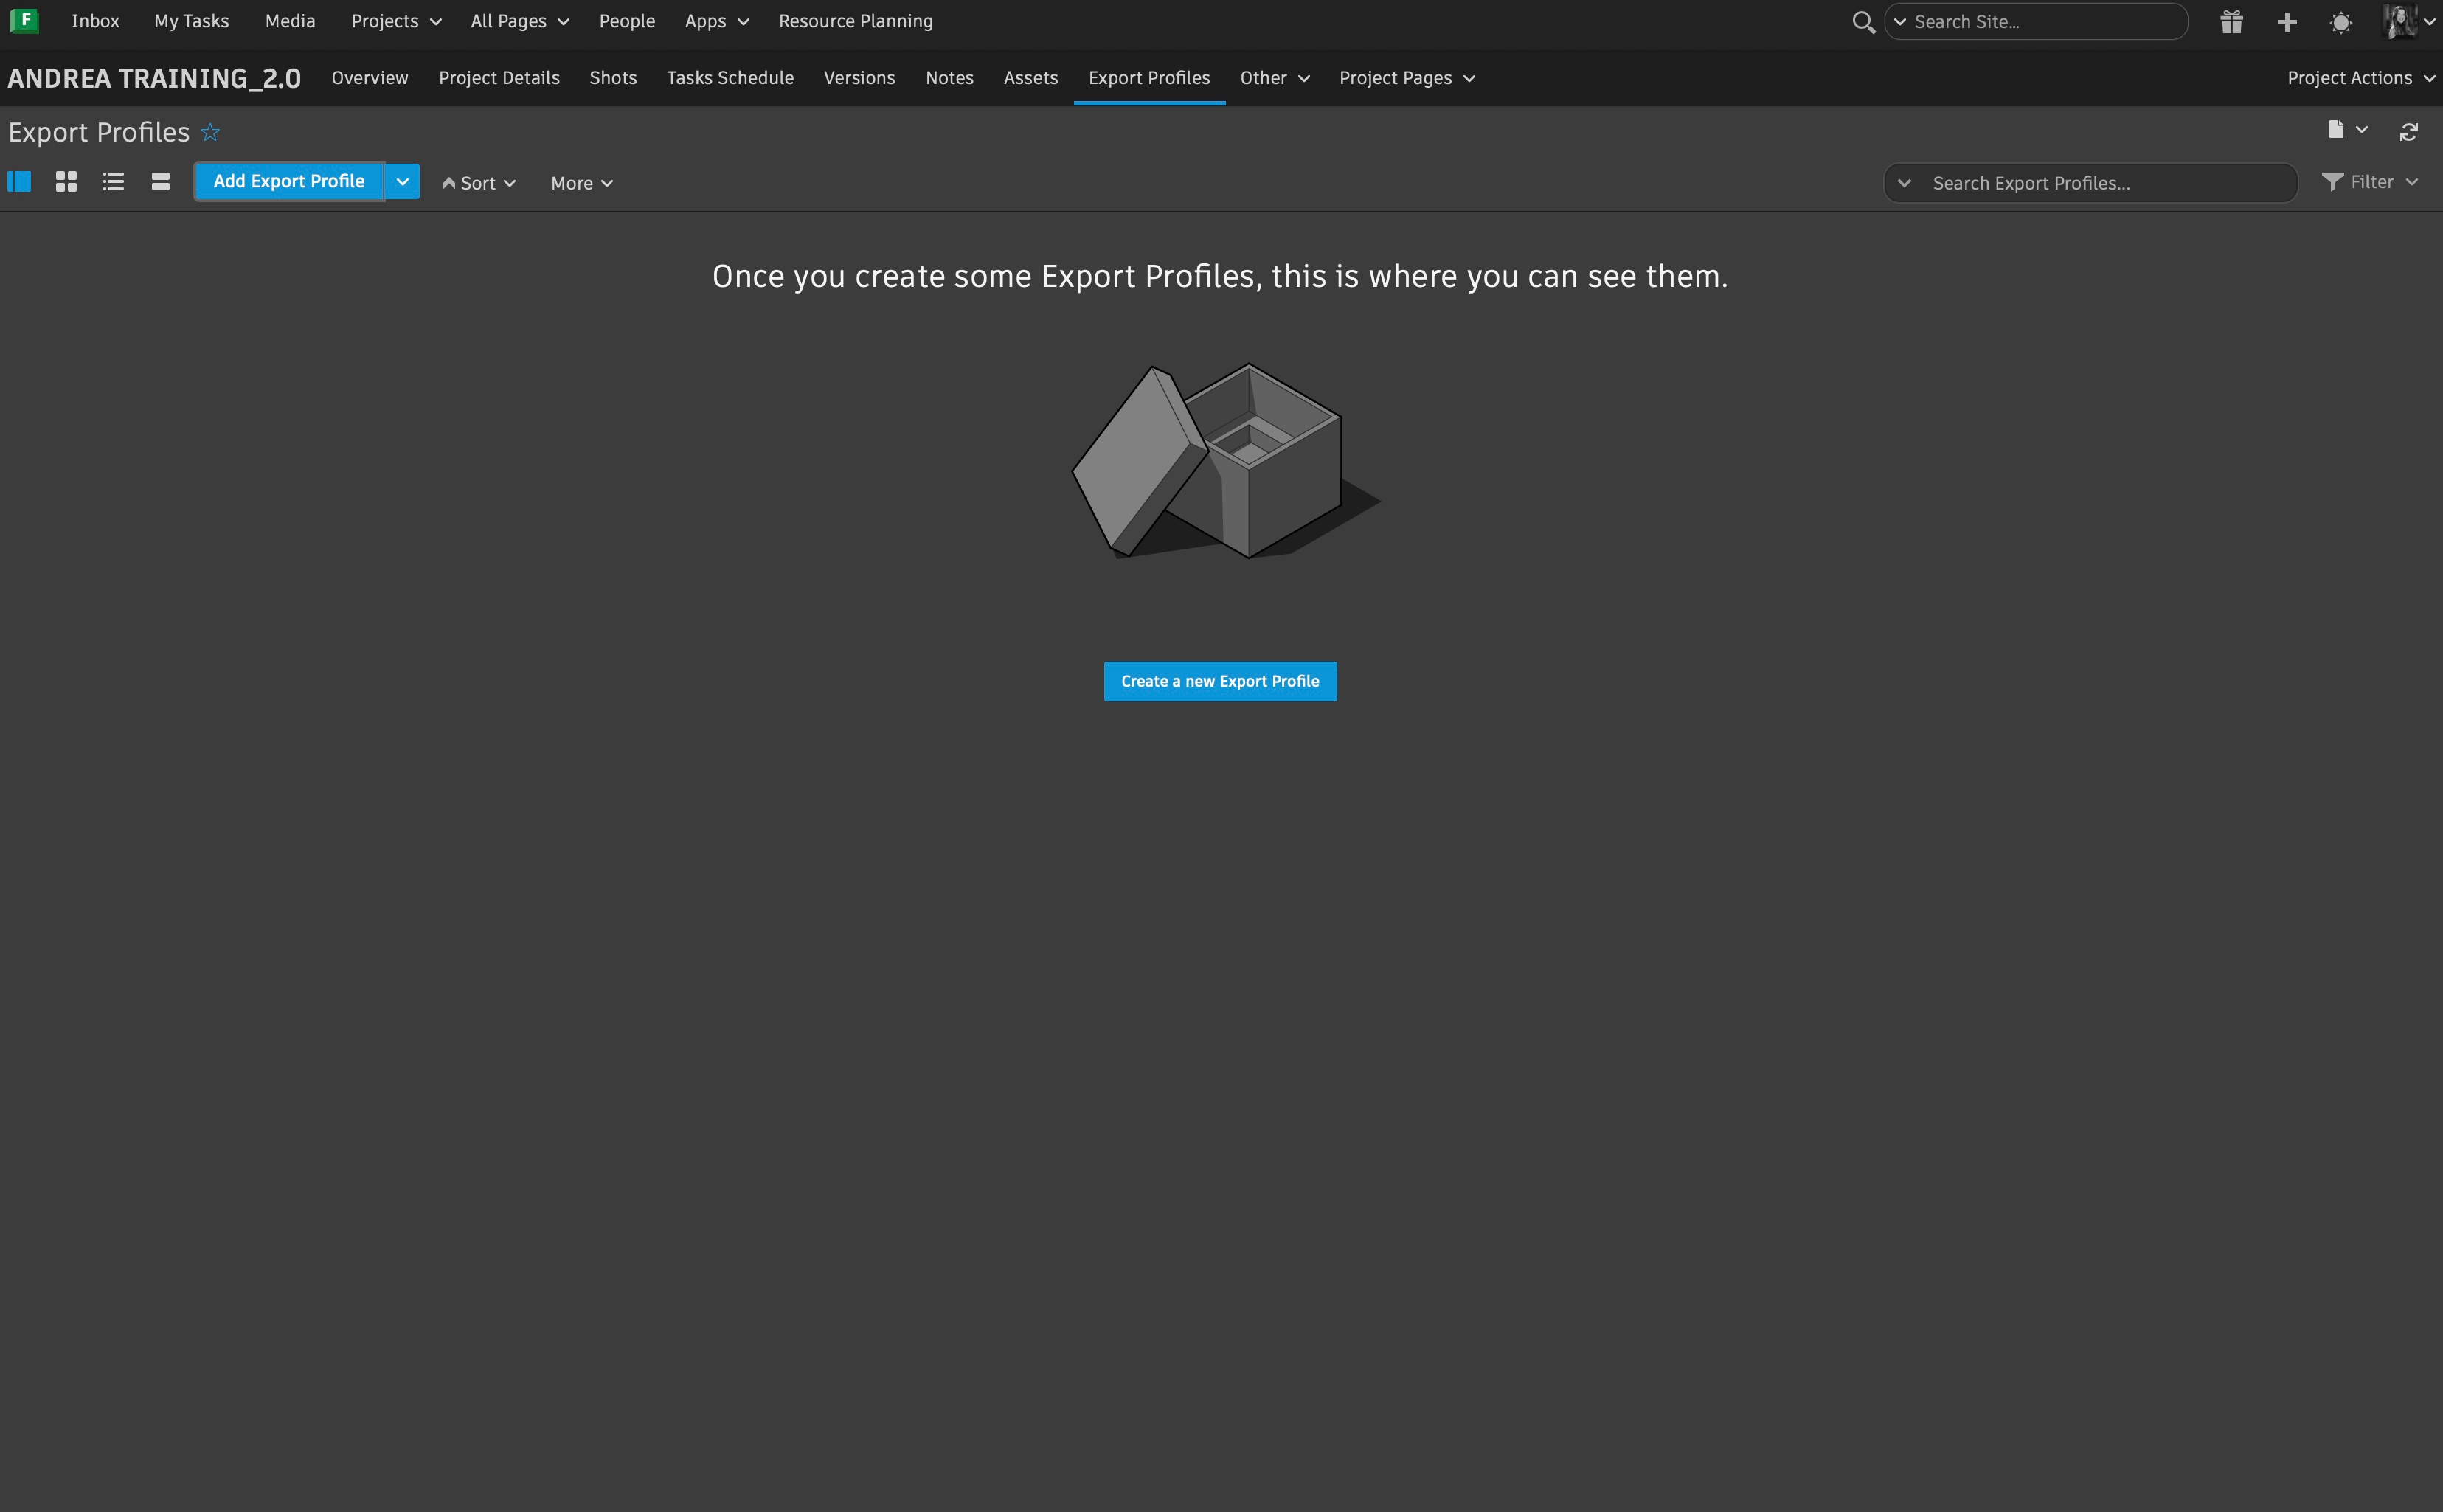
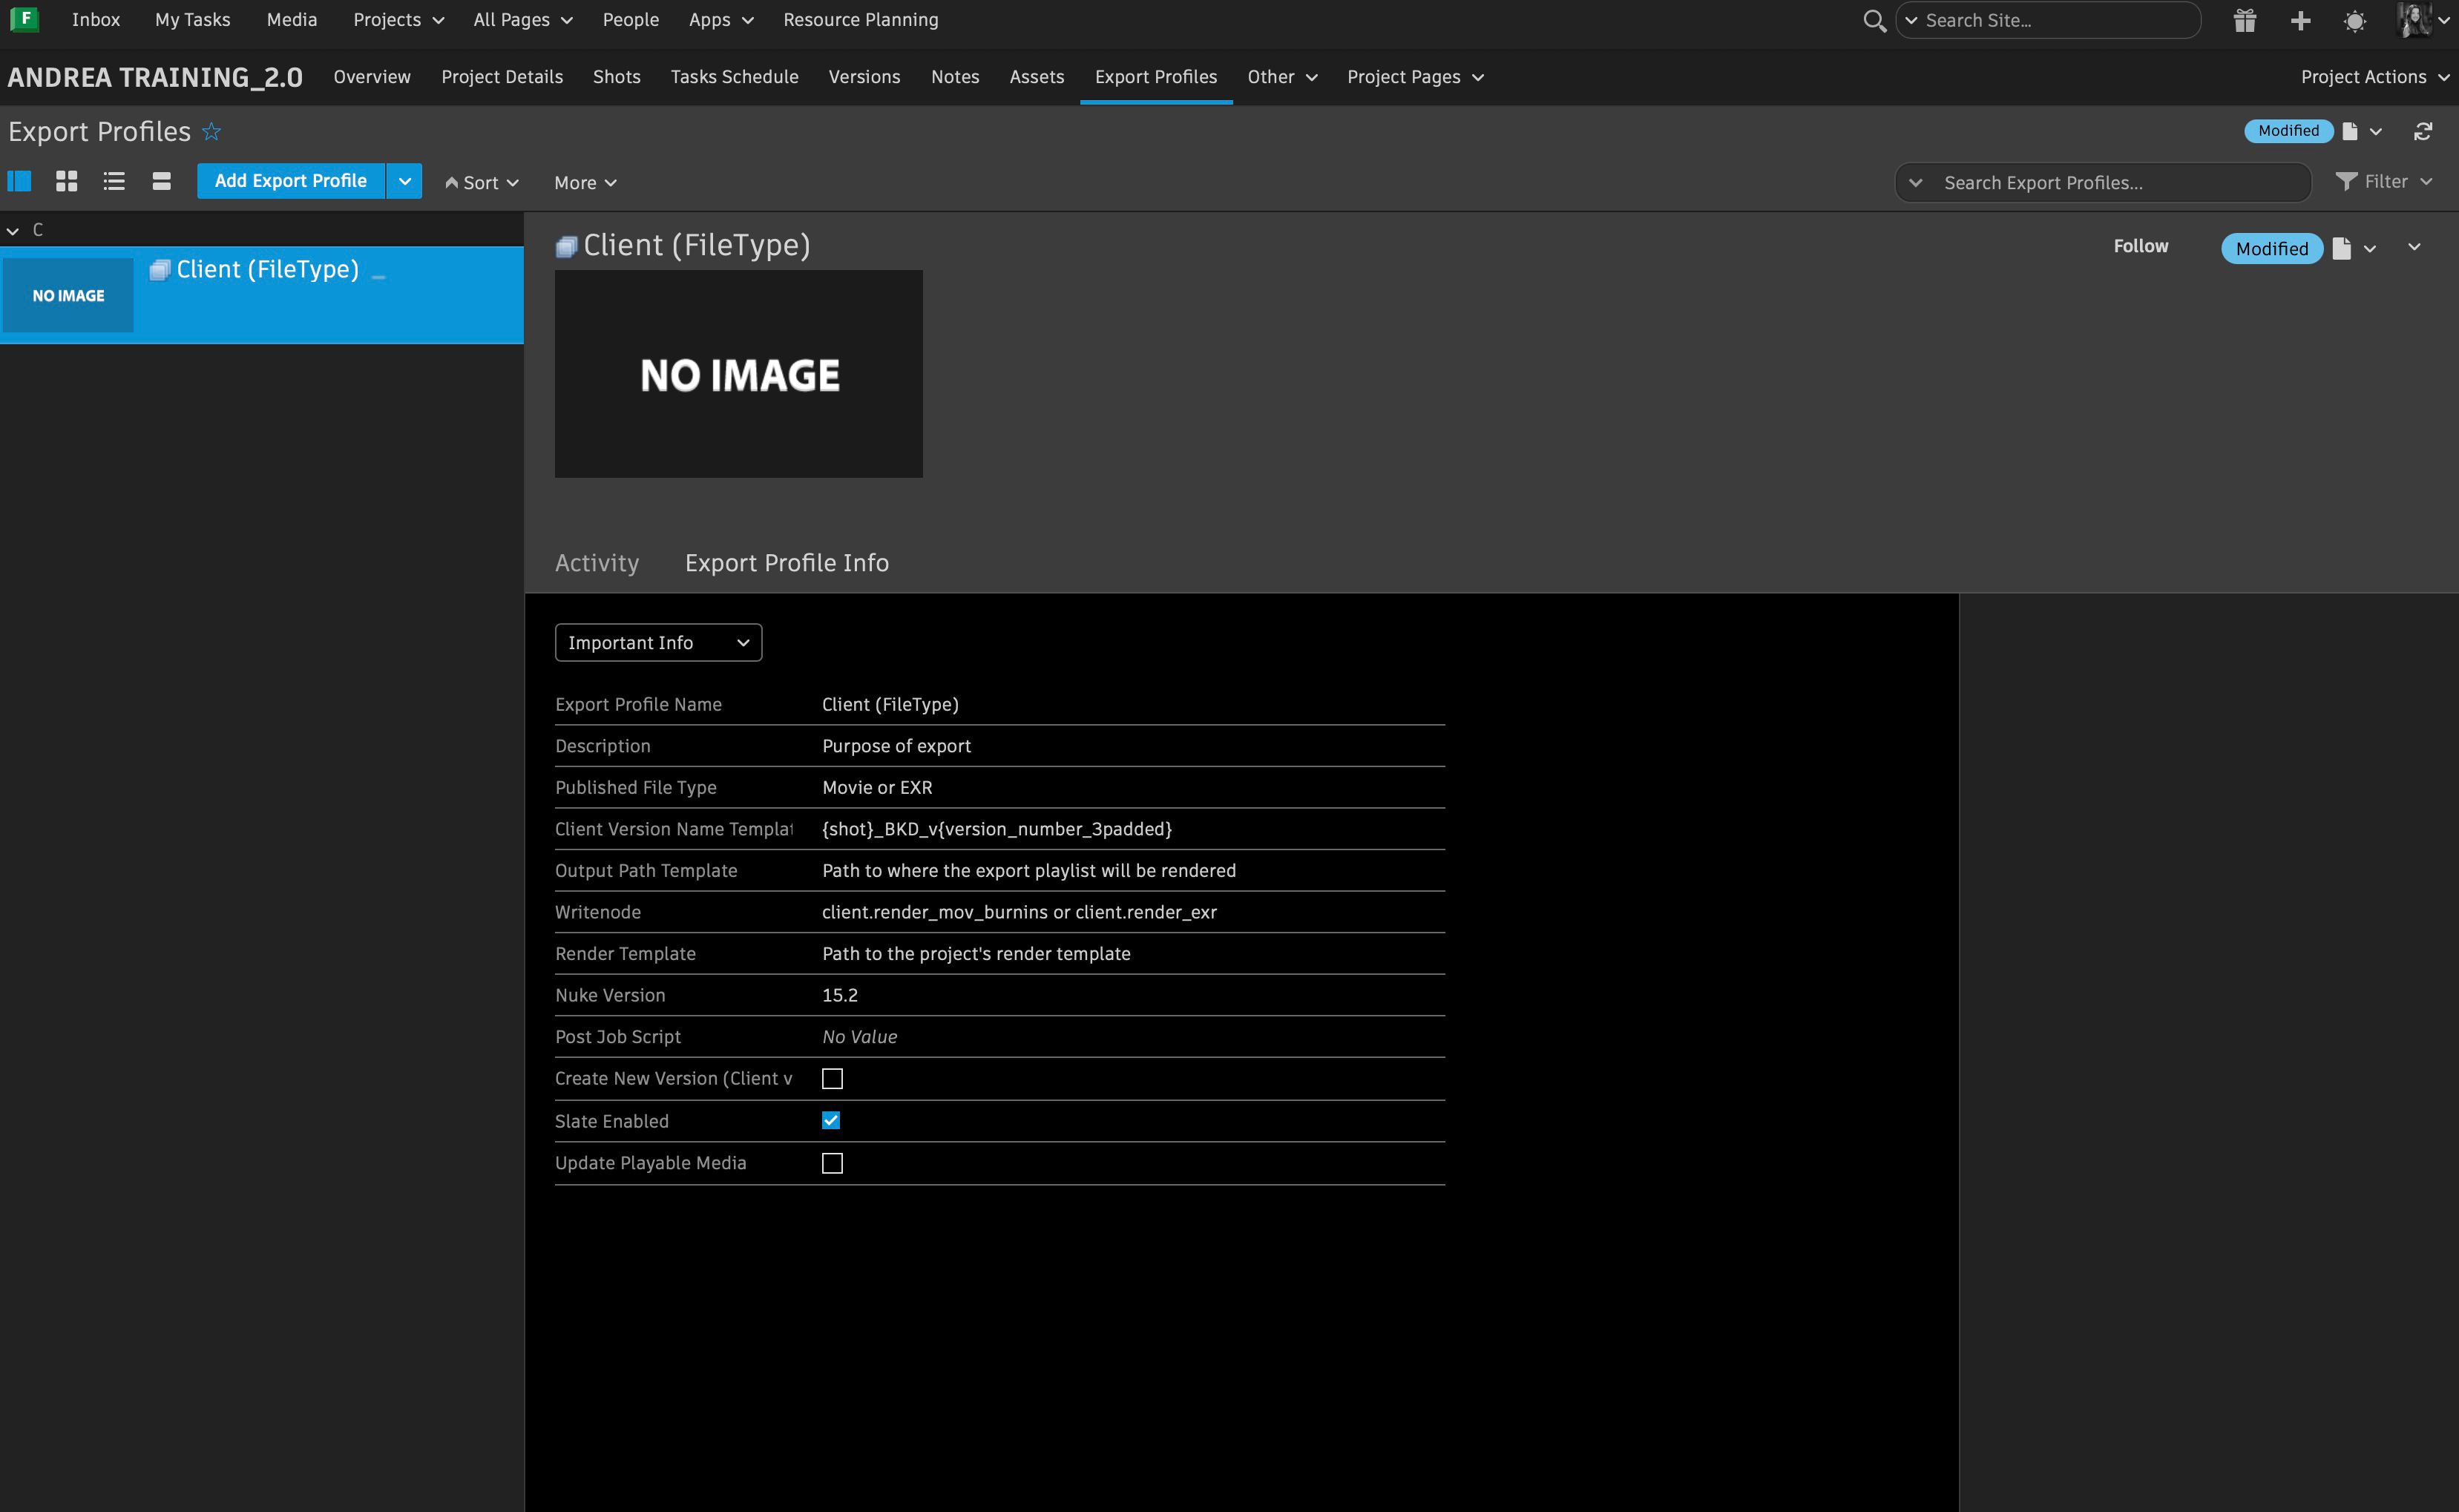
Export Profiles
-
Part of the steps of setting up a project is creating Export Profiles within Flow Production Tracking. By doing so, it allows file organization within shotgrid and the set up of any important information needed for delivery. There will be multiple project-based files that are going to be exported for internal review, client review or final delivery and each have their own specifications.
a. Create an Export Profile on its respective page in Shot Grid and name it accordingly
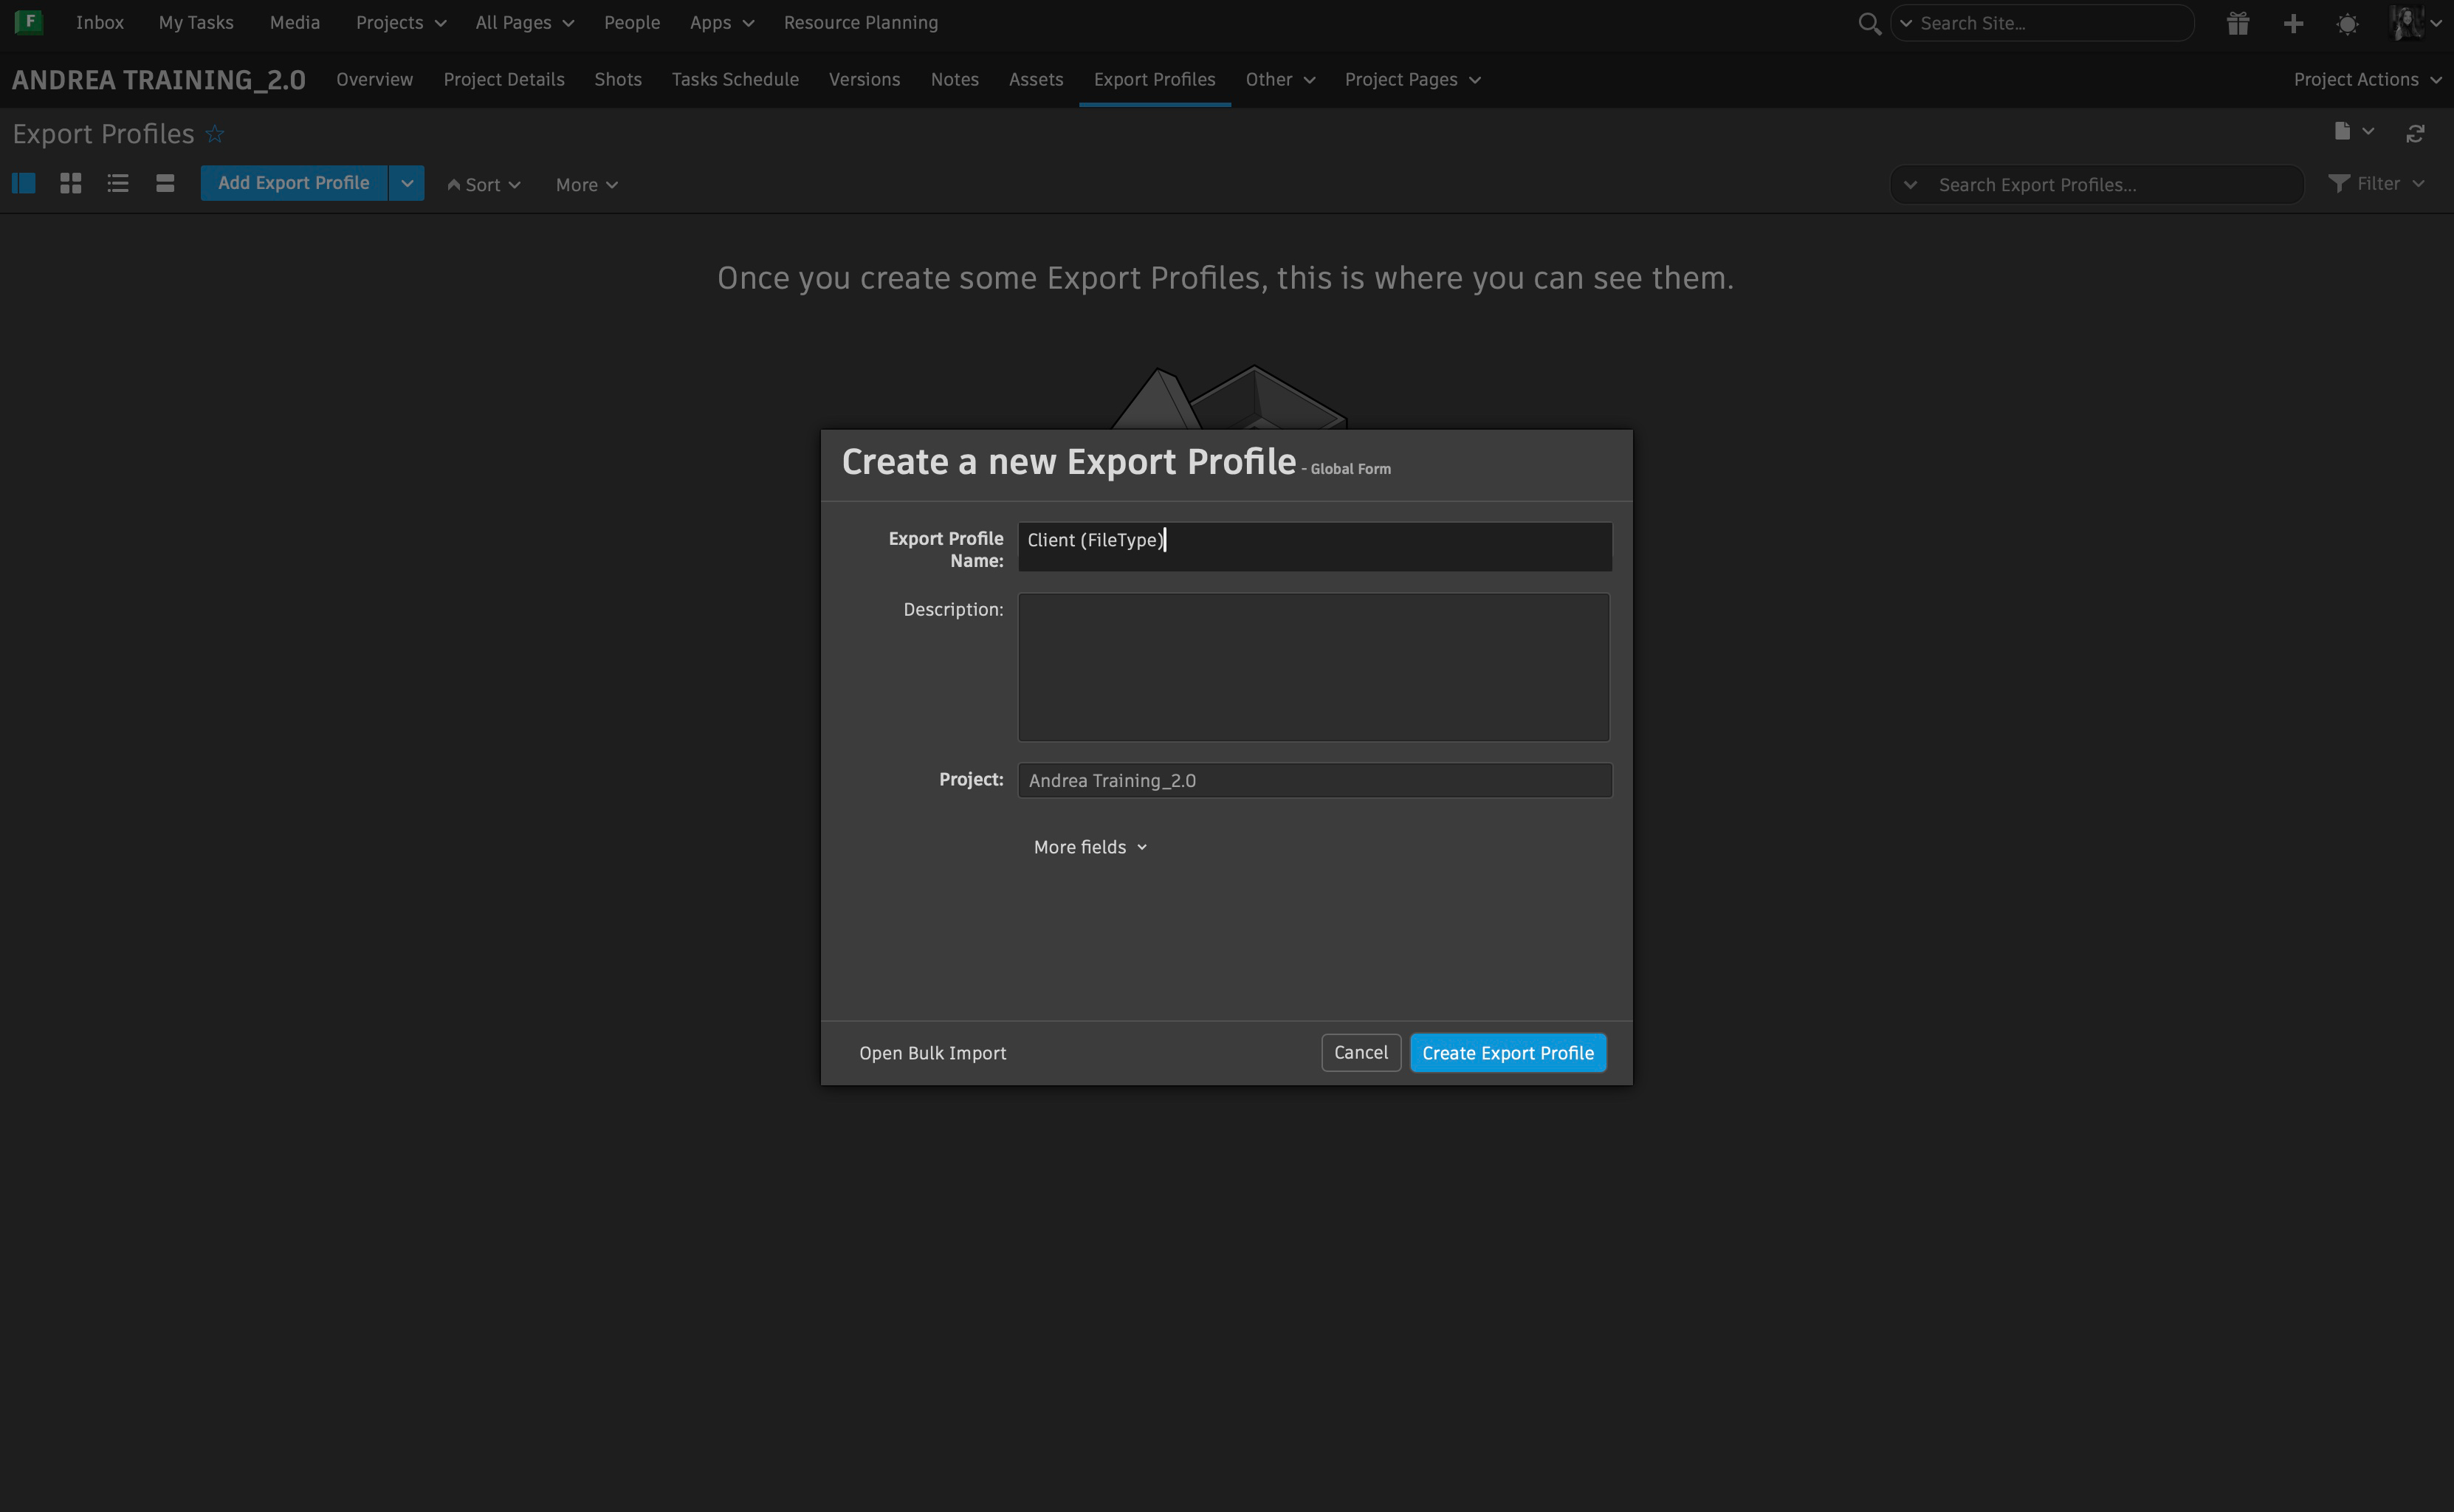
b. You can then proceed to edit the important tabs based on what is going to be exported
c. Information for the client delieveries and internal reviews have different export specifications
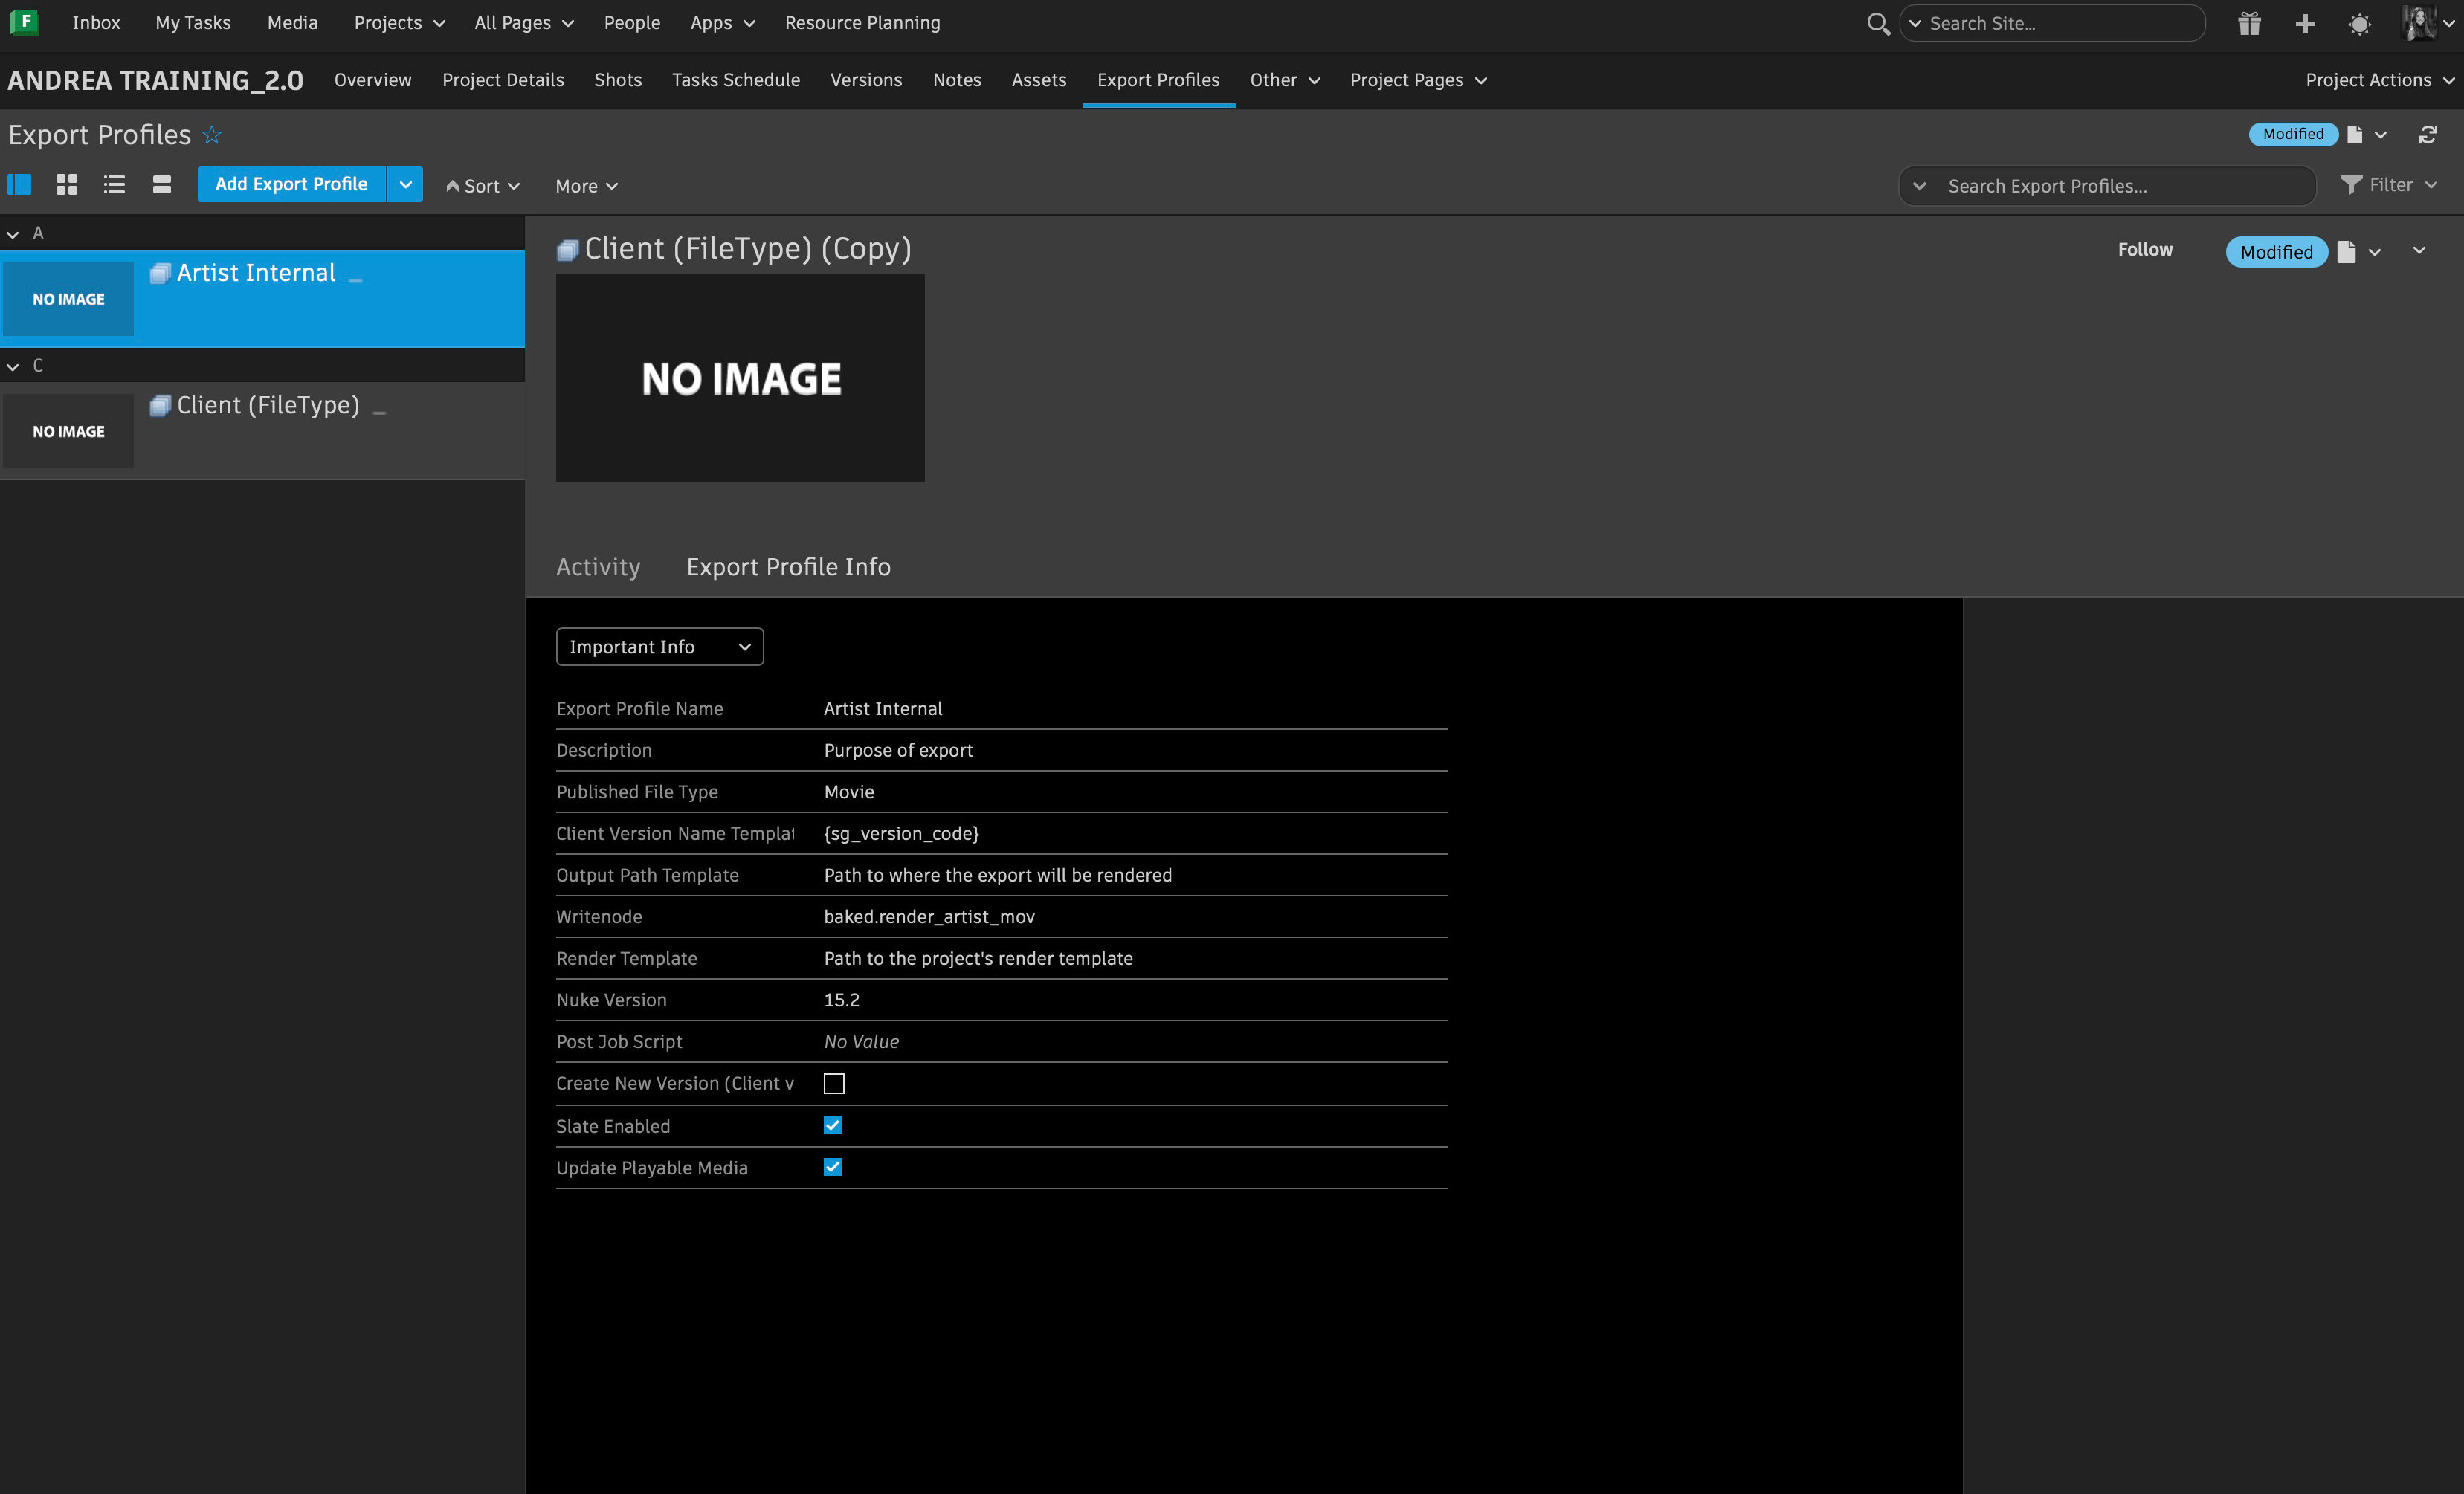
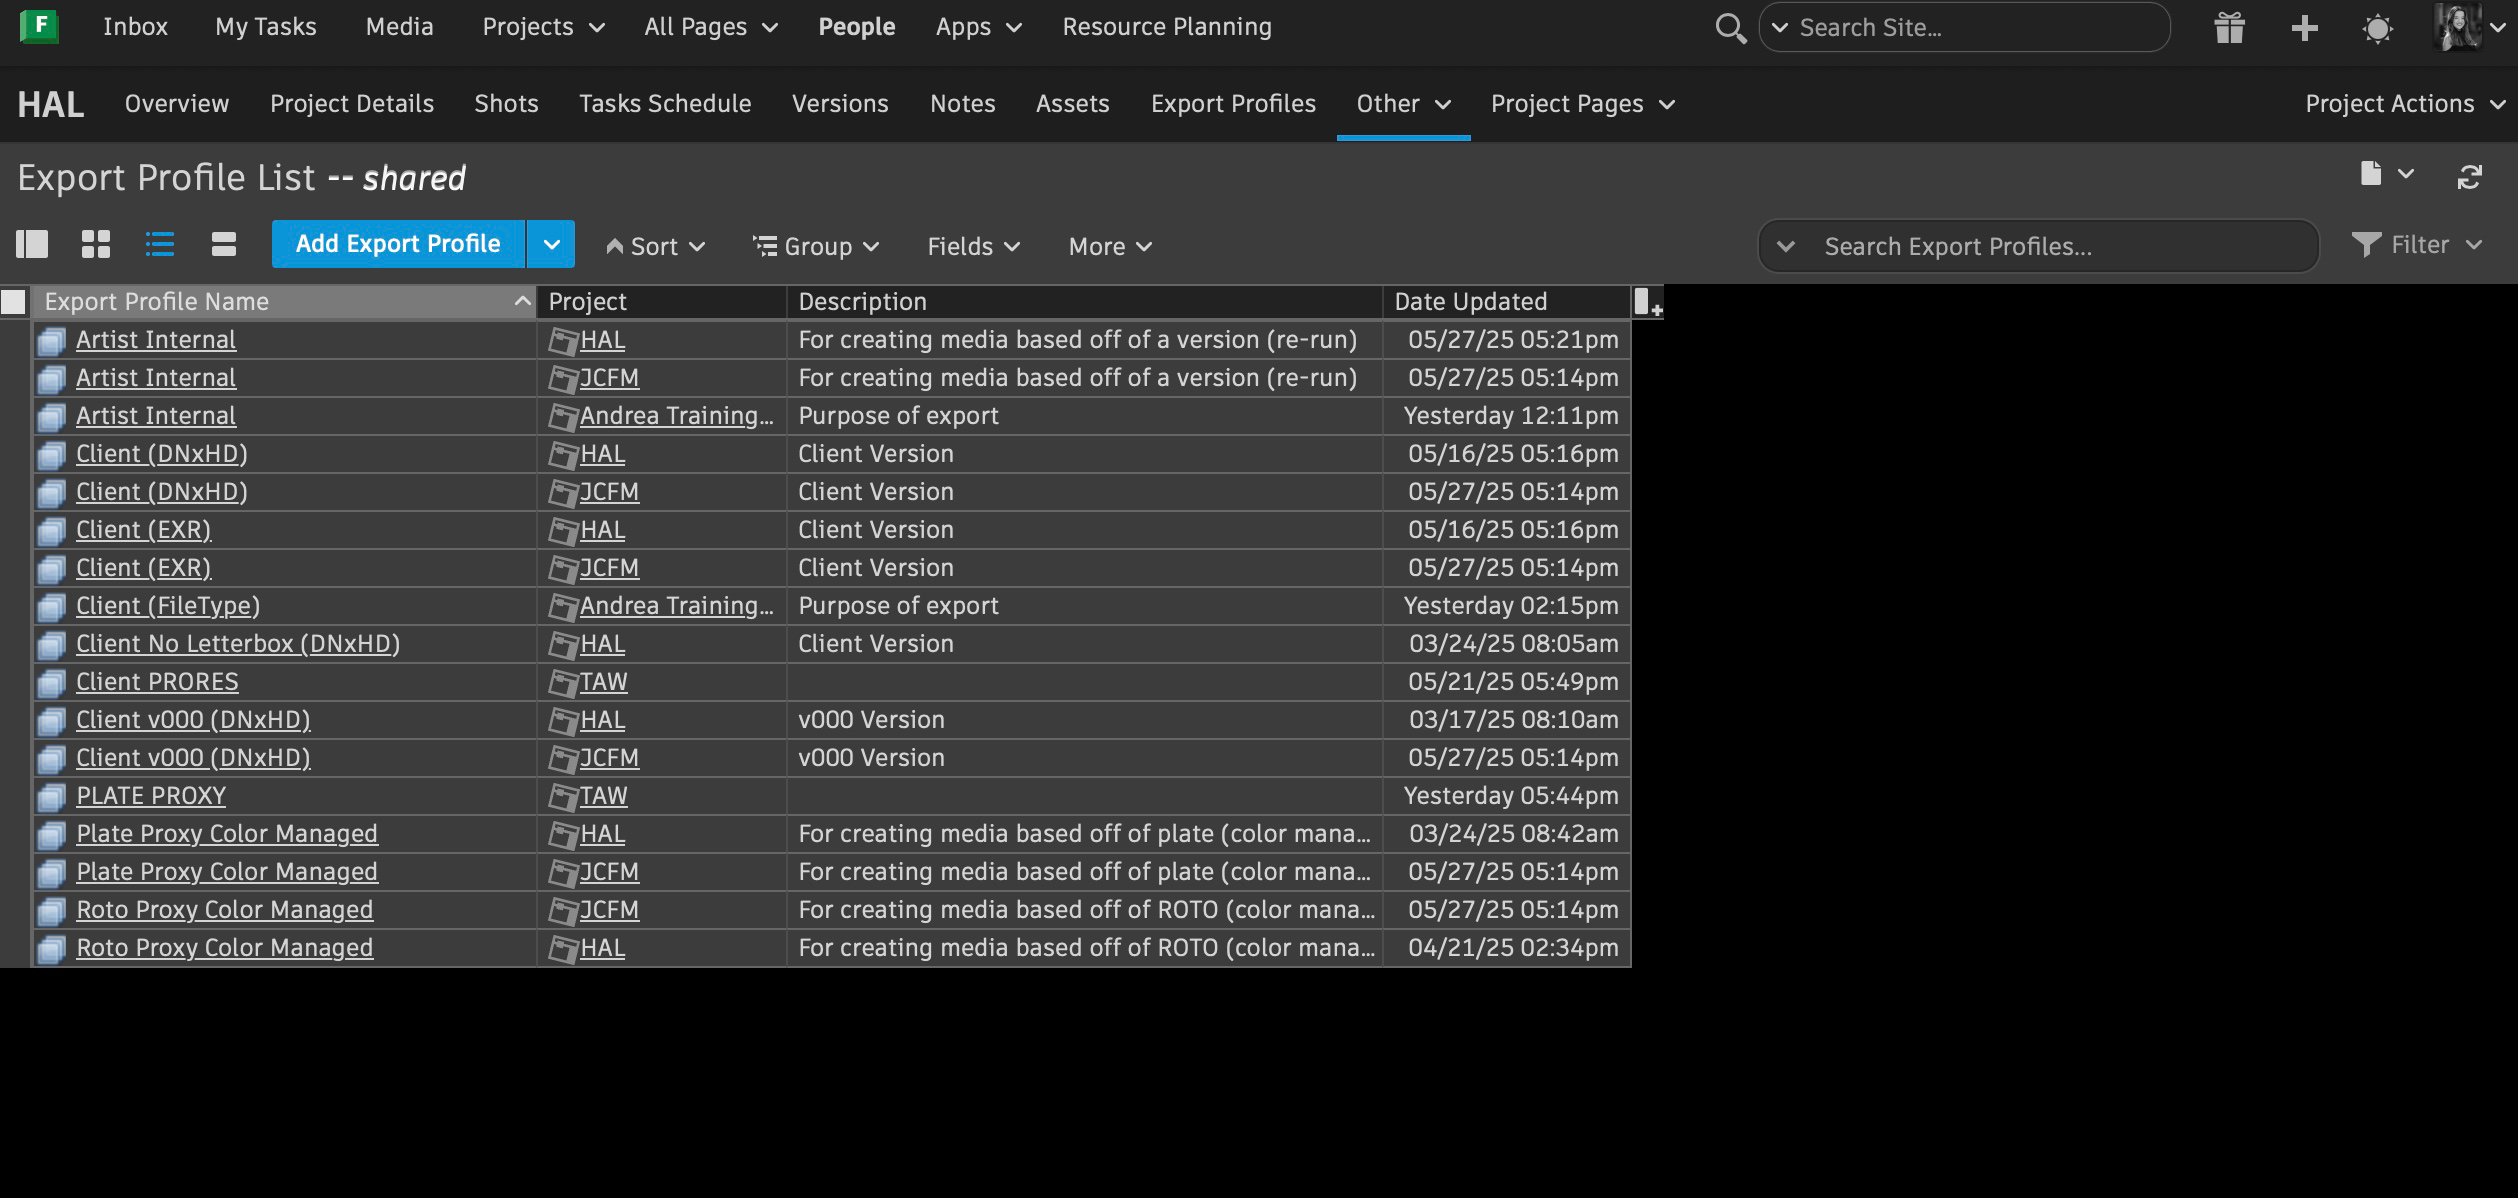
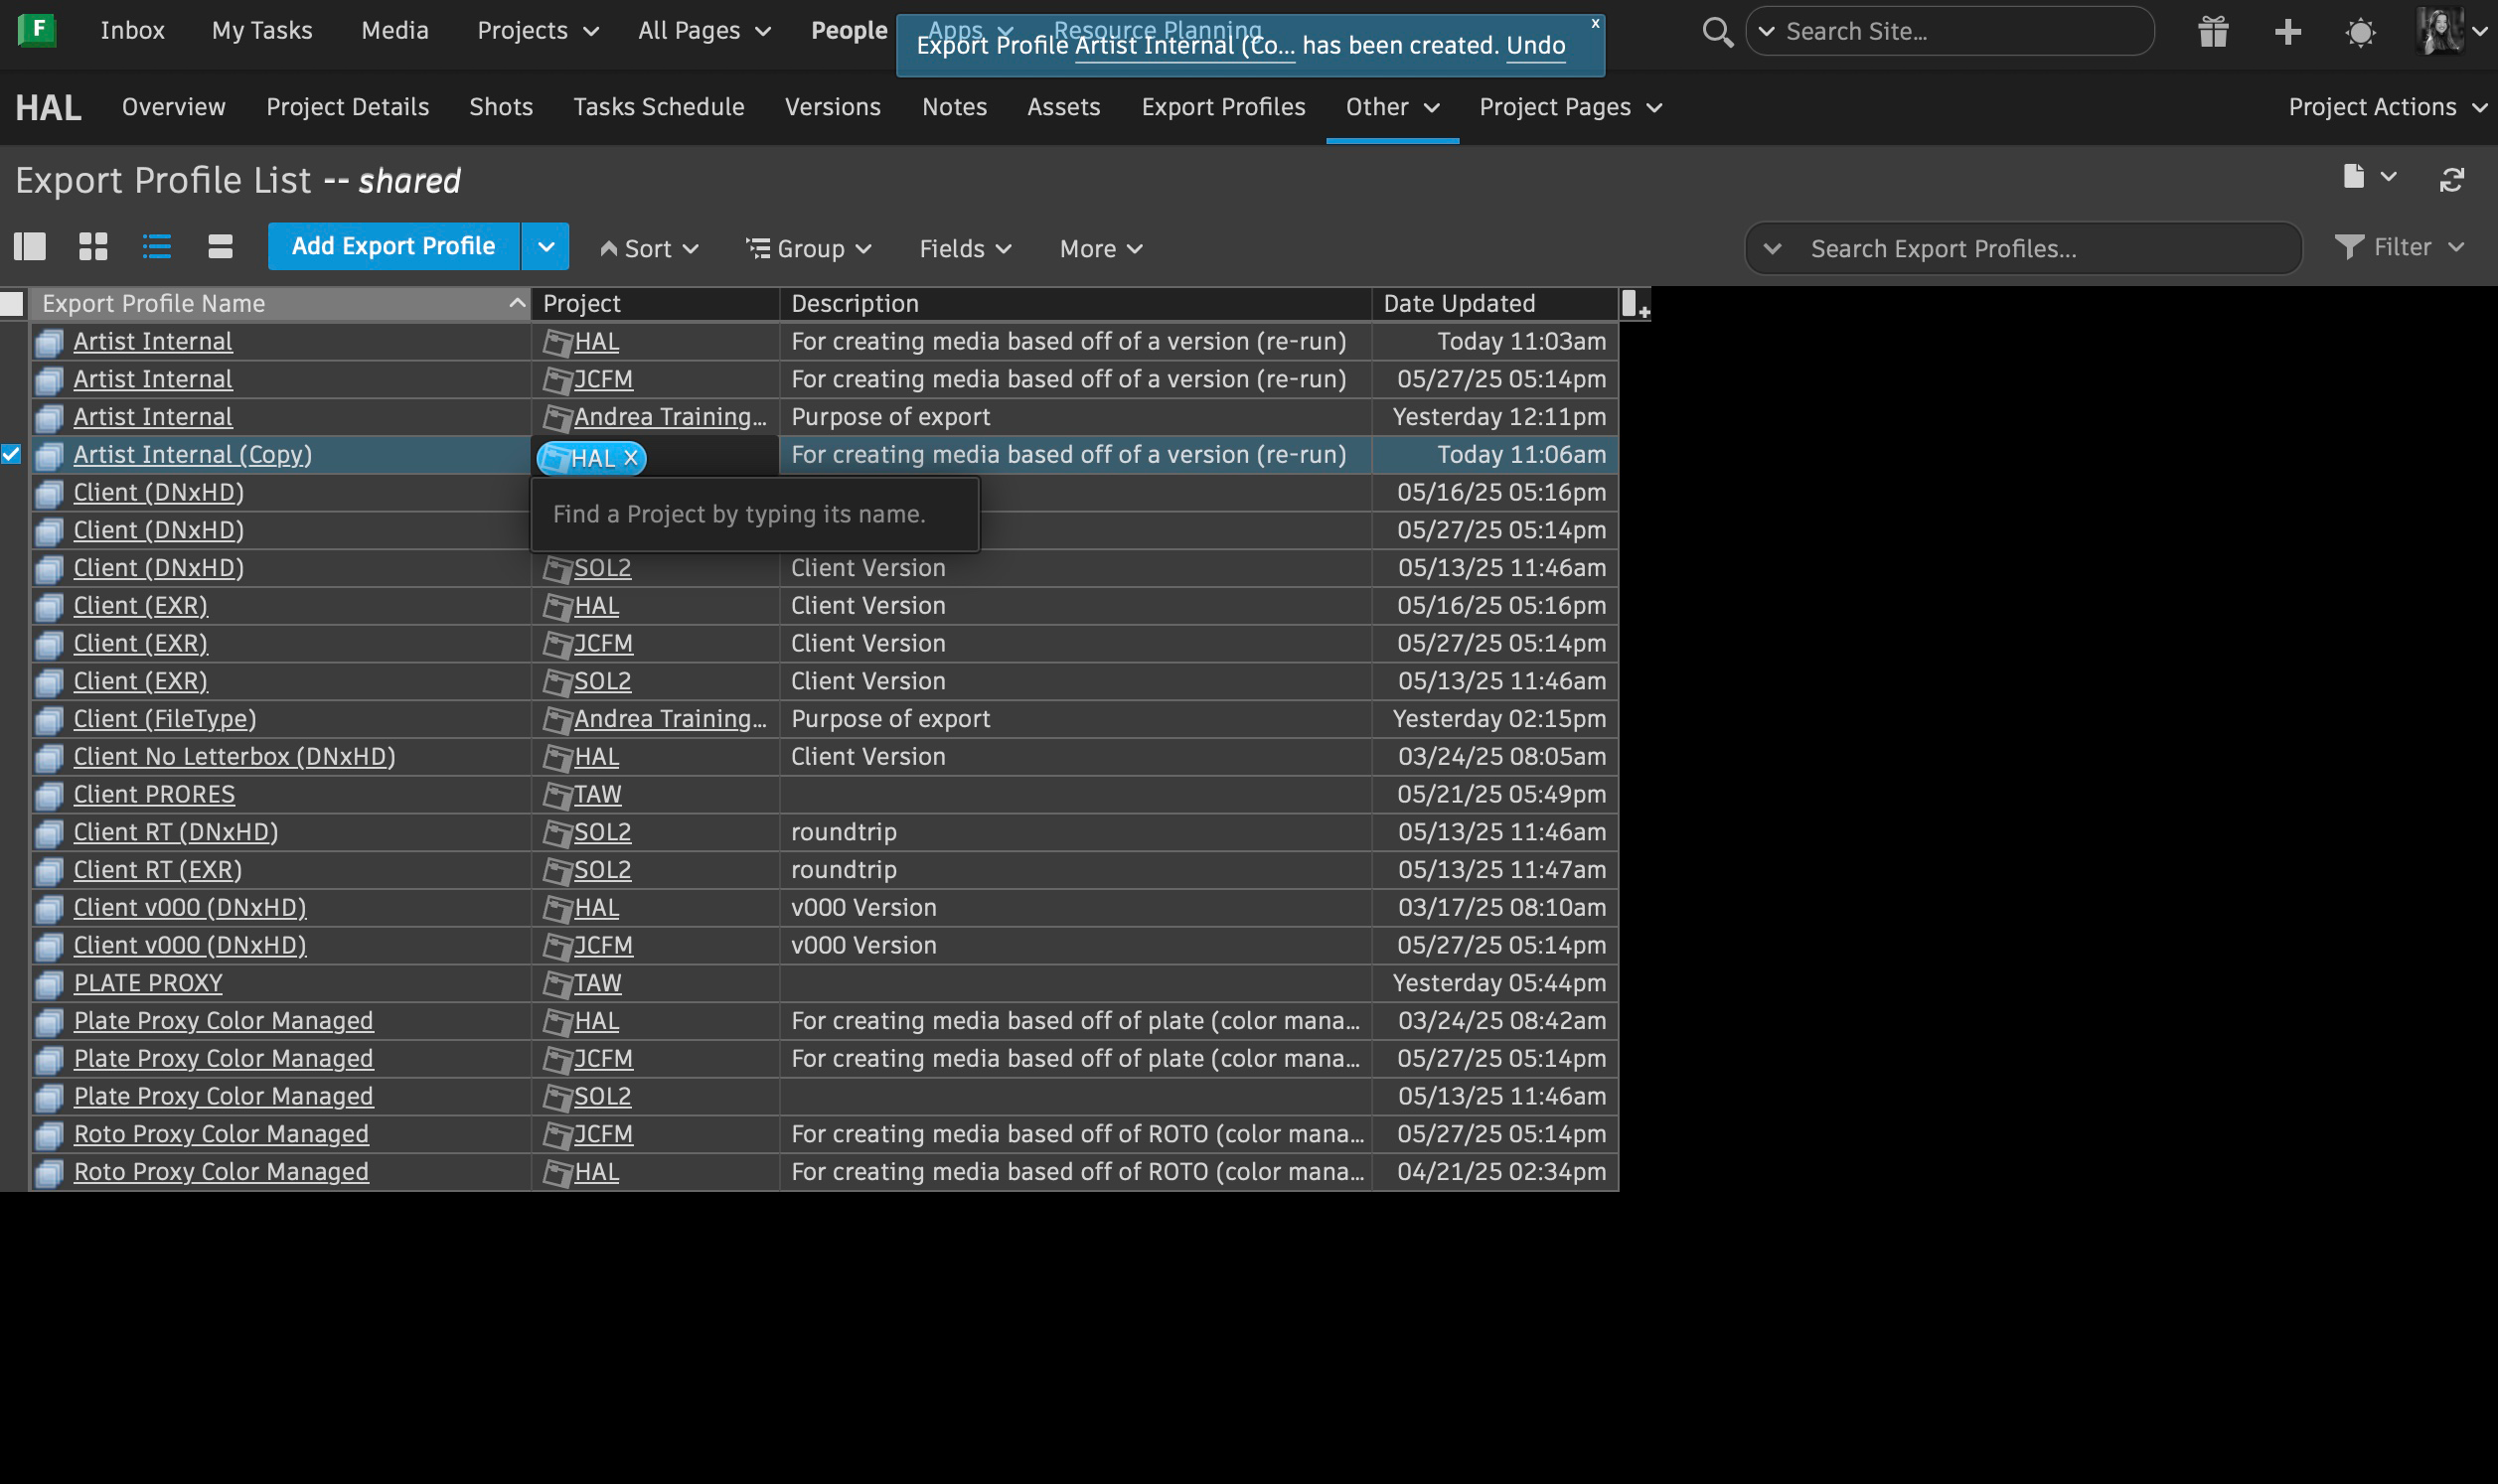
An easier way of creating Export Profiles is by accessing the Export Profile List in Flow Production Tracking. All the Export Profiles for previous projects are listed within this page and they can be used as reference to create a new one.
a. Select the Export Profile you would like to review.
b. Once you have decided which Export Profile you want to reference, right click and duplicate it.

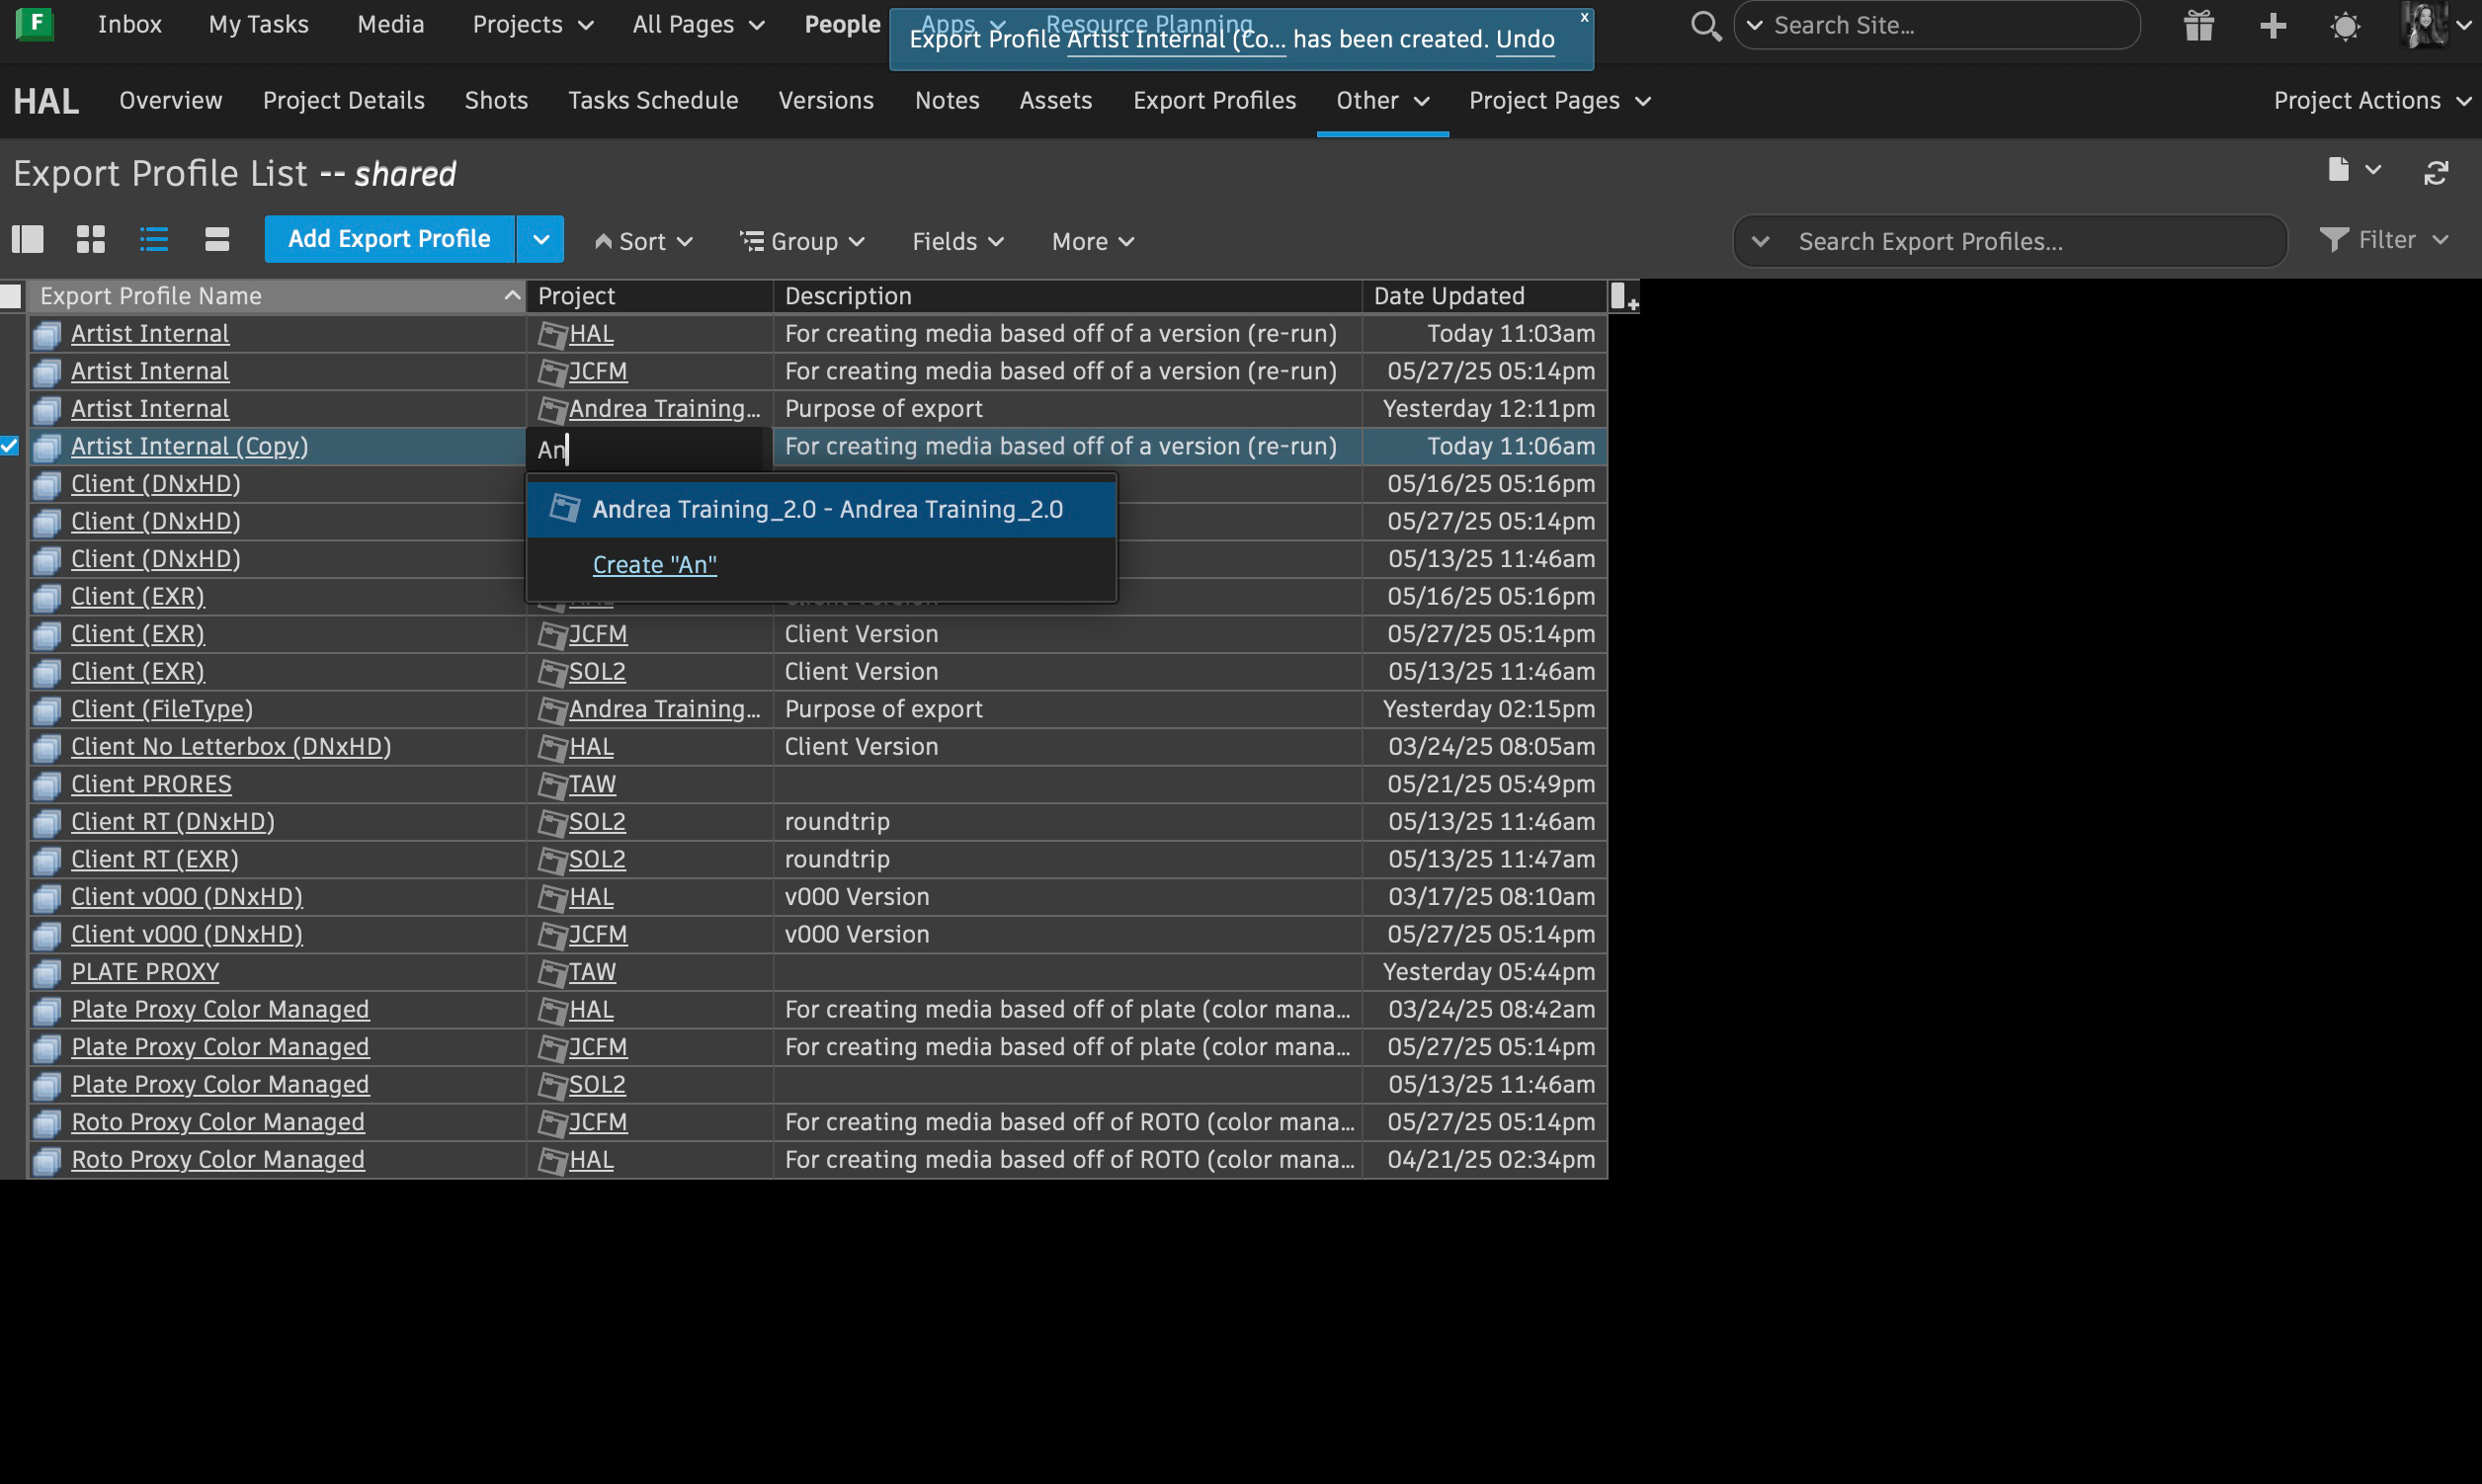
c. Proceed to change the project name of the duplicated Export Profile to the project where you want it to live.
d. The new Export Profile will appear in the respective project, and you can proceed to adjust it based on the new project's specifications.
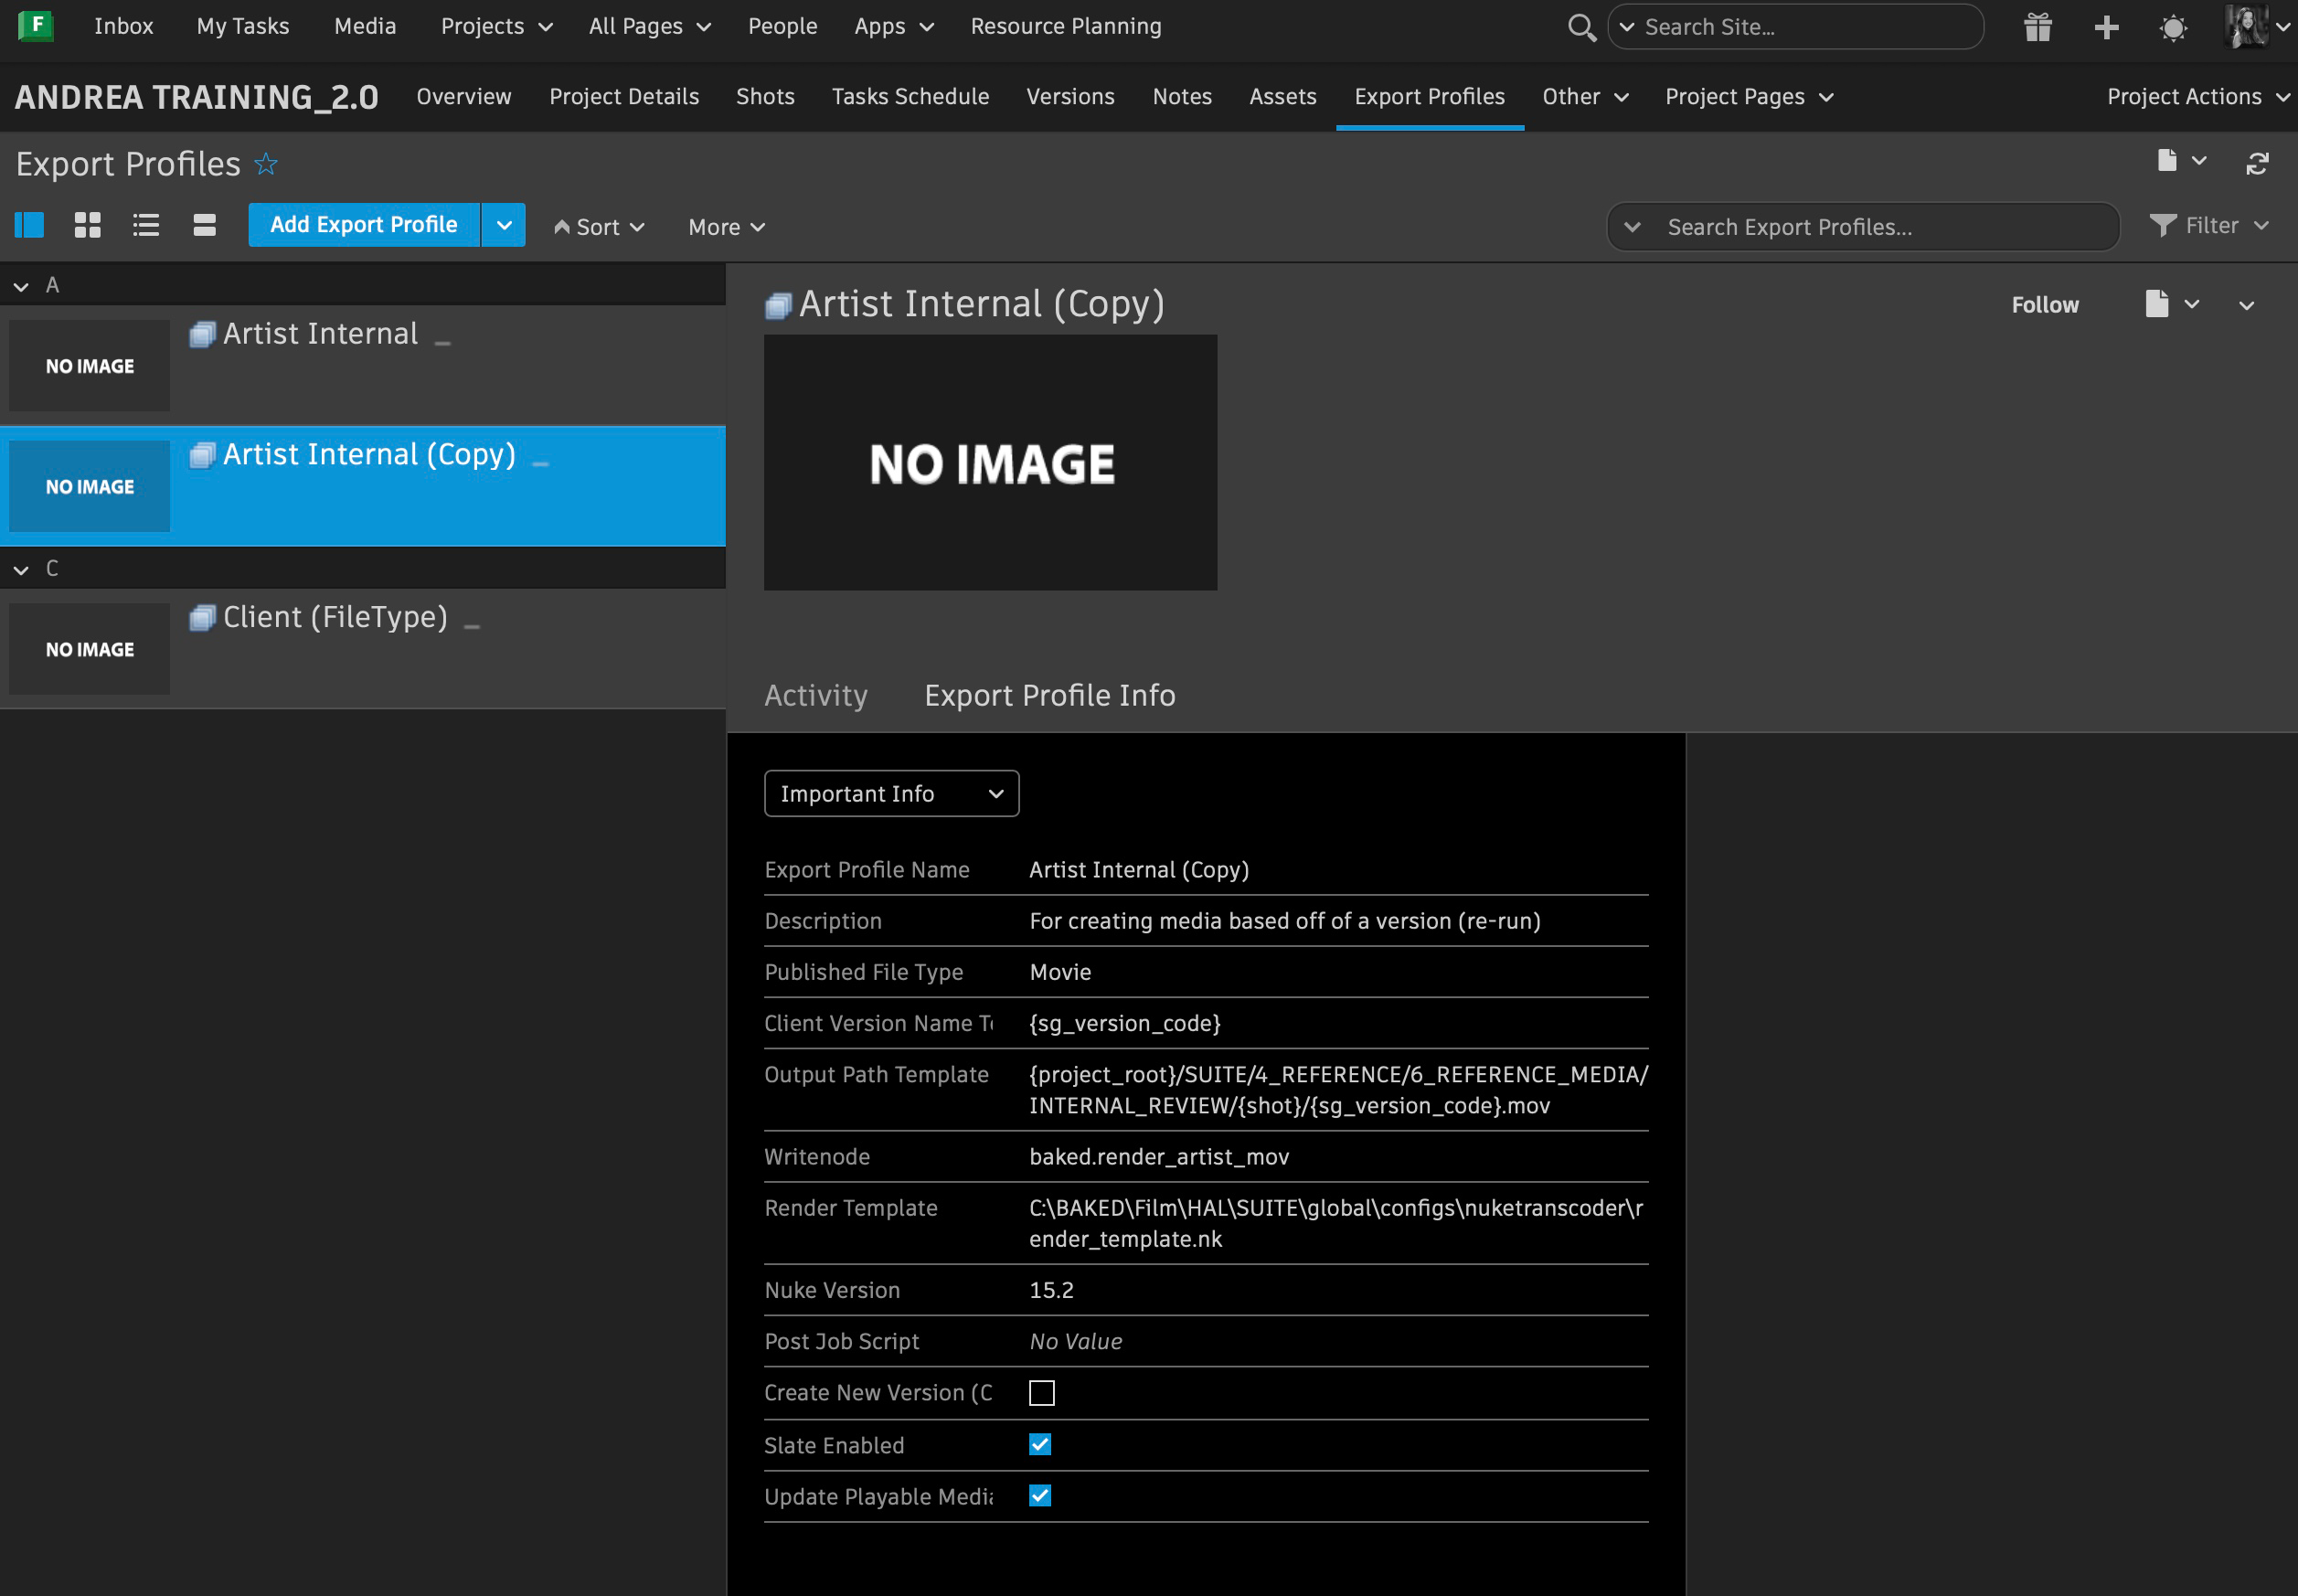
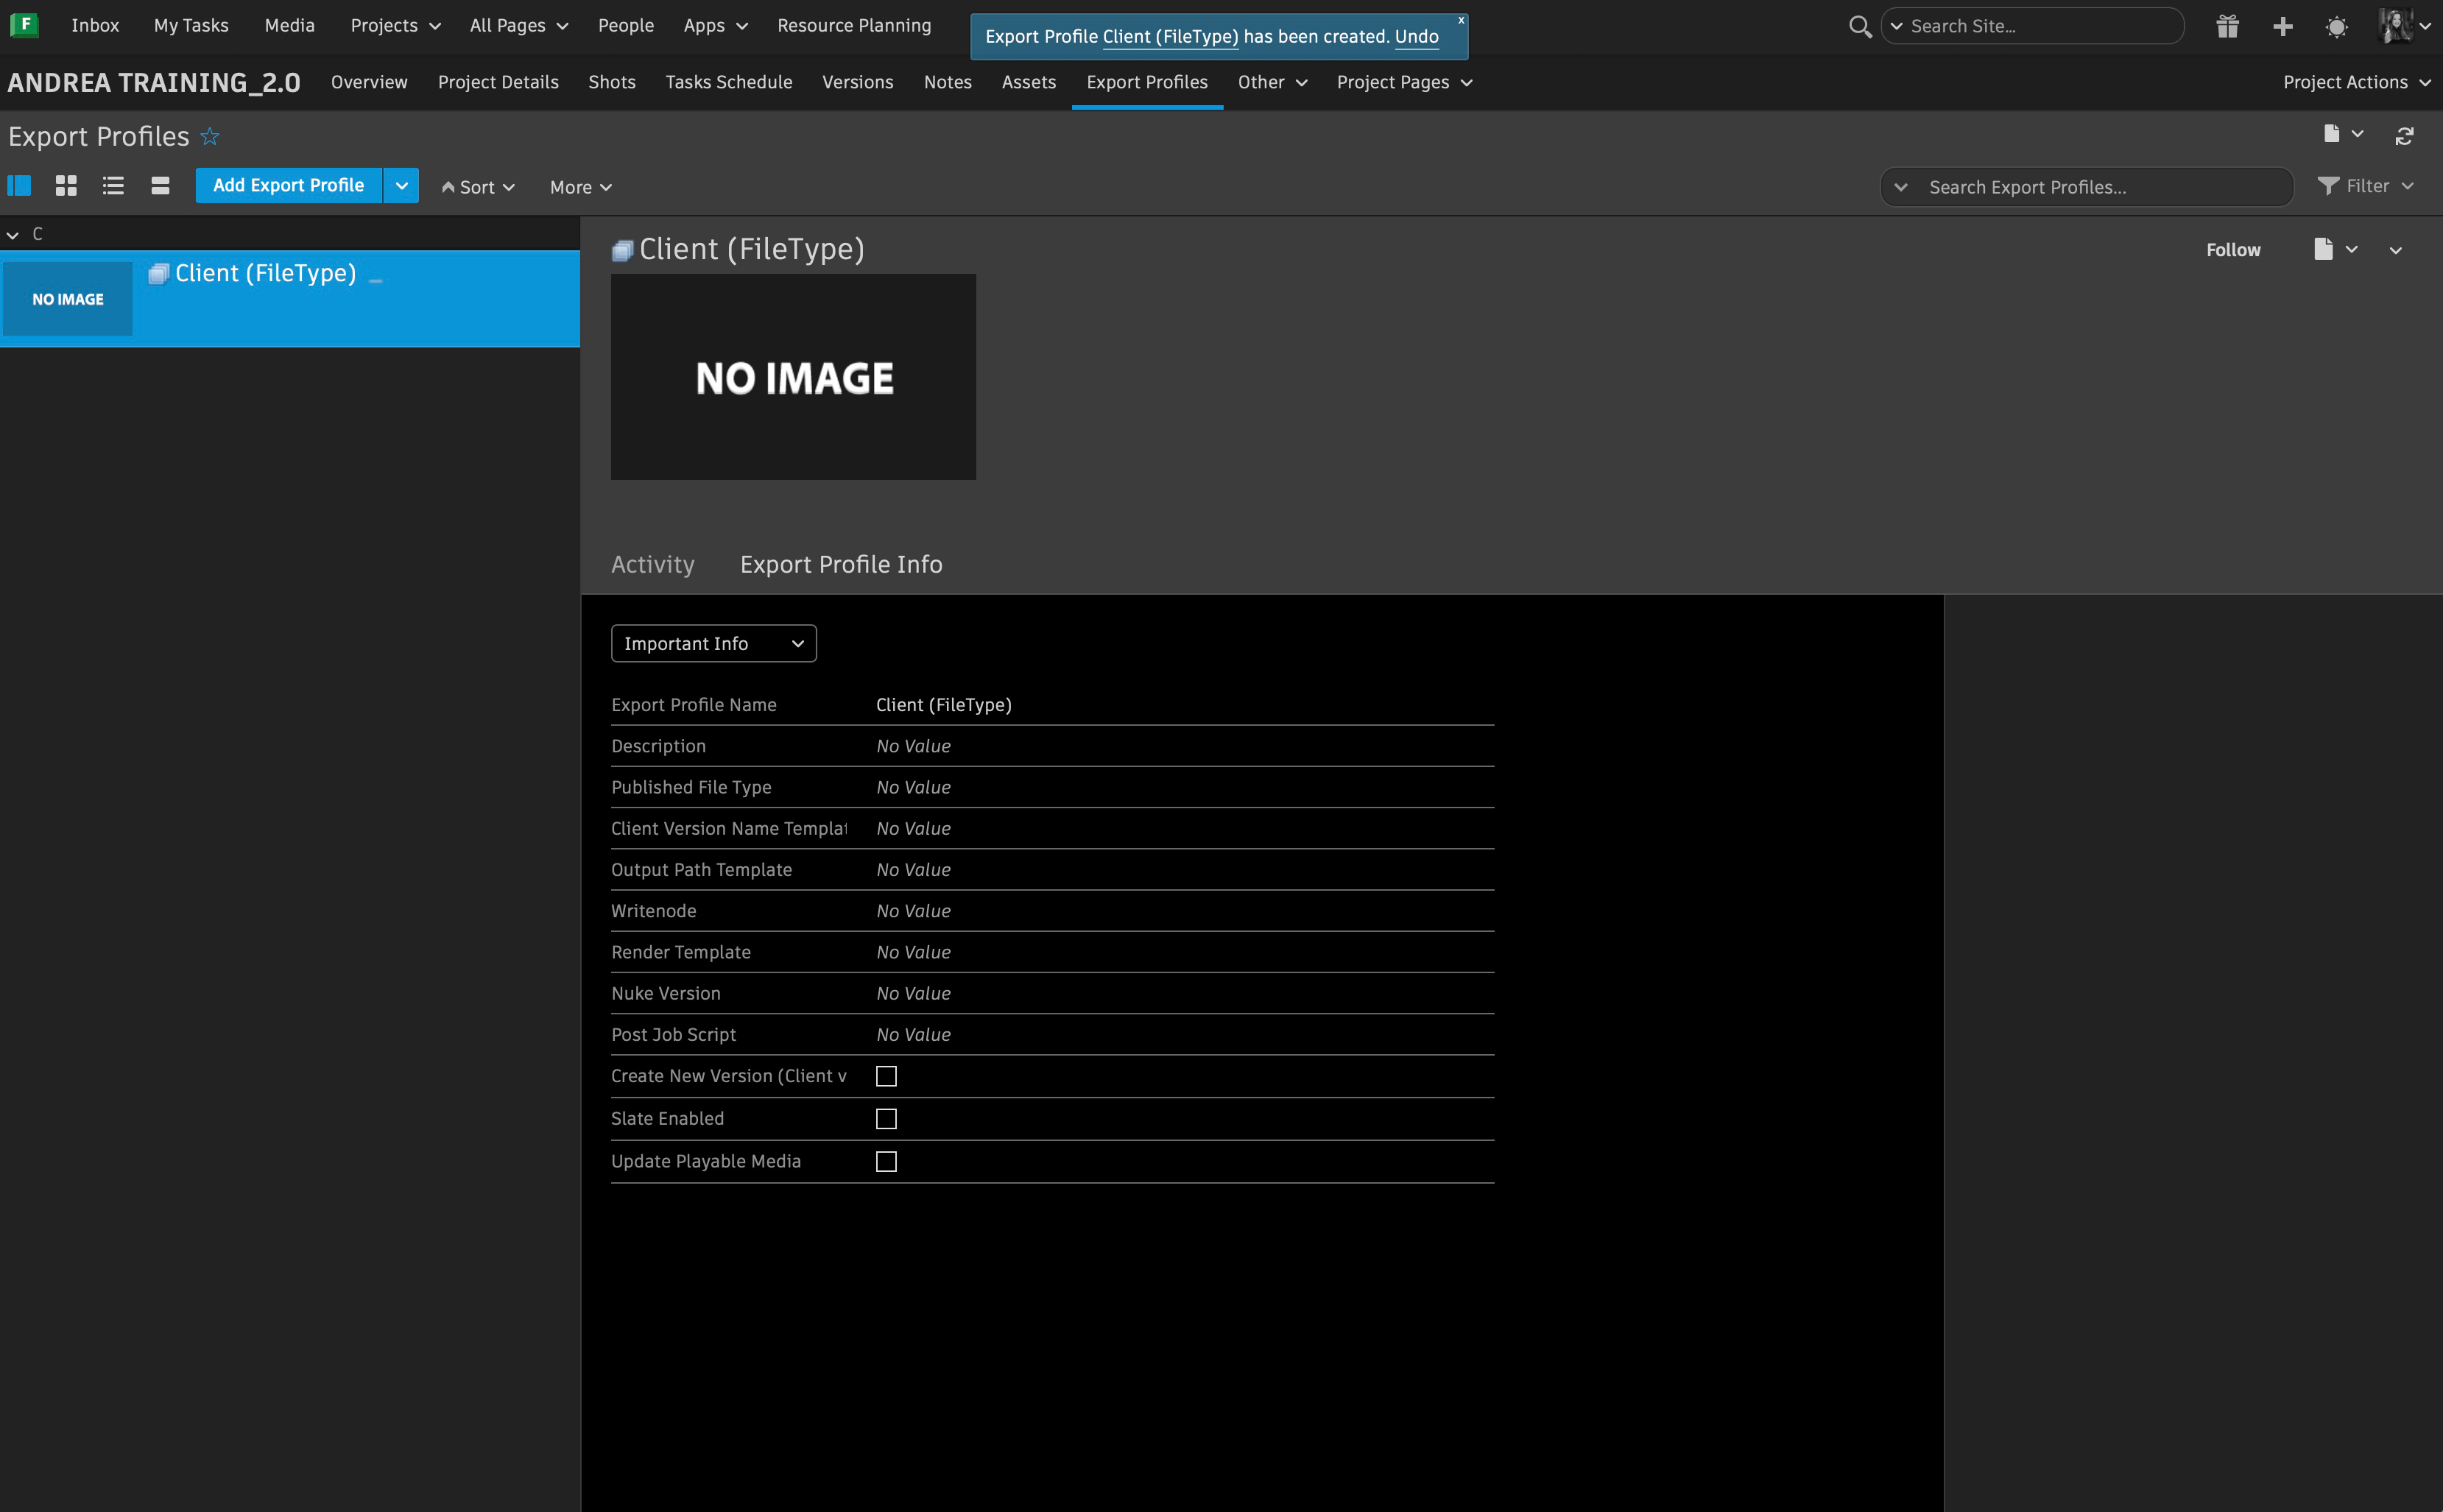
Common changes within Export Profiles are:
Writenodes. It will change based on what is being exported. Look at Nodes List Documentation for reference.
Render Template The path will change based on show.
Description
Name
Common Export Profiles
-
V000 at Baked are created as Export Profiles. Their purpose is to test workflow. When sharing them with client, the export profile is labeled as Client(V000) and named "check" as part of the Client Version Name template so there can be multiple versions of V000.
-
Client(EXRs) or Client Export (EXR) EXR high resolution image sequences to be shared with client for delivery.
-
Client(DNxHD) or Client(ProRes) or Client Export (MOV) MOV files to be shared with client for review and delivery.
-
Proxy These are important so ingested EXR sequences can be vieweable in Shot Grid as MOVs. Usually used for plates and roto. It generates media based of a plate.
-
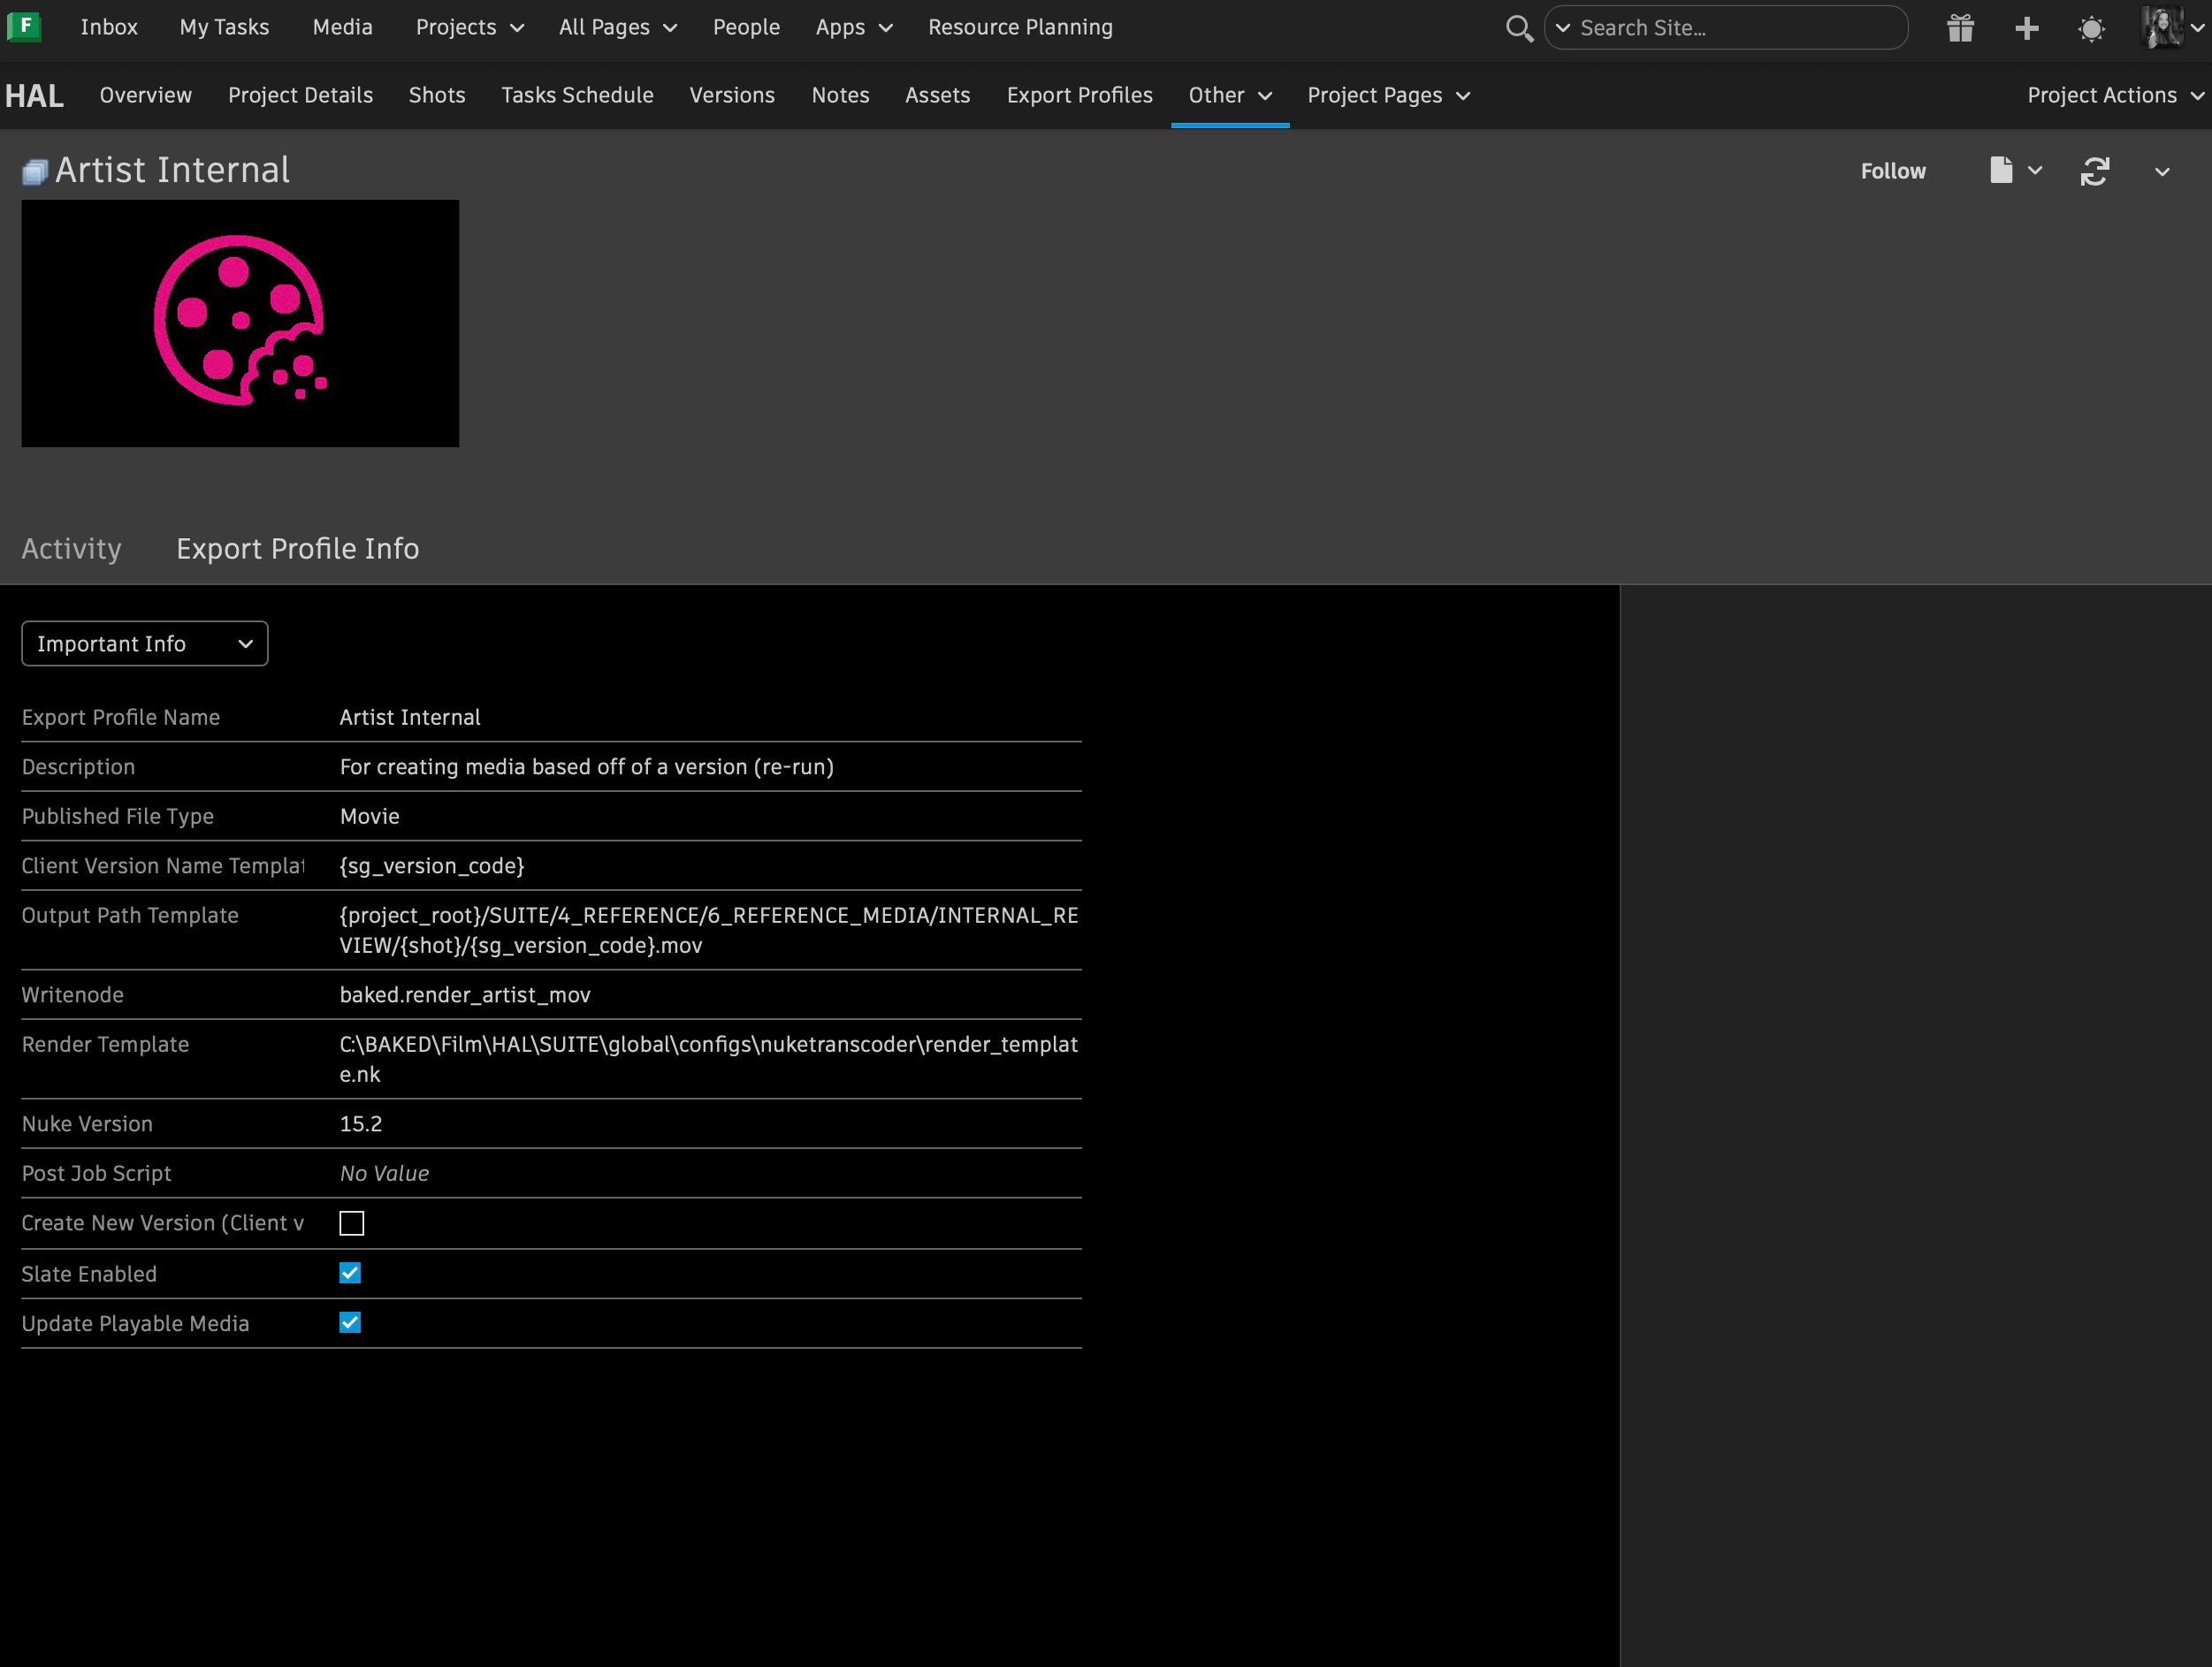
Artist Internal For creating media based off of a version (re-run) to be used at Baked internally
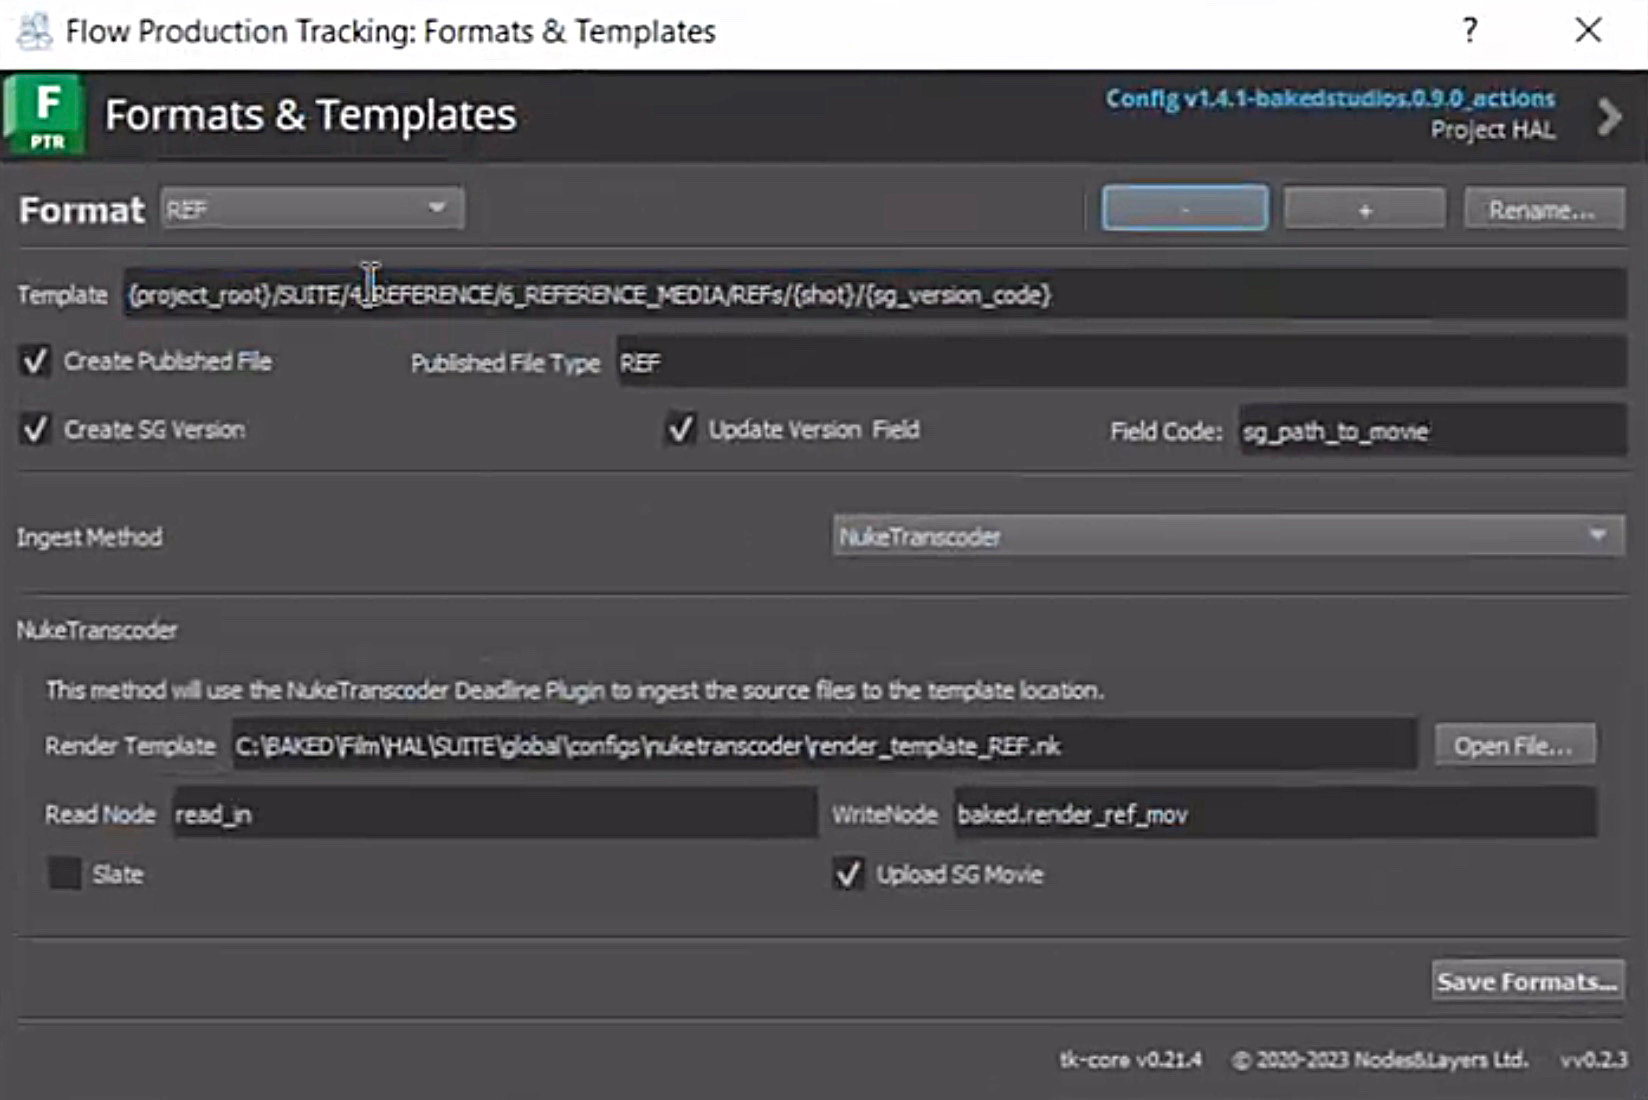
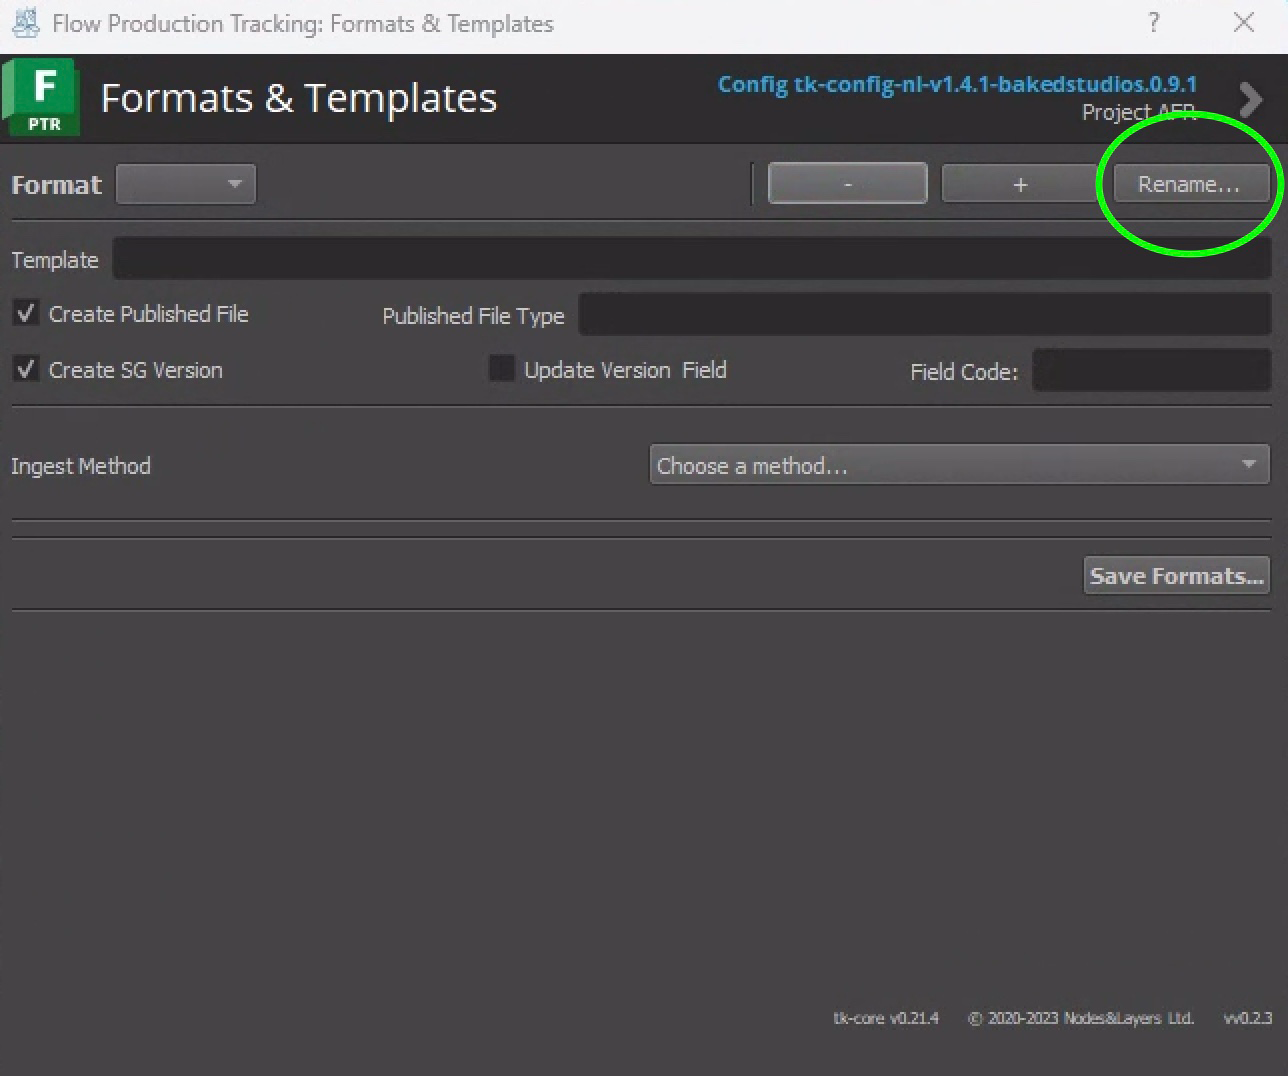
Create Ingest Profiles/Formats
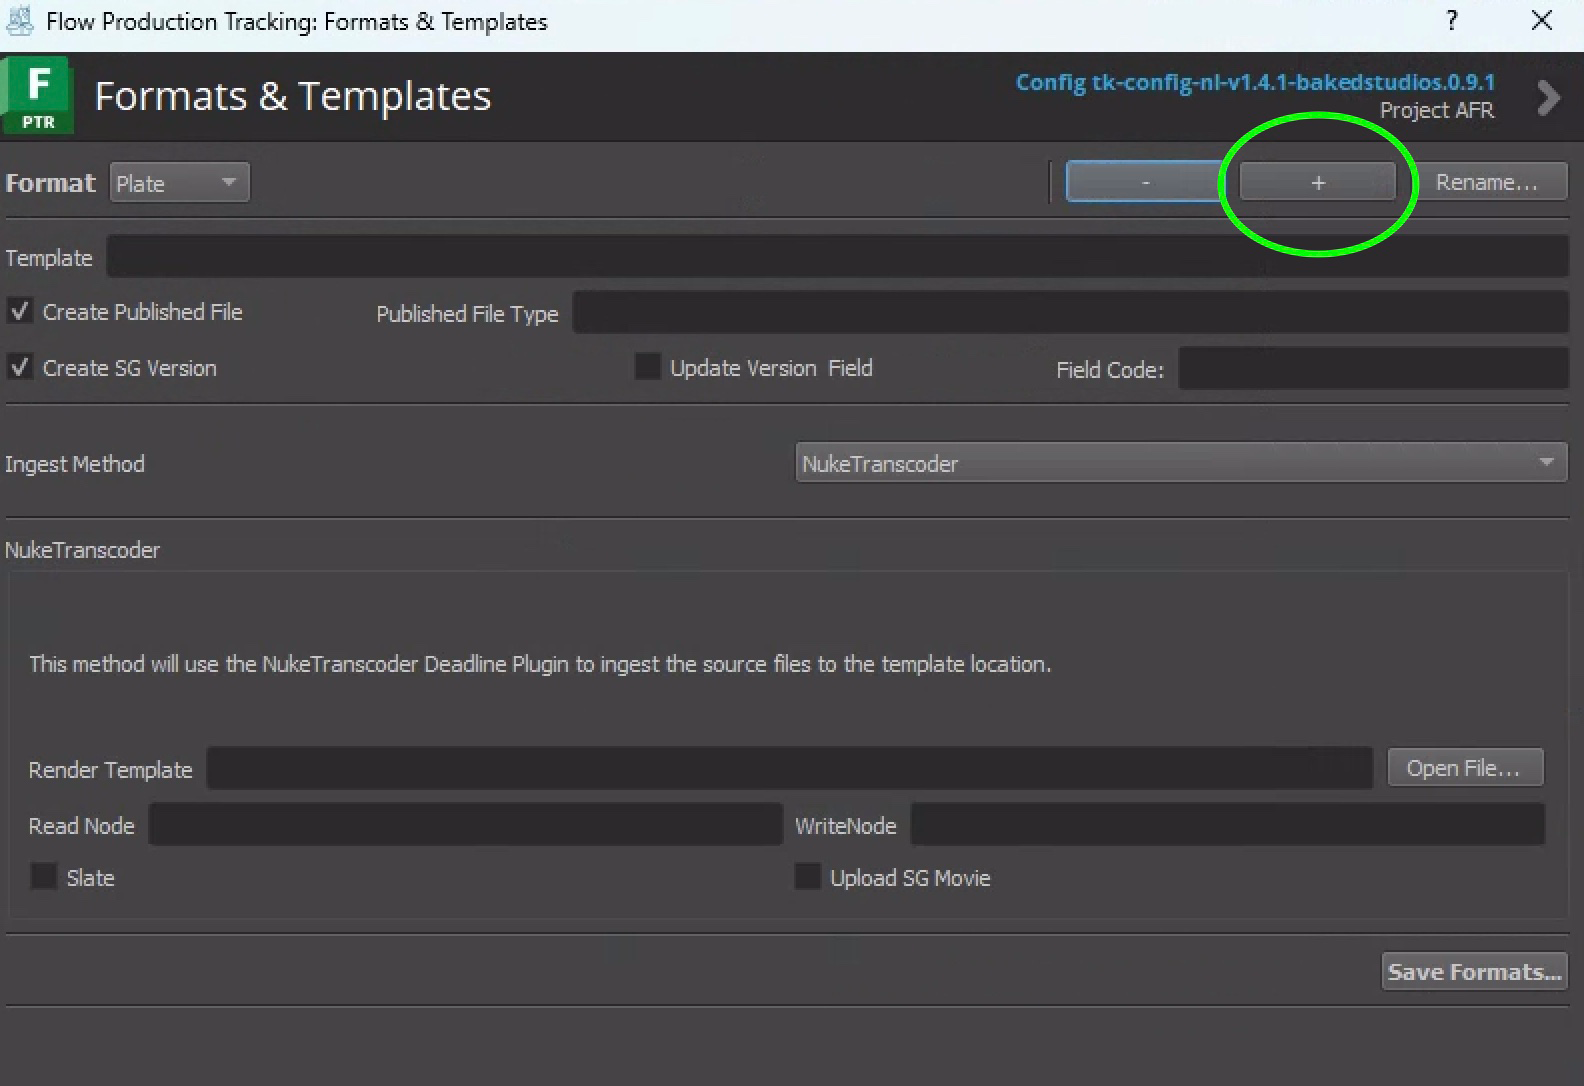
- Ingest Profiles is a tool provided by Nodes and Layers created for ingesting specific files. Each file, such as Roto, REFs, Plates..etc. need to have an ingest profile for them to be able to get ingested properly through Nuke and Flow Production Tracking. The following steps are a guide to creating Ingest Profiles:
a. Go to the Flow Production Desktop App and click Ingest Formats within the corresponding project.
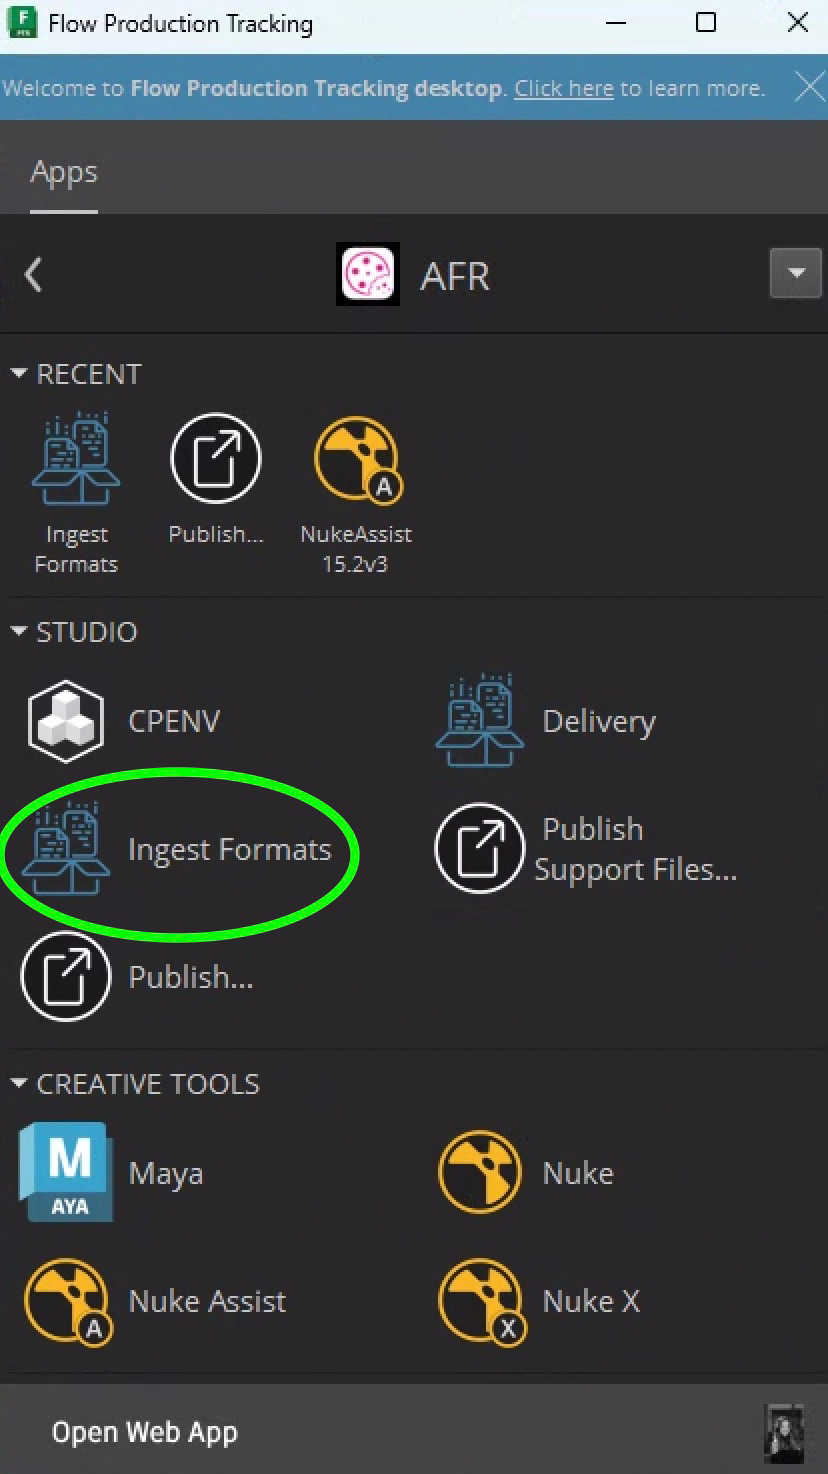
For these external tools to appear in SG Desktop app, make sure that the Pipeline Configs are set up correctly in SG.
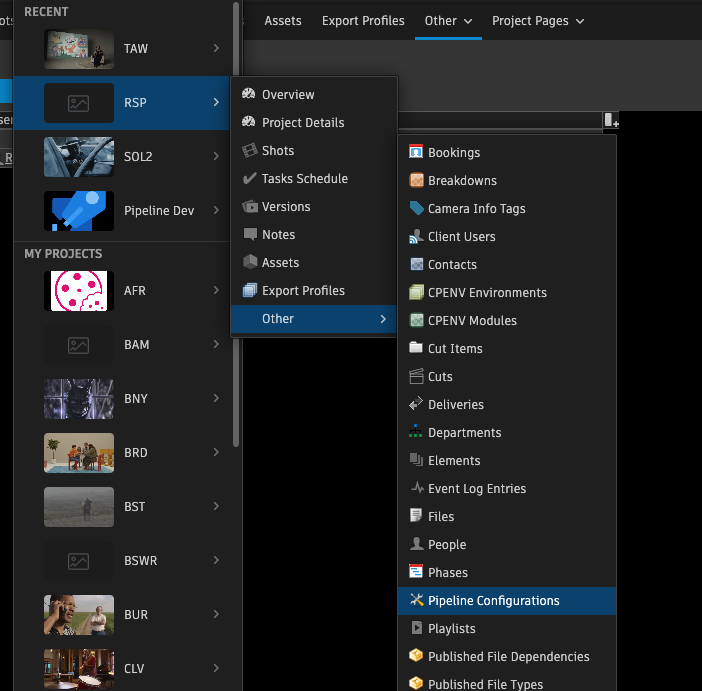
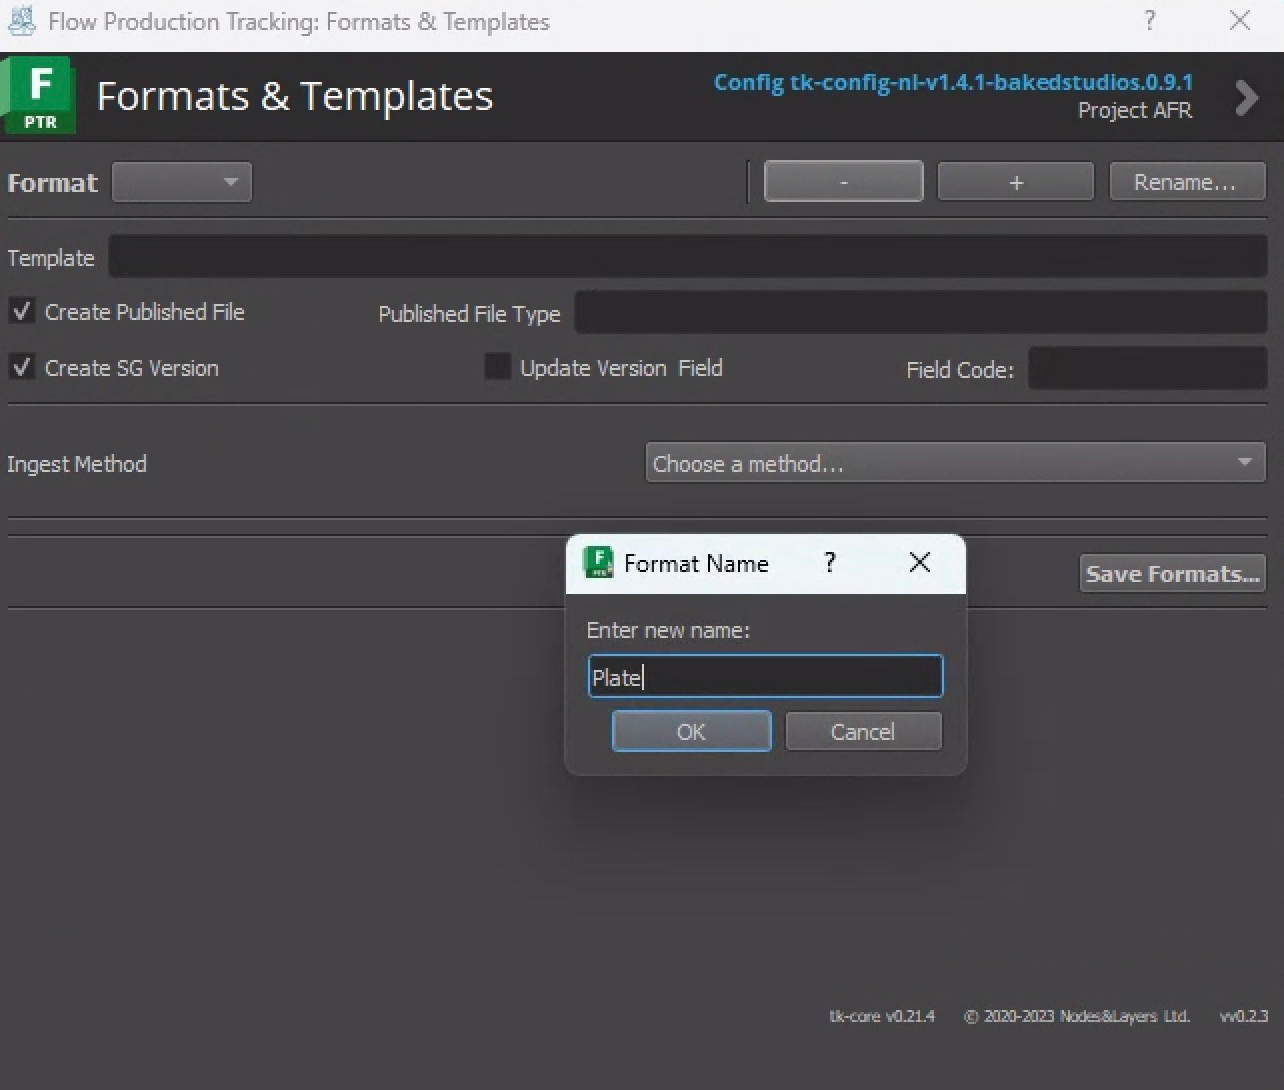
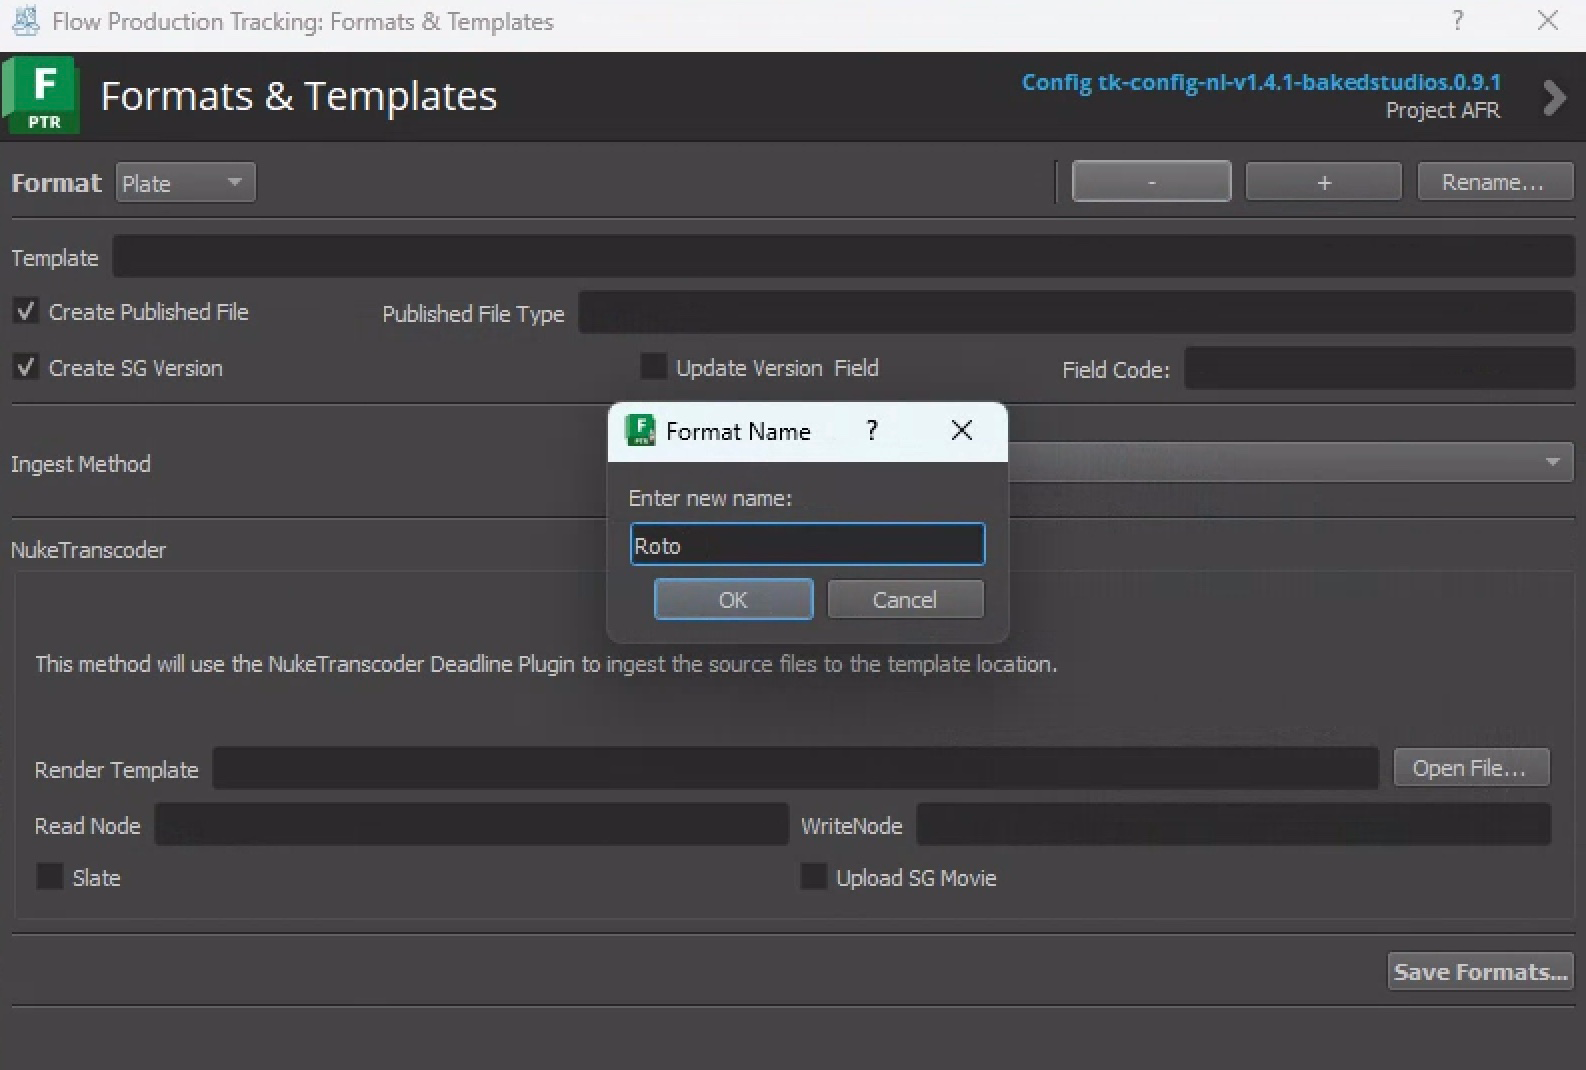
b. To start an Ingest Profile from scratch, click the rename button and rename it.
c. To create more than one Ingest Profile, you can click on the + sign.
The dropdown menu on the left allows you to see which Ingest Profile already exist.
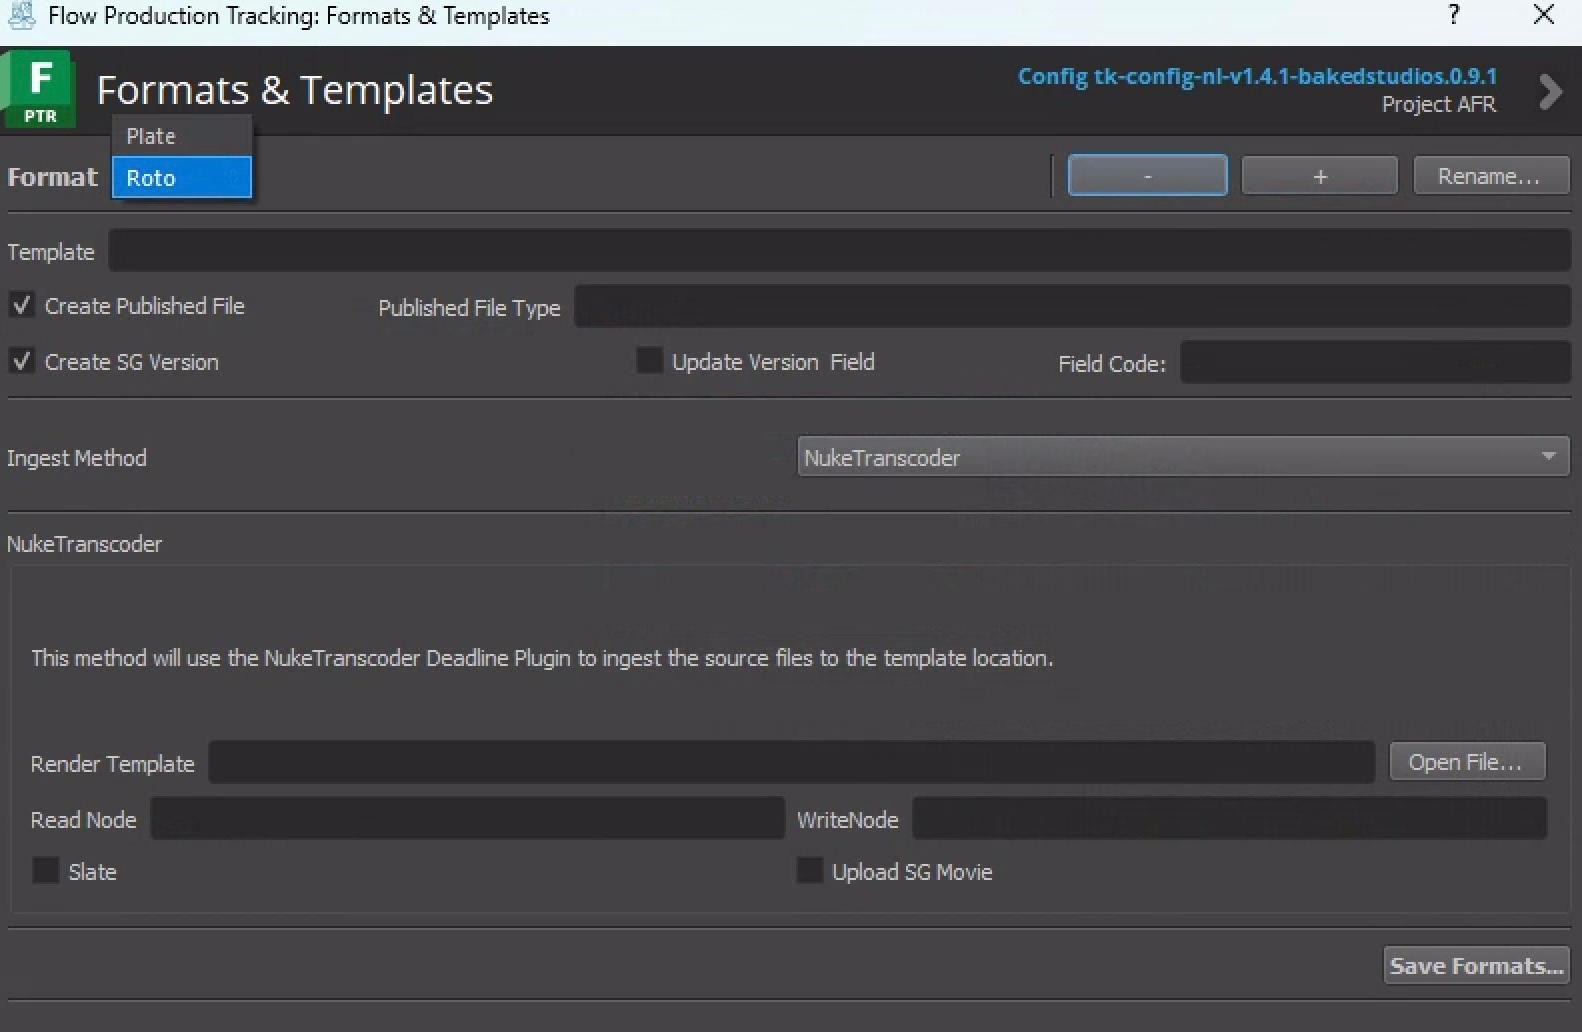
You can also click on the - sign to remove Ingest Profiles.
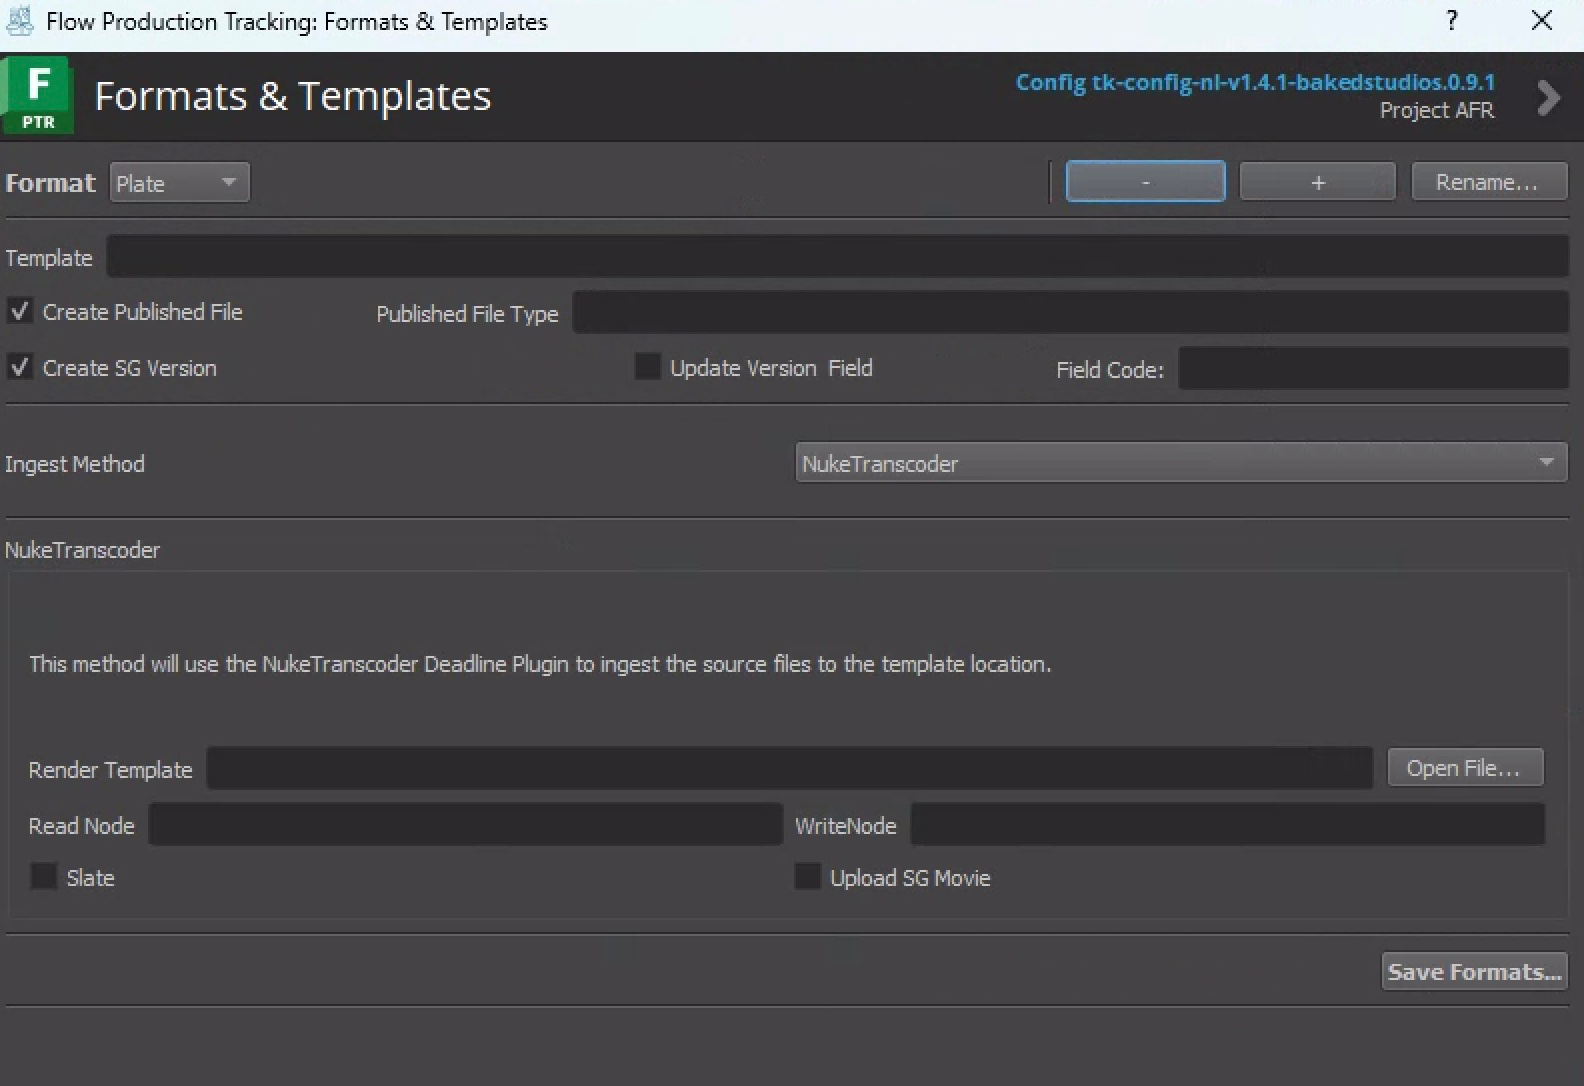
c. Make sure the Ingest Method is set to Nuke Transcoder and fill out the following fields:
-
Template: Path for the respective project
-
Field Code: sg_path_to_frames (for EXRs) or sg_path_to_movie (for REFs)
-
Published File Type: Plate/Roto/REF..etc.
-
Render Template: Nuke Template Path
-
Read Node: read_in
-
Write Node: ingest.ingest_frames or baked.render_ref_mov (Check Node Lists in documentation)
-
Make sure the following boxes are checked: Create Published File, Create SG Version and Update Version Field
To automate this process, copy the settings from a previously-existent ingest profile and adjust settings according to the new project specifications.Usually the template paths are the only ones that vary.
Once the Ingest Profile is created, make sure to click Save Formats at the bottom right to complete the process and save any changes before ingesting.
Example of Ingest Profiles
Project Example of an Ingest Profile for Plates

Project Example of an Ingest Profile for REFs