Part 2: Ingest
- Prior to ingesting the assets, the coordinator must update the shot status in Flow Production Tracking to AWA (Awaiting Assignment) for the selected shots that are ready to be assigned to an artist. Once the supervisor assigns the shot to an artist, that shot becomes active (actv) and the assets are then ready to be ingested.

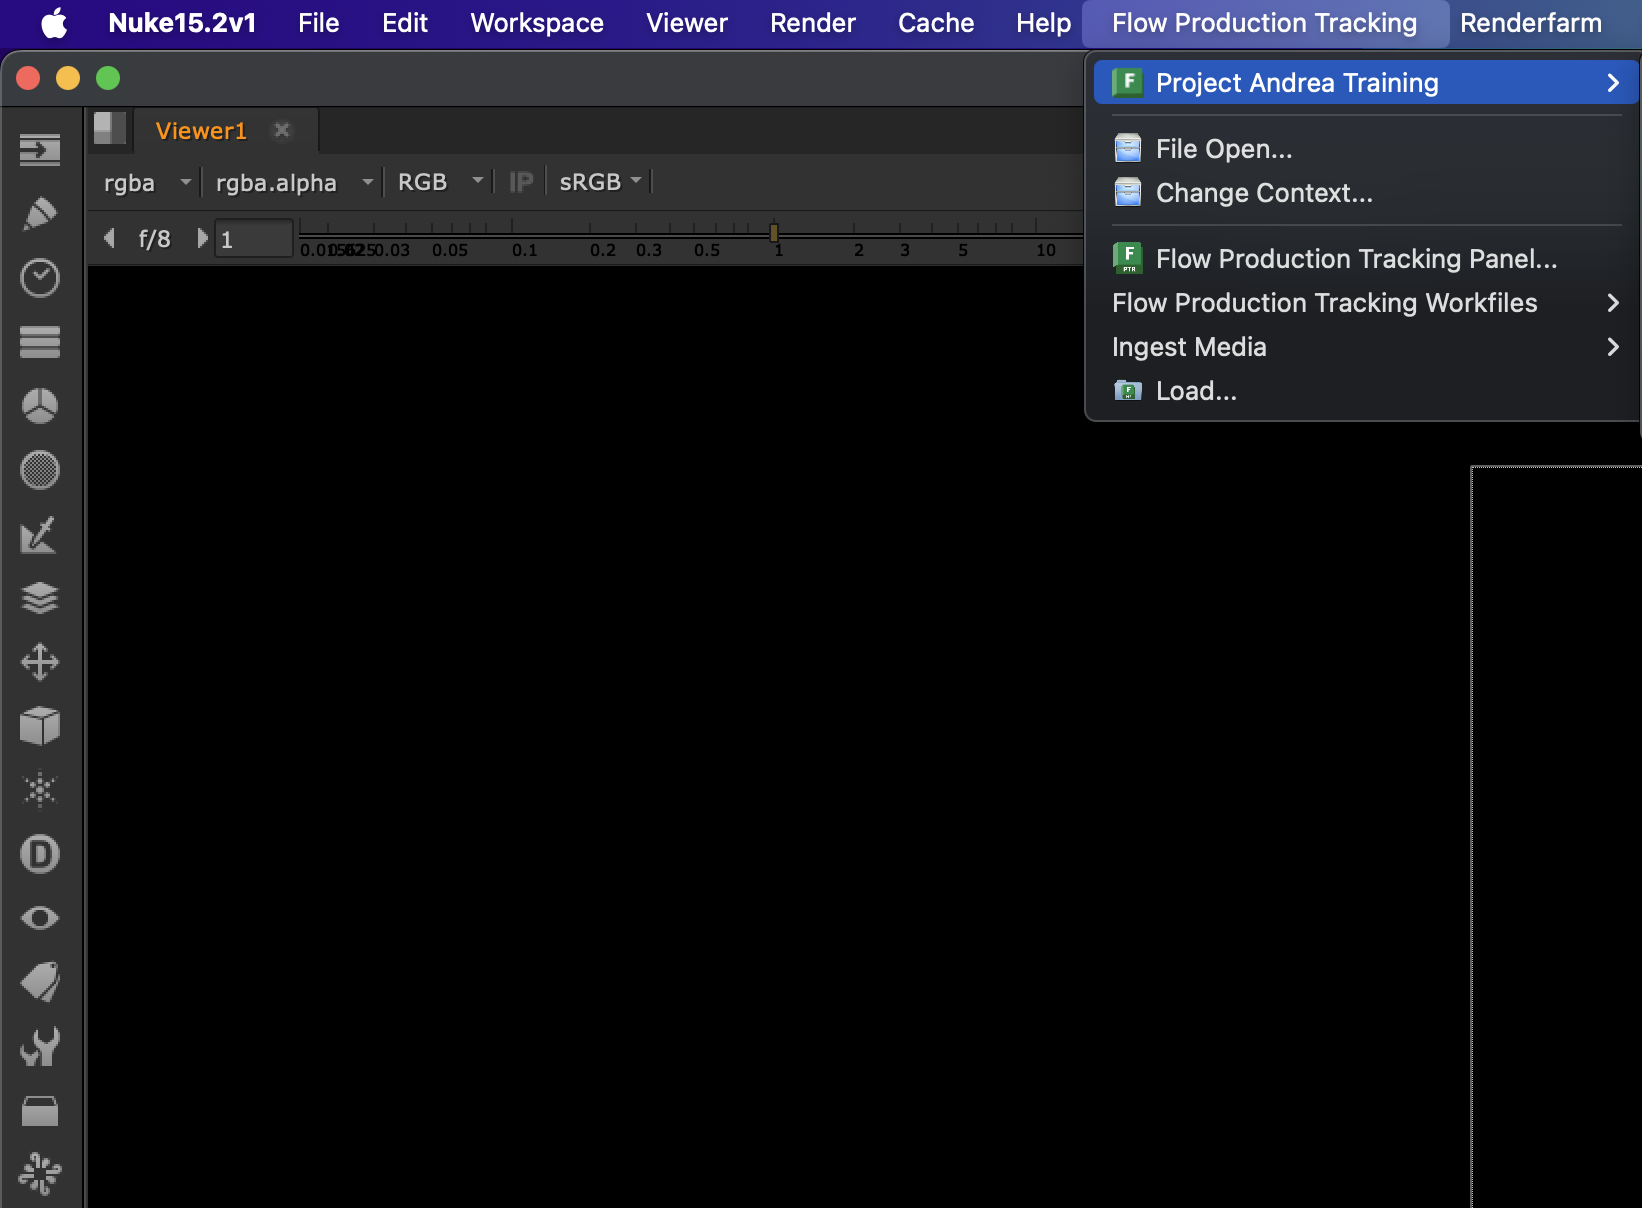
- To begin the ingest process, coordinators must work in Nuke—preferably Nuke Assist— and set the correct project in which the plates will get ingested. Once this is established, the coordinator must bring all the plates or assets into Nuke and select the ones to be ingested, click Flow Production Tracking tab, and ingest media.

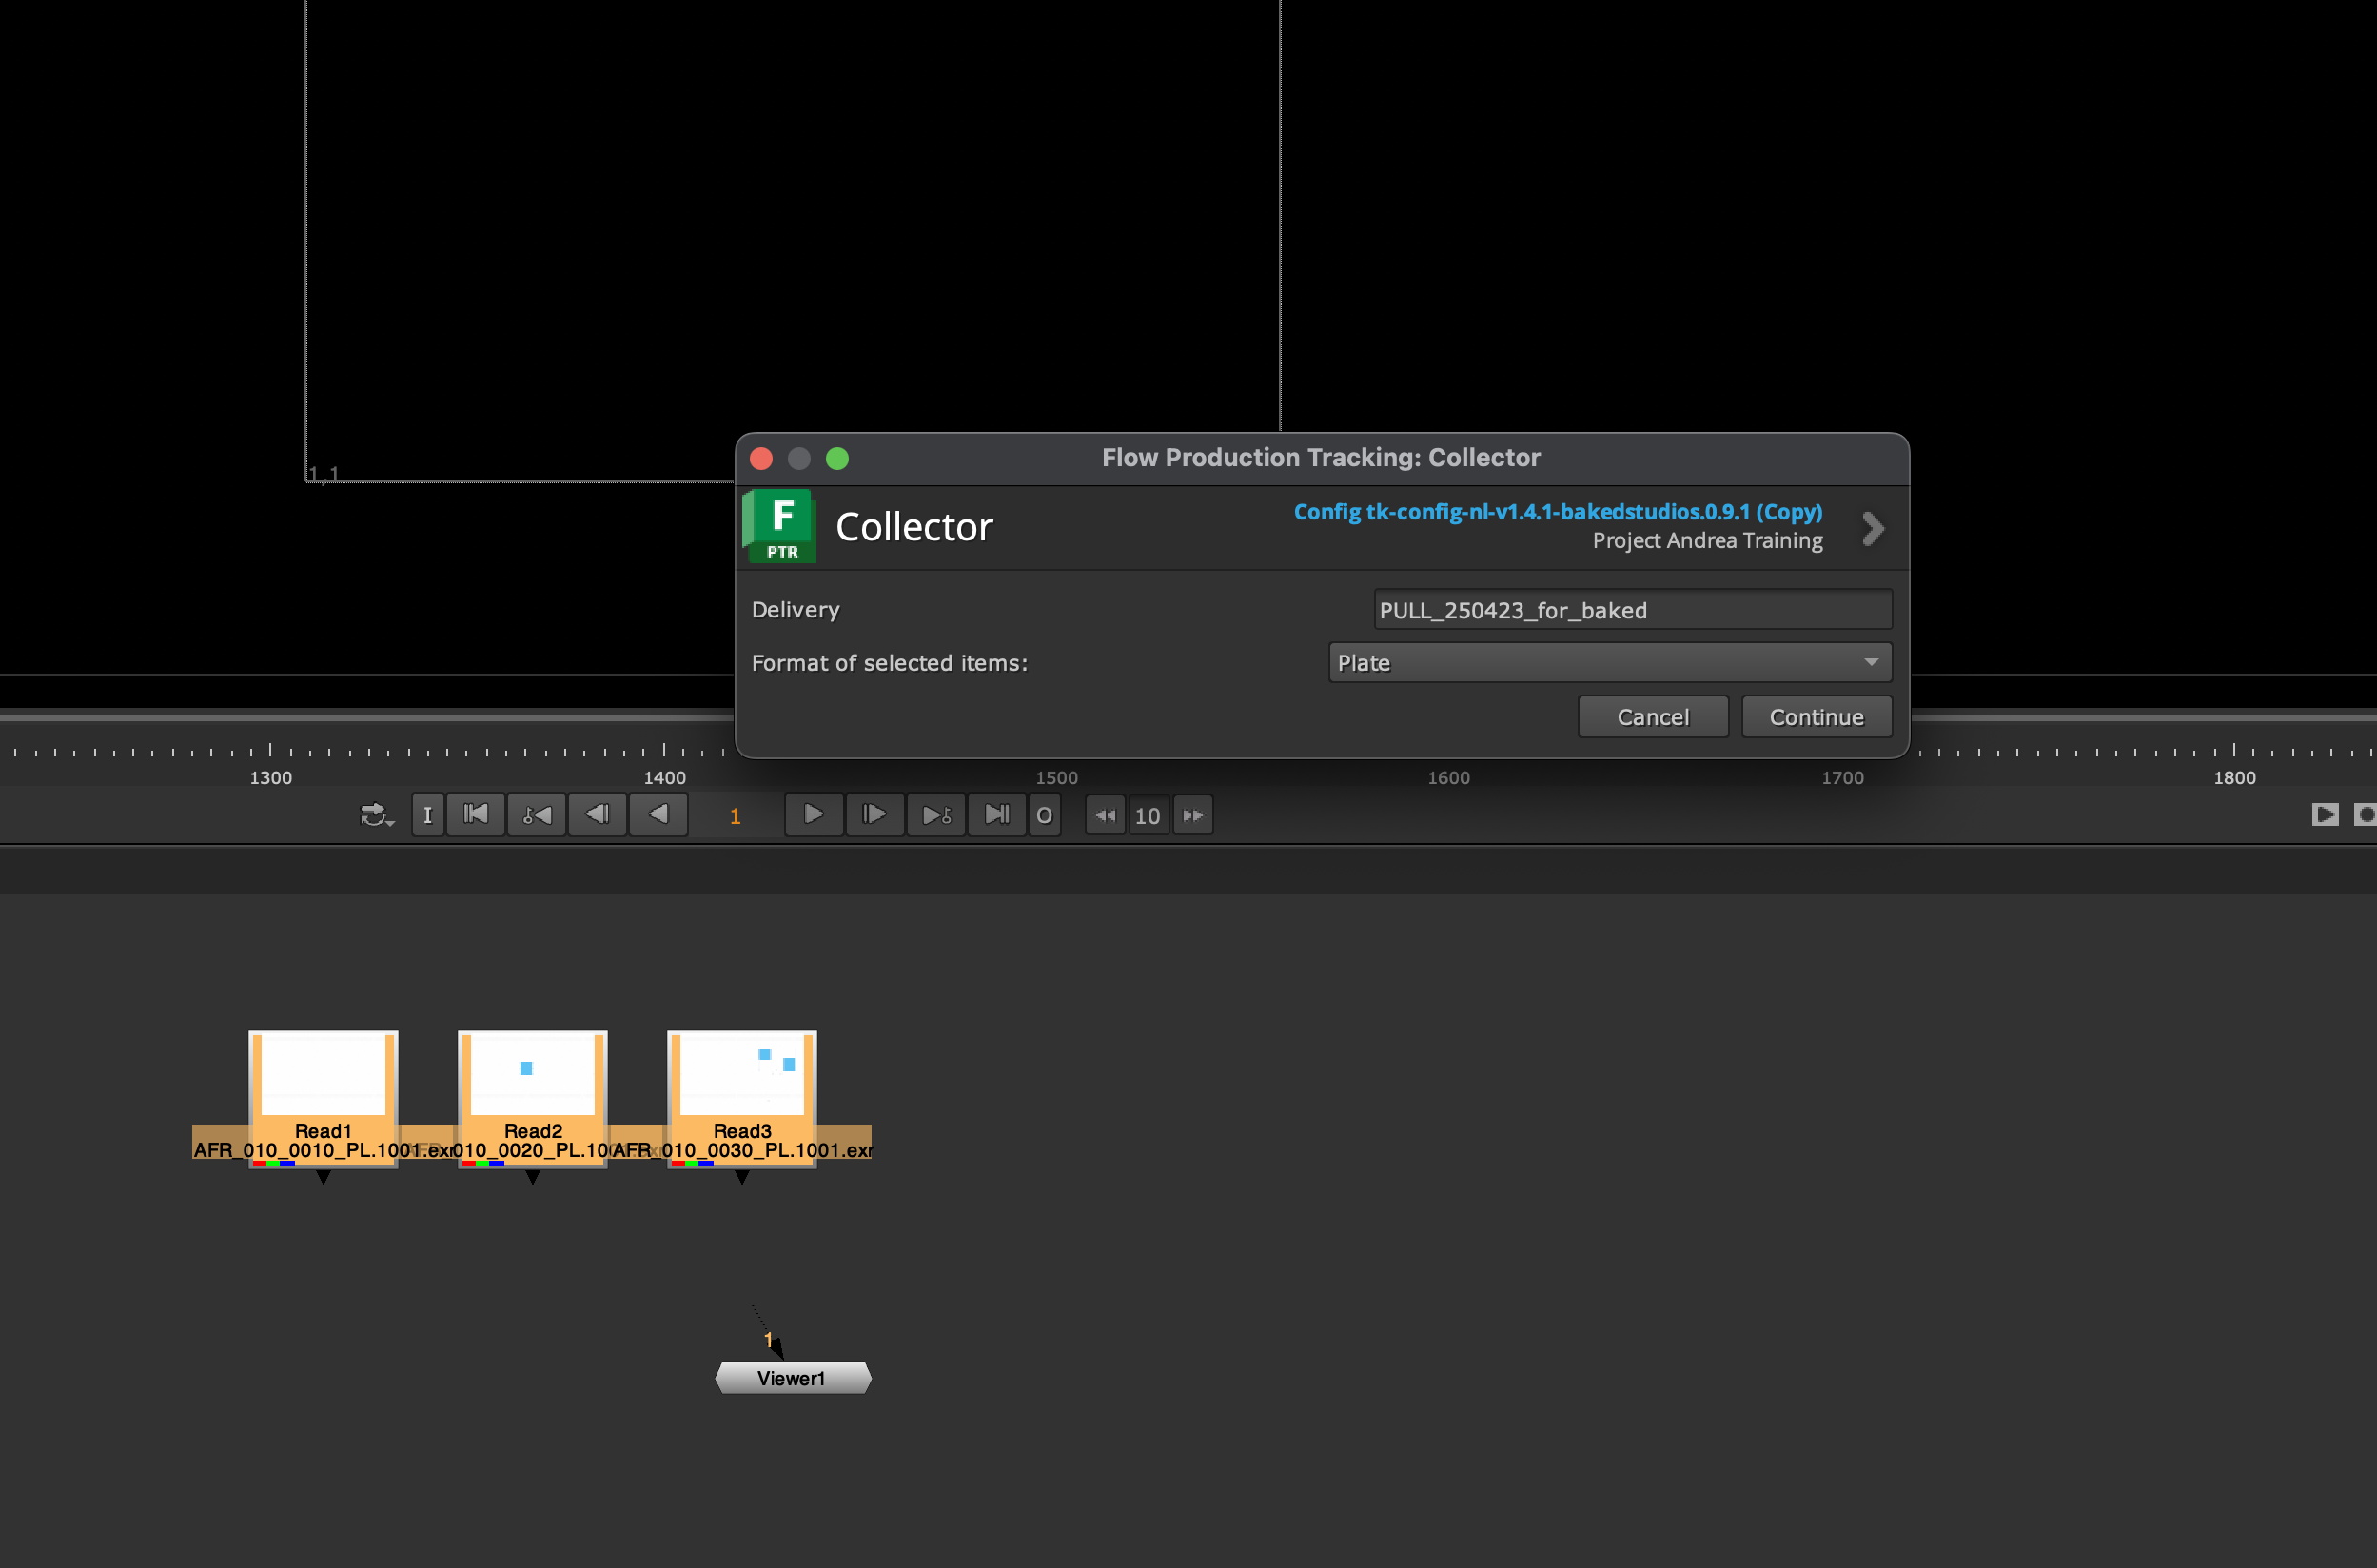
- In the Collector settings, the Delivery Name should be set as the name of the folder IN 1_IO where the plates currently live or the name of the Pull provided by editorial. Additionally, at this stage, the coordinator also defines the ingest format of the items being ingested—such as plate, roto, cleanup, or track. (Check Ingest Profiles Documentation to learn how to create these.)
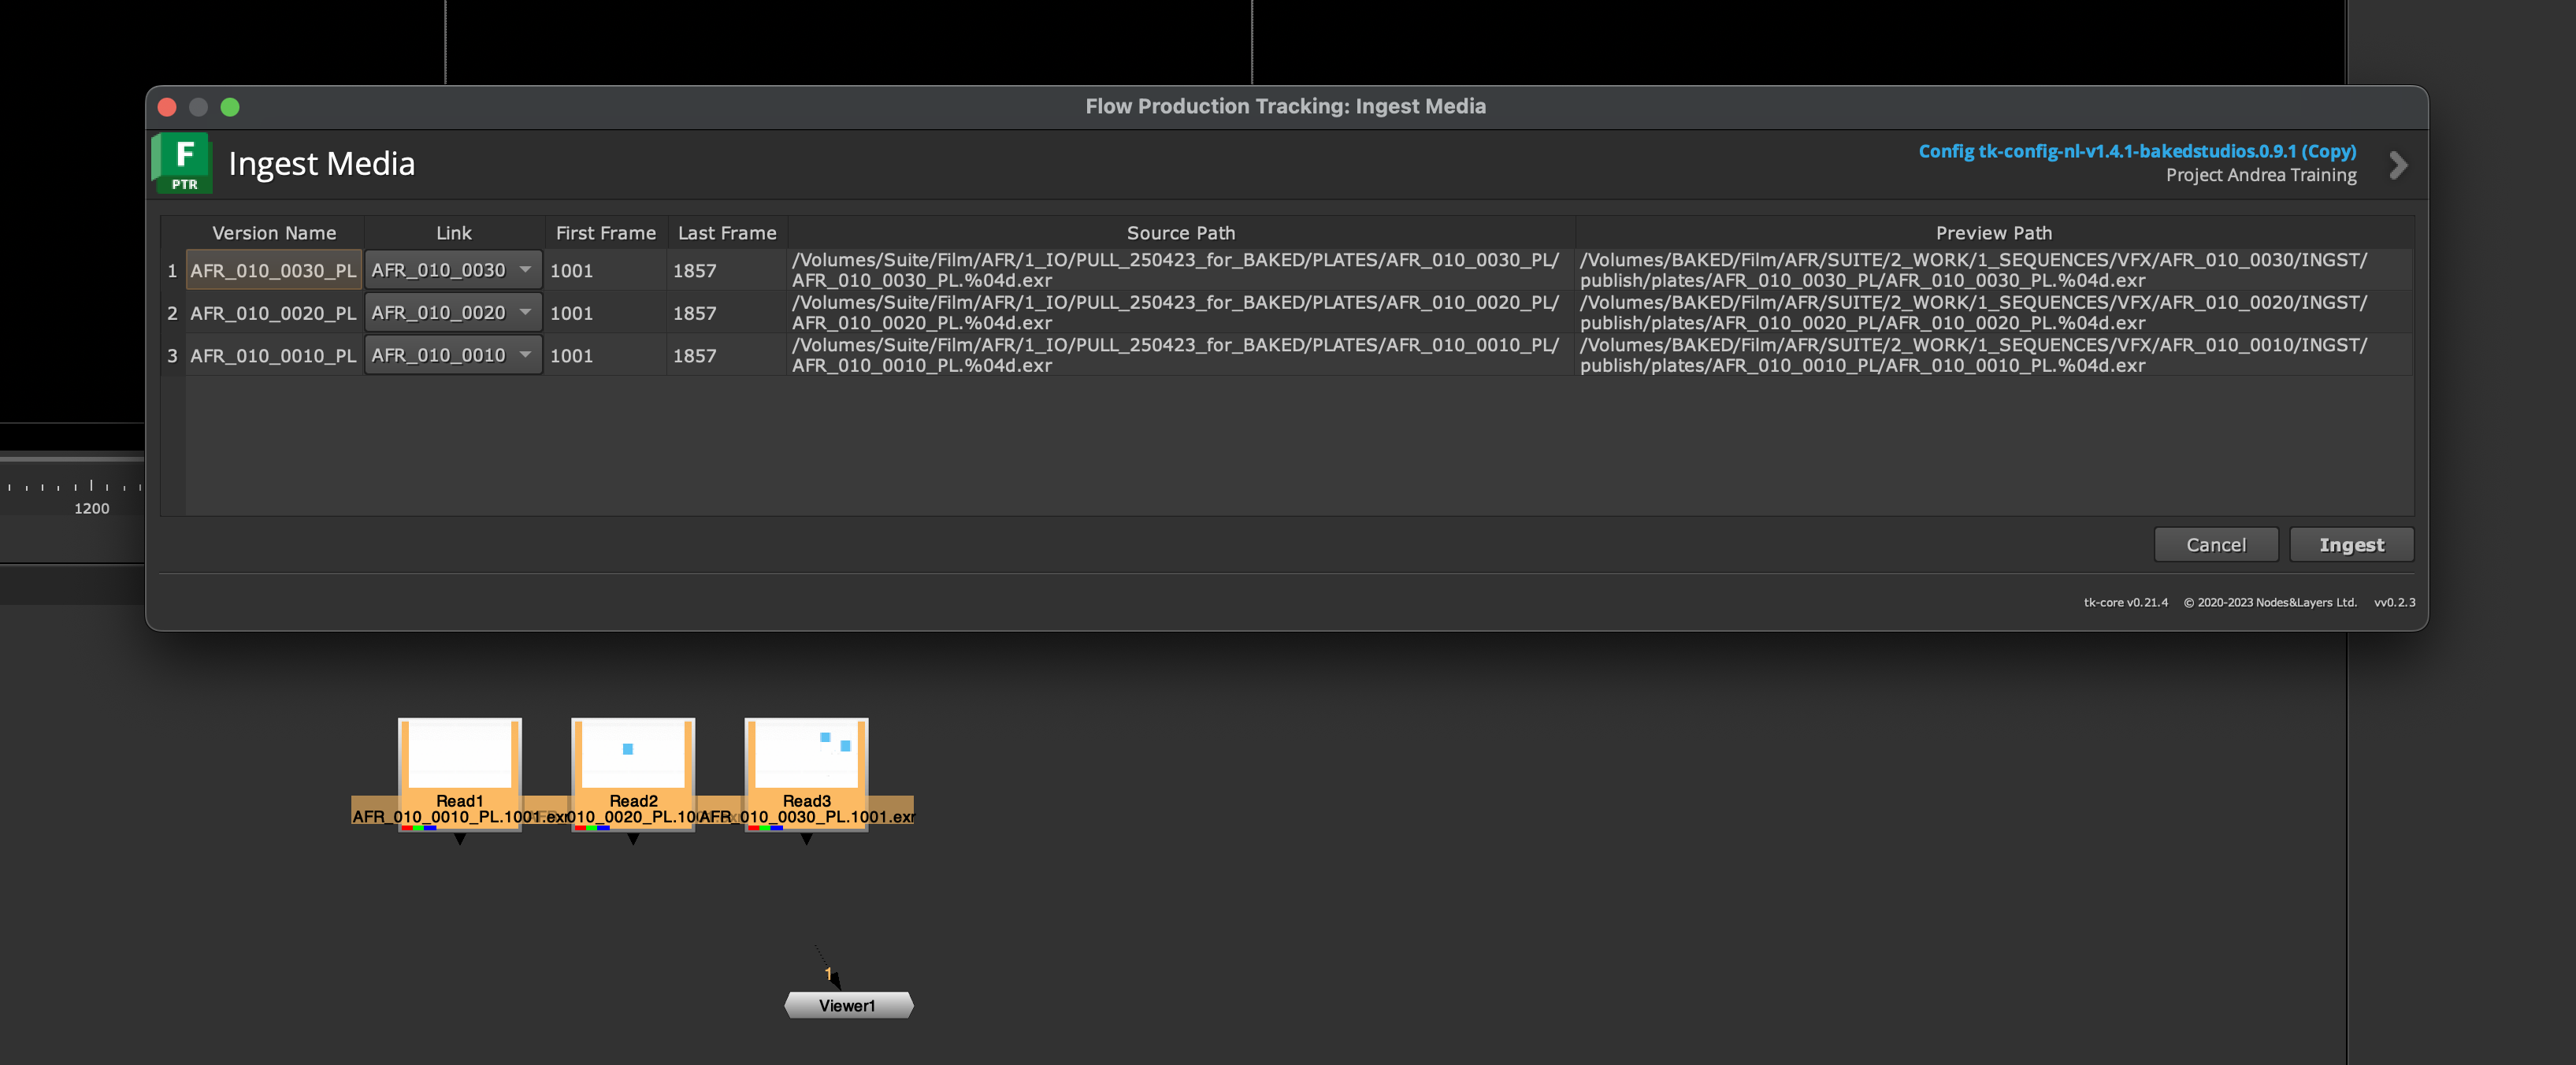
- Before sending items to Deadline to complete the ingest process, the shot list with their respective links, frame ranges and source/delivery paths will be shown for confirmation. If everything is correct, coordinator can click ingest to send the items to Deadline Monitor and finalize the ingest process.
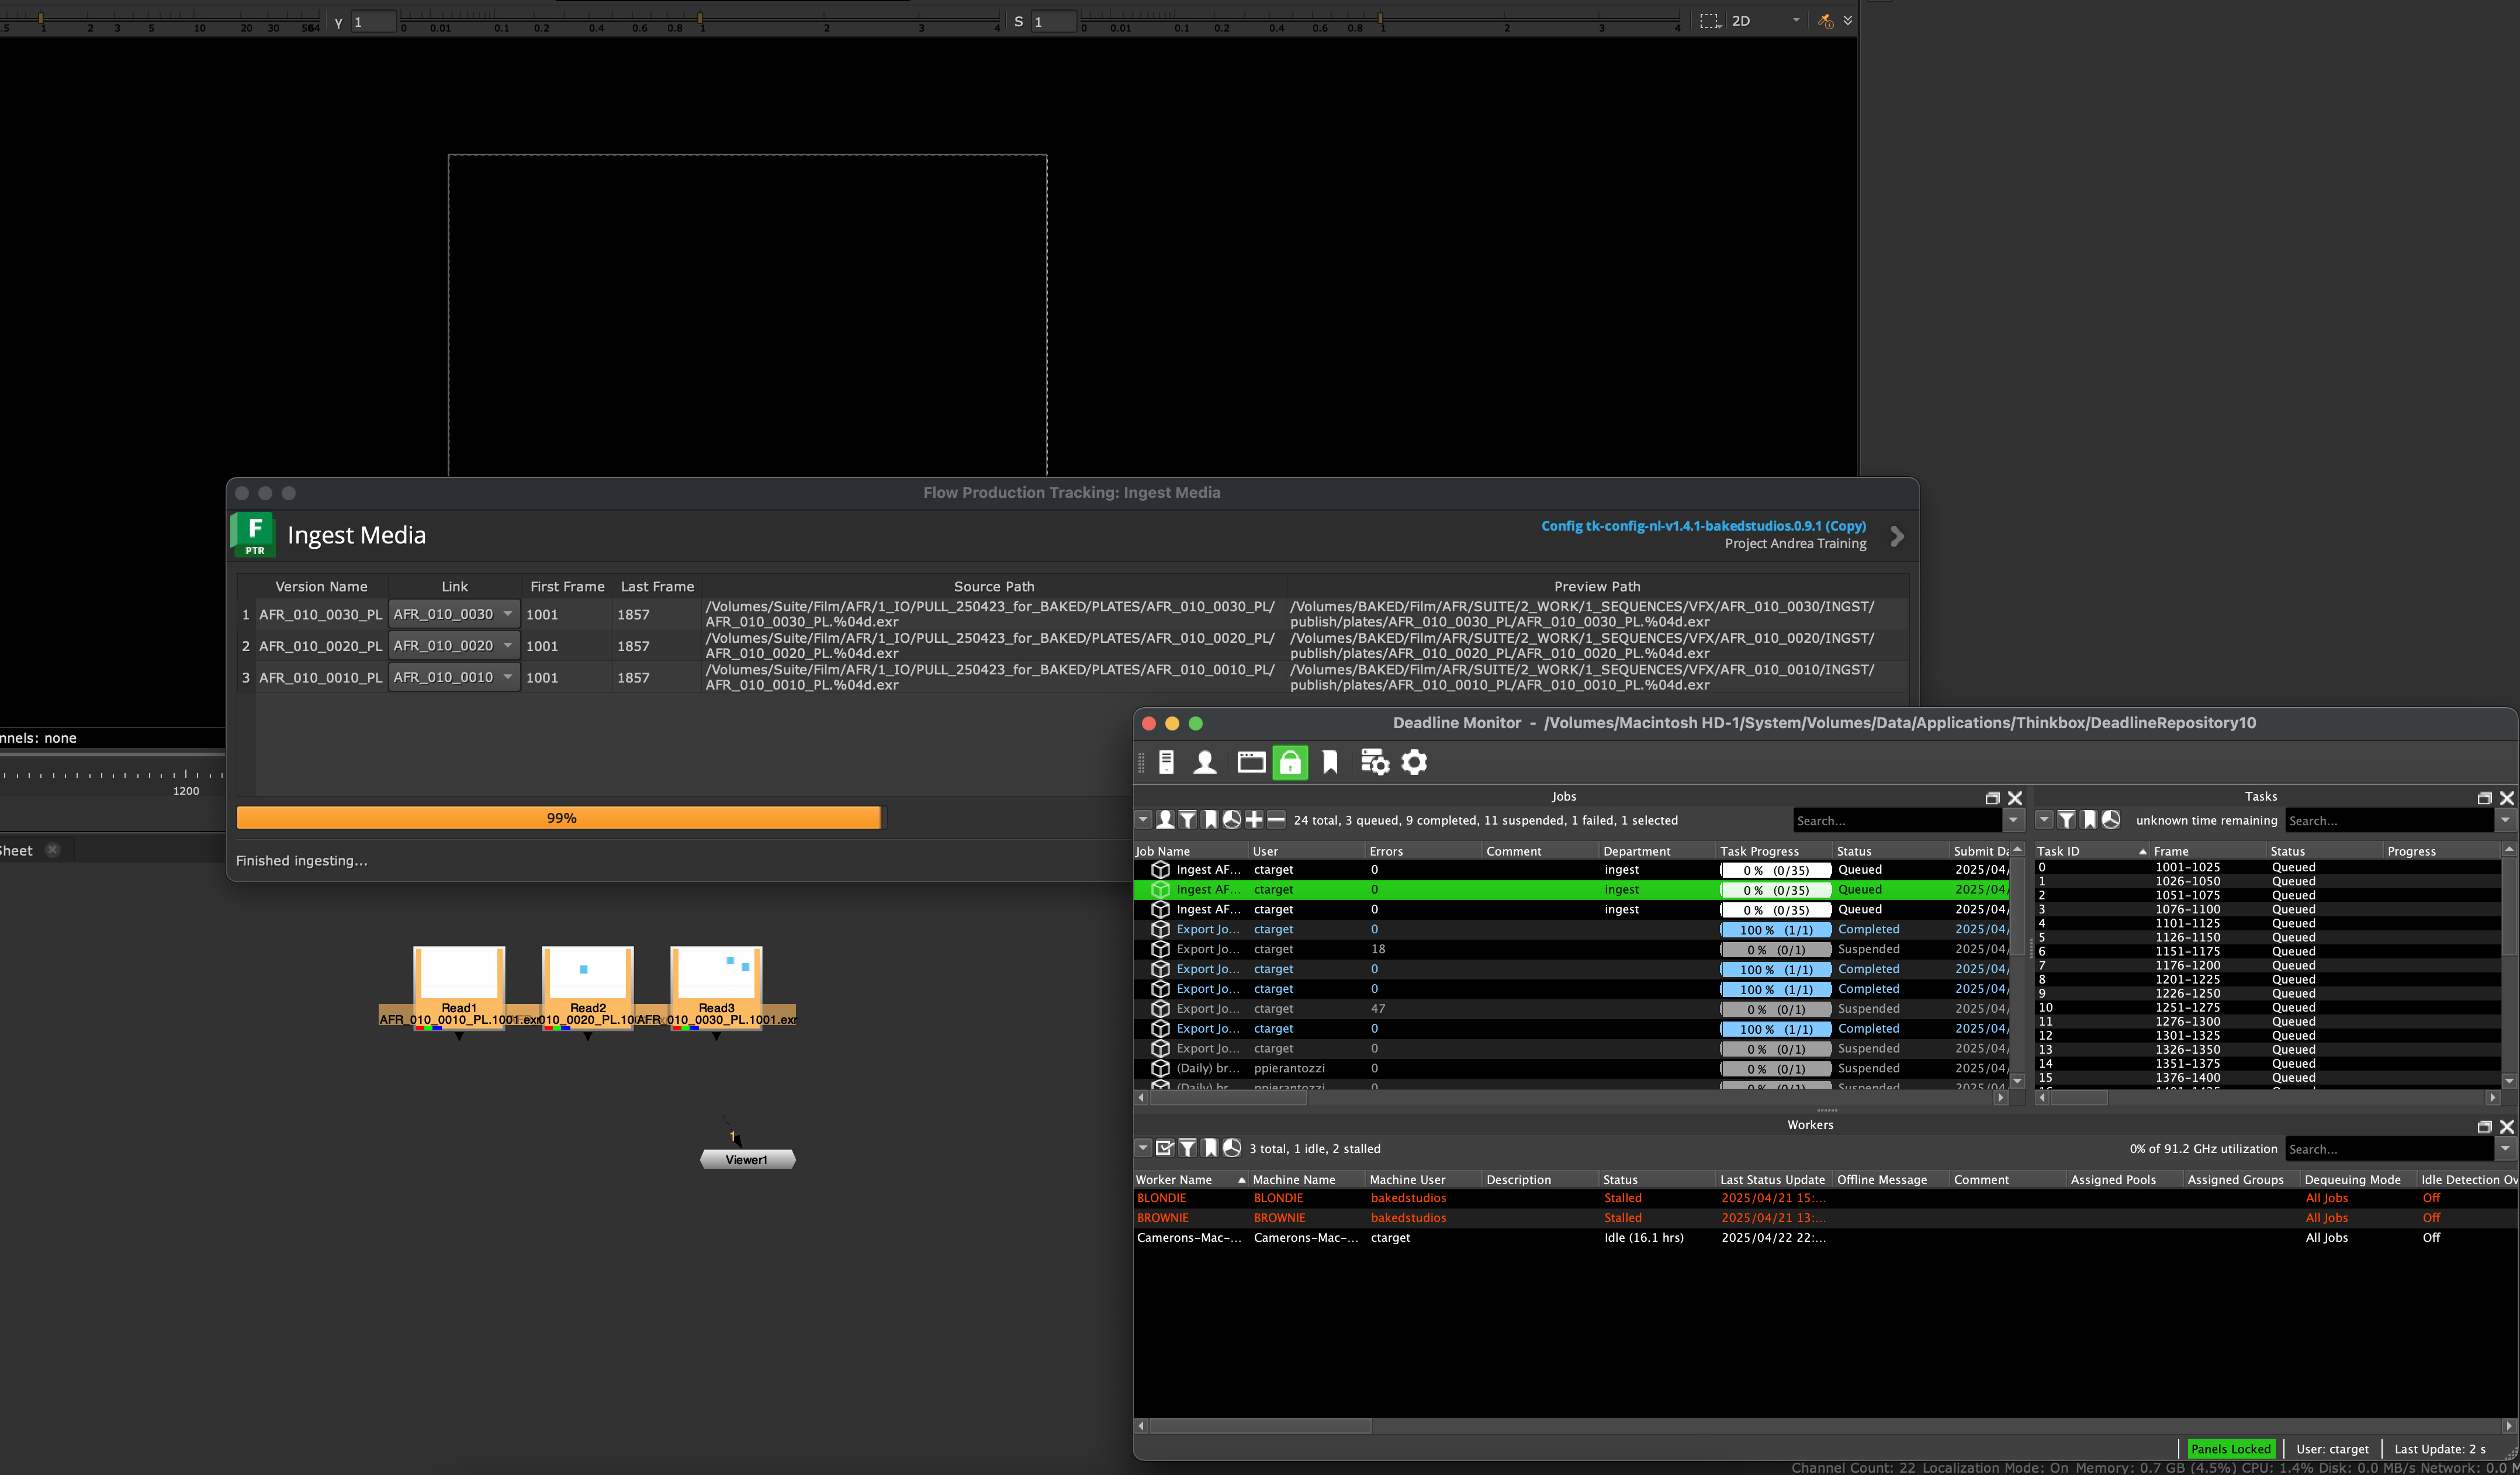
Best Practices: To keep everything organized within the Nuke structure, it is recommended that the coordinator color-code the plates with their respective delivery name based on those that have already been ingested and those that are yet to ingest.
In SG only mov files can be seen. To be able to view the EXR plates in SG, they need to be exported using the plate proxy export profile to create viewable qts. (This approach is currently being worked on and will be tested further before it can be incorporated into a project.)
Publishing Support Files
This step is important for the [ocio color workflow]. Specifically .cdl and .ccc files published here will swap out with the
$SHOT_CUBEtag in the ocio config.
Shots that don't have a published corresponding .cdl or .ccc will default to a blank .cdl or .ccc that lives in the global/configs/ocio folder.
-
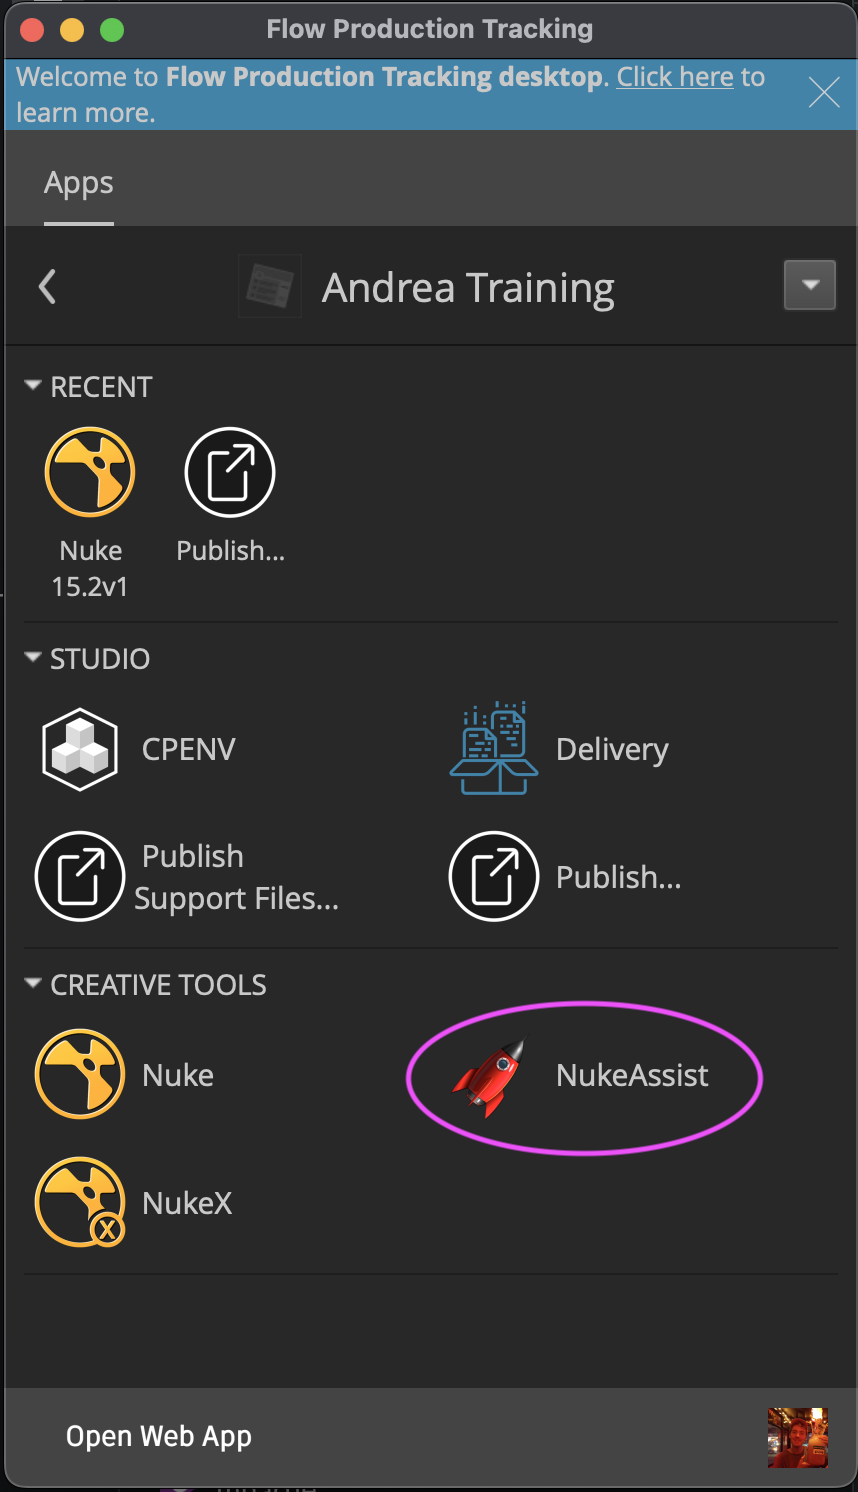
Open Shotgrid Desktop
-
Open a Project
-
Open "Publish Support Files..."
-
In Finder, access your support files where they should live in Basket -> PRO(3 letter project code) -> 1_IO -> 1_PULLS -> PRO_COLOR
-
Drag and drop the show LUT to the Support Files Publisher
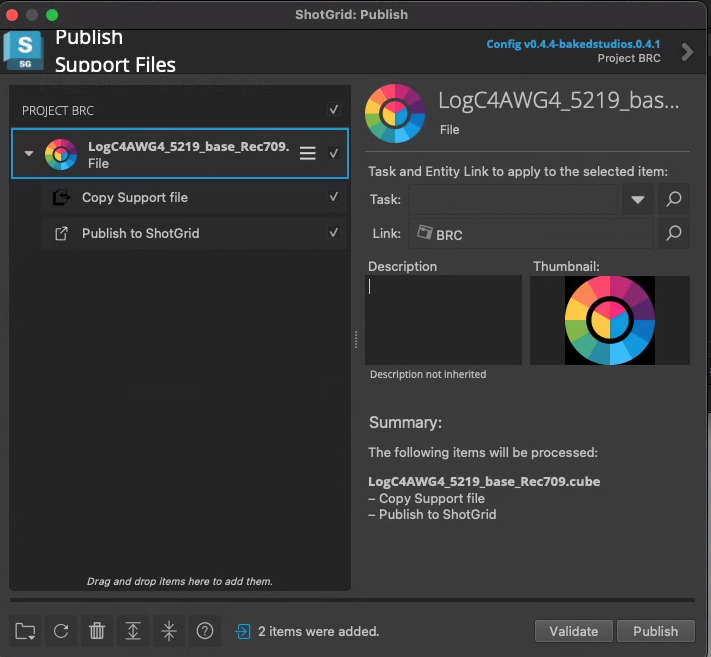
Show LUTs will not match context like .ccc and .cdl files will. Still a good idea to publish the file.
- Drag and drop all your cdls/ccc files named for the shot they belong to into the Support files Publisher. Notice the Context is Auto-matched and .ccc files are always copied to the template path - i.e they end up in the shot folder.
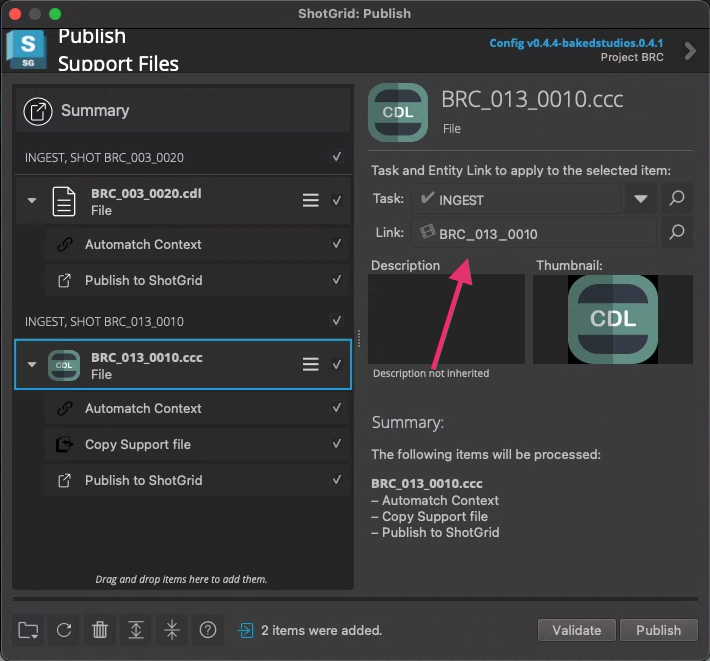
You can drag and drop all the .ccc files for a show into the publisher and so long as they're named correctly, they'll link up with the shot they belong to and copy over to the right folder.